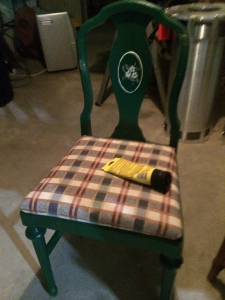
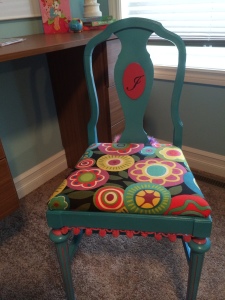
While working on a client’s bedroom for their daughters, a need for a desk and chair for their youngest was requested. The desk would be in a separate room and would be part of a wall closet unit so the desk was taken care of, but a chair was still a need. I thought, every little girl would love to have a chair made just for them-one that would have their name on it and make them feel very special. So, I started to look through my furniture stash, and pulled out this vintage painted wooden kitchen chair that I had purchased at a garage sale a couple of years ago. I liked the curves of the chair and the legs had nice details so I could accent them in some way. Plus, the chair was on the smaller size, not a big bulky chair….perfect for a desk chair. Now, I just had to design how to transform this dowdy find with a makeover for a seat for a princess….
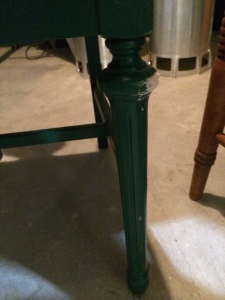
I began the process by checking what paints I had on hand if I had any that would coordinate with the other colors in the room. The girls loved bright turquoise and pinks, so I decided to paint the chair turquoise with some pink accents. I removed the upholstered seat first….I will find some new fun fabric later to recover, and lightly sanded the whole chair so it would accept the paint better. Then, I filled in some deep chips on the legs with wood filler sanding it down smooth after it dried. I decided to try and spray paint the chair since I had never spray painted a wooden piece of furniture before, and because I found a beautiful turquoise color available. I also thought the spray paint would hold up pretty well with a youngster.
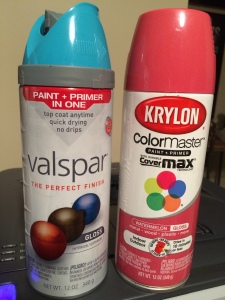
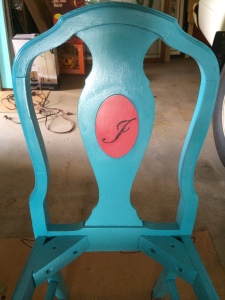
I think I ended up using 2 cans of Valspar gloss paint and primer in color Exotic Sea. I was going to spray prime the chair first, but since the paint had a primer in it, I skipped that step, and it covered the old green paint of the chair pretty well. I had taped off the parts of the chair that I wanted to spray in the 2nd color by Krylon, Colormaster also in a paint and primer color Watermelon Gloss. These 2 colors together definitely made a statement, and that was just what I was going for!! I sprayed each coat lightly moving back and forth not too close so there wouldn’t be any drips. I kept adding coats until I got the color intensity that I wanted.
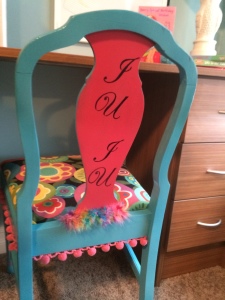
This chair had a nice curved center section on the back that would be a perfect place to add an initial on the front, and on the back, her nickname just fit! The initials I hand painted in black acrylic using a stencil in a fancy script style for this special little lady.
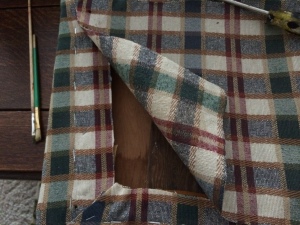
I was able to find some fun fabric at Hobby Lobby to recover the seat, by first removing all the staples, the old plaid fabric and added some new fiberfill to give the seat to give it a little more padding.
I decided to hand paint some pink accents in the grooves of the legs with acrylics to bring down some of the pink color I had on the chair back. Even though the pink accents were nice, I wanted to add a little more fun to the chair to make it even more special. I dove into my storage bin in my craft room where I’ve collected trimmings and ribbons for years, and found some pink ball fringe…and it was just the right color! I had just enough to glue underneath the rim of the chair so it would dangle down and bounce around whenever the chair was moved. I loved the way it played off of the bright floral fabric of the cushion.
I still wanted even a little more on the back, since that was the side of the chair that would be seen the most. I know “less is more” , but in this case, for this special little girl, I wanted, “more is more”, and really have a statement chair. So, while shopping at JoAnn Fabrics looking for items for another project, I spied a beautiful multi-color feather boa hanging in the aisle. The colors jumped out at me, and I thought, this is just the perfect finishing touch to this fun little chair. I tried holding it up all around the seat and it was just too much…even though I wanted “more” this was too much “more”! I just wanted a little tickle of a piece on the back under her nickname as a bit of surprise and unexpected touch…perfect and done!
I was going to put wheels on the legs, but it was going on carpet and I thought it may tip and not be a good idea, so left them off. The chair was a big hit, and a chair makeover that will always be as special as she is!
*To receive posts via email click HERE ![]() Subscribe in a reader or sign up in Subscription box in sidebar.
Subscribe in a reader or sign up in Subscription box in sidebar.
