• Shop
    • Antiques
    • Home Decor
    • Jewelry
      • Necklaces
      • Bracelets
      • Earrings
      • Rings
      • Pins
    • Upcycled handmade
      • upcycled womens tops
      • upcycled womens jackets
      • Upcycled womens pants
      • upcycled pillows
      • Upcycled Pickleball Shirts
      • upcycled purses
    • MacKenzie-Childs
      • MacKenzie-Childs Taylor Dinner Plate
      • MacKenzie-Childs Taylor Luncheon Plate
      • MacKenzie-Childs small oval dish
      • MacKenzie-Childs Taylor Bread & Butter
      • MacKenzie-Childs Taylor Mugs
      • MacKenzie-Childs Taylor Saucers
      • MacKenzie-Childs Taylor Breakfast Bowls
      • MacKenzie-Childs Taylor Berry Bowl
      • MacKenzie-Childs Taylor Chowder Bowls
      • MacKenzie-Childs Wallcourt pieces
      • MacKenzie-Childs Enamelware
      • MacKenzie-Childs Torquay dinnerware
      • MacKenzie-Childs MacLachlan Dinnerware
      • MacKenzie-Childs Taylor Serving Ware
      • MacKenzie-Childs Glass Goblets
      • MacKenzie-Childs glass tumbler
      • MacKenzie-Childs Glass Serving pieces
      • MacKenzie-Childs Decor pieces
      • MacKenzie-Childs Placemats & Coaster sets
      • MacKenzie-Childs Paper Products
      • MacKenzie-Childs Tile
    • Shoes
  • Home
  • About
    • I believe…
  • Gallery
    • Custom Design
    • Interior Design
      • Bath
      • Bedroom
      • Dining Room
      • Entry Way
      • Kitchen
      • Laundry
      • Living Room
      • Office
      • Mudroom
      • Themed Rooms
  • Color CCE
  • Services
    • Services
    • Design Process
    • New Construction
  • Journal
    • DIY
    • Repurposed
    • Art
    • Interior Design Room
    • Holiday
    • Theme Room
  • Press
  • Contact

Who doesn’t like a tree in the shower?

Taylor
23 Feb 2015
Interior Design Room

The trends for bathrooms it seems, is that they keep getting larger and larger with huge walk in showers, steam rooms and even spa lap tubs. Gone are the large whirlpool tubs that take forever to fill up, they cool off quickly and in most cases, hard to get into safely. In comes the large walk in showers….walk in, as in no door, just walk in to one end with usually 2 or more shower heads, body sprays, benches, niches and even full length windows.
Master shower in Parade of Homes 2014 TayRose Design

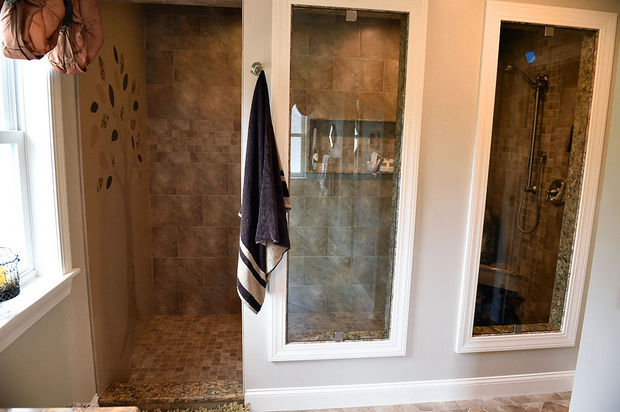
I don’t think I would miss a shower door actually, and this new trend in showers makes the most of one whole wall in a bathroom. I was fortunate to have designed the tile layout for one such shower in a master bath, and I knew I wanted something dramatic….not that this huge shower with full length glass windows wasn’t enough drama, I wanted more..

Master vanity in Parade House 2014 TayRose Design

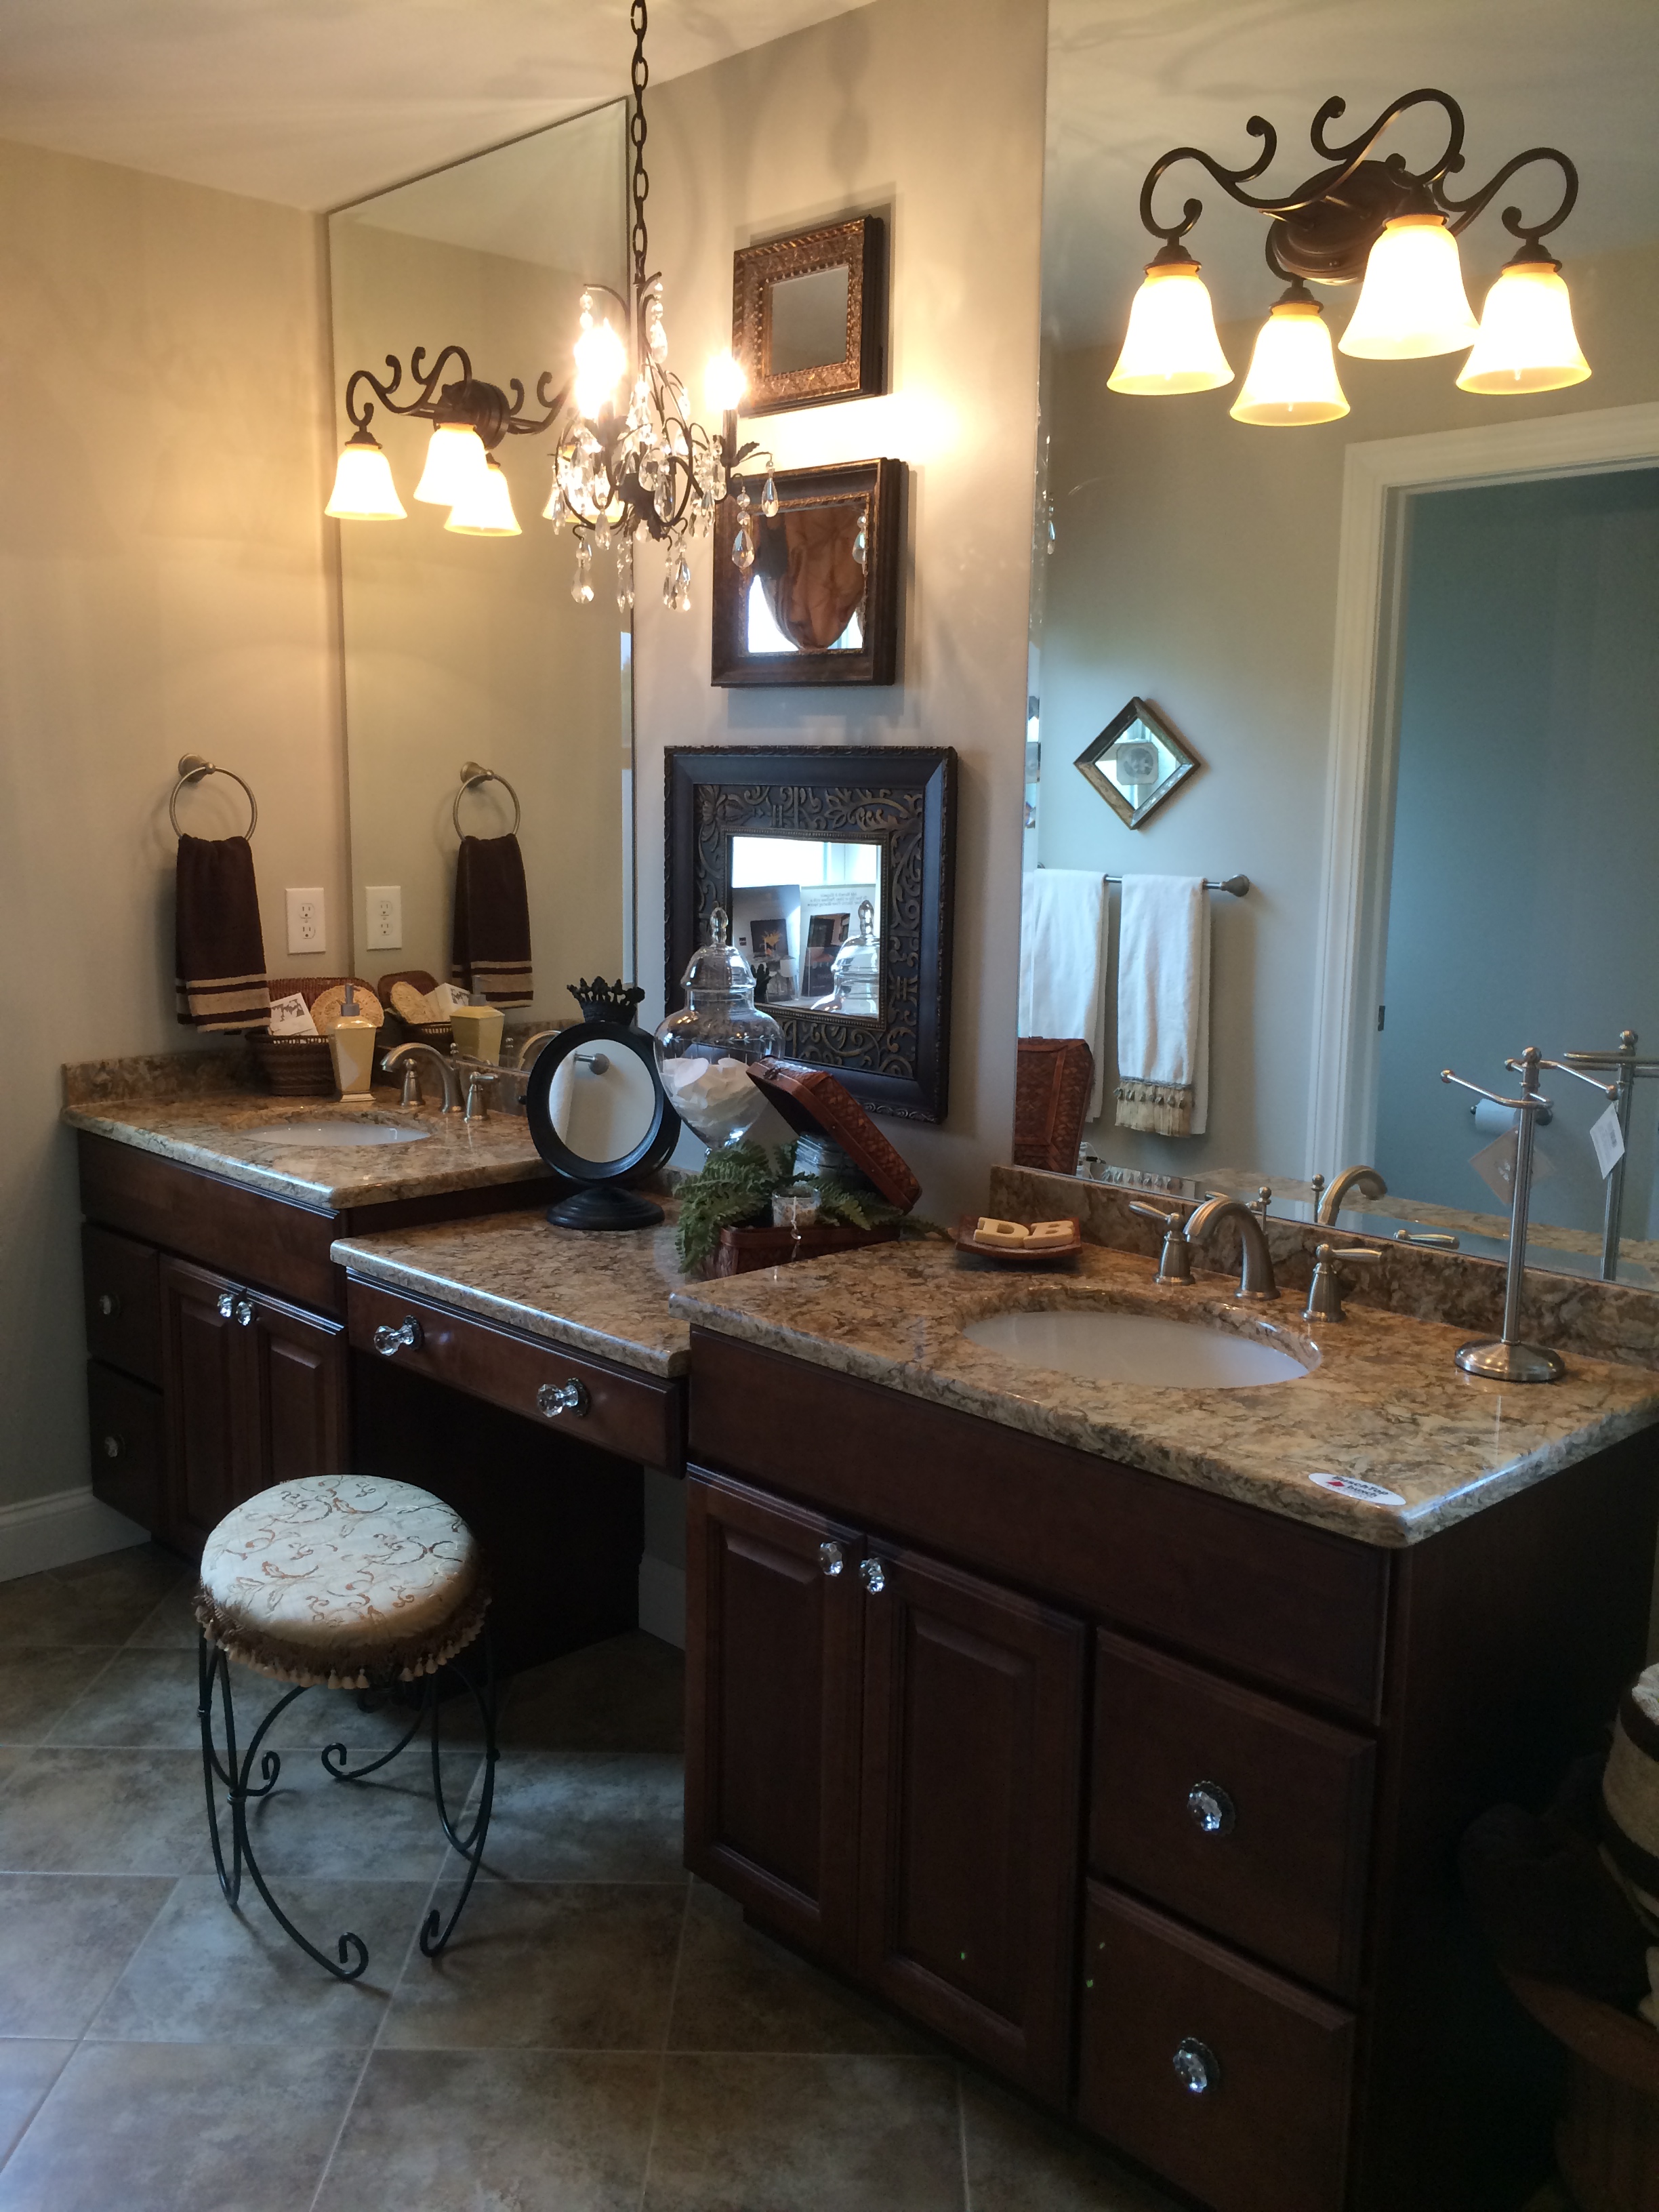
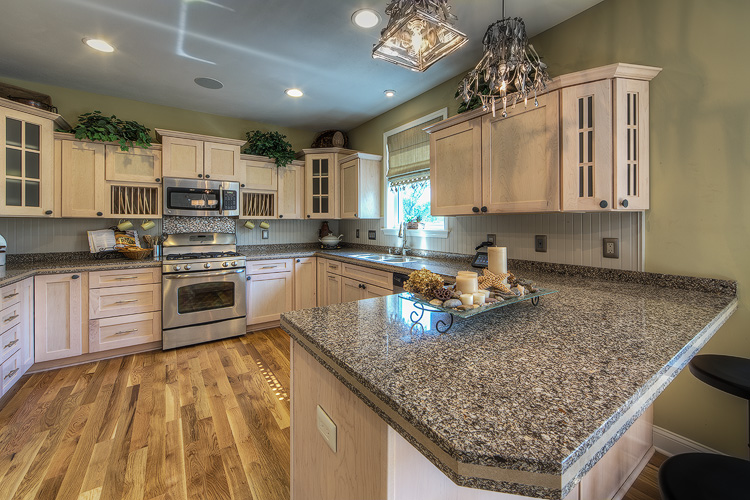
The builder uses Cambria Quartz products for his countertops, islands, and fireplace surrounds, and since I had to choose the colors for the vanity top and threshold to the shower, I went to the showroom to see what pattern would best fit with design palette I was working with. While in the showroom waiting for the salesperson to come, I noticed they had the Cambria mascot, a dragon, inset like a mosaic into a piece of Quartz. My aha moment, there was the drama I was looking for…a mosaic of some kind in the shower. I was jittery from excitement to discuss the possibilities with the salesperson…yes, they could do it…they have never done one in a residential install before…I would just have to supply the template…..whoa-what? I would have to make the template? I was thinking of a 5’8″ tree with leaves on the entrance wall all in different quartz patterns…a mosaic that will be showcased, and not inexpensive, and I have to draw it? All of a sudden my jitters burst like a balloon!

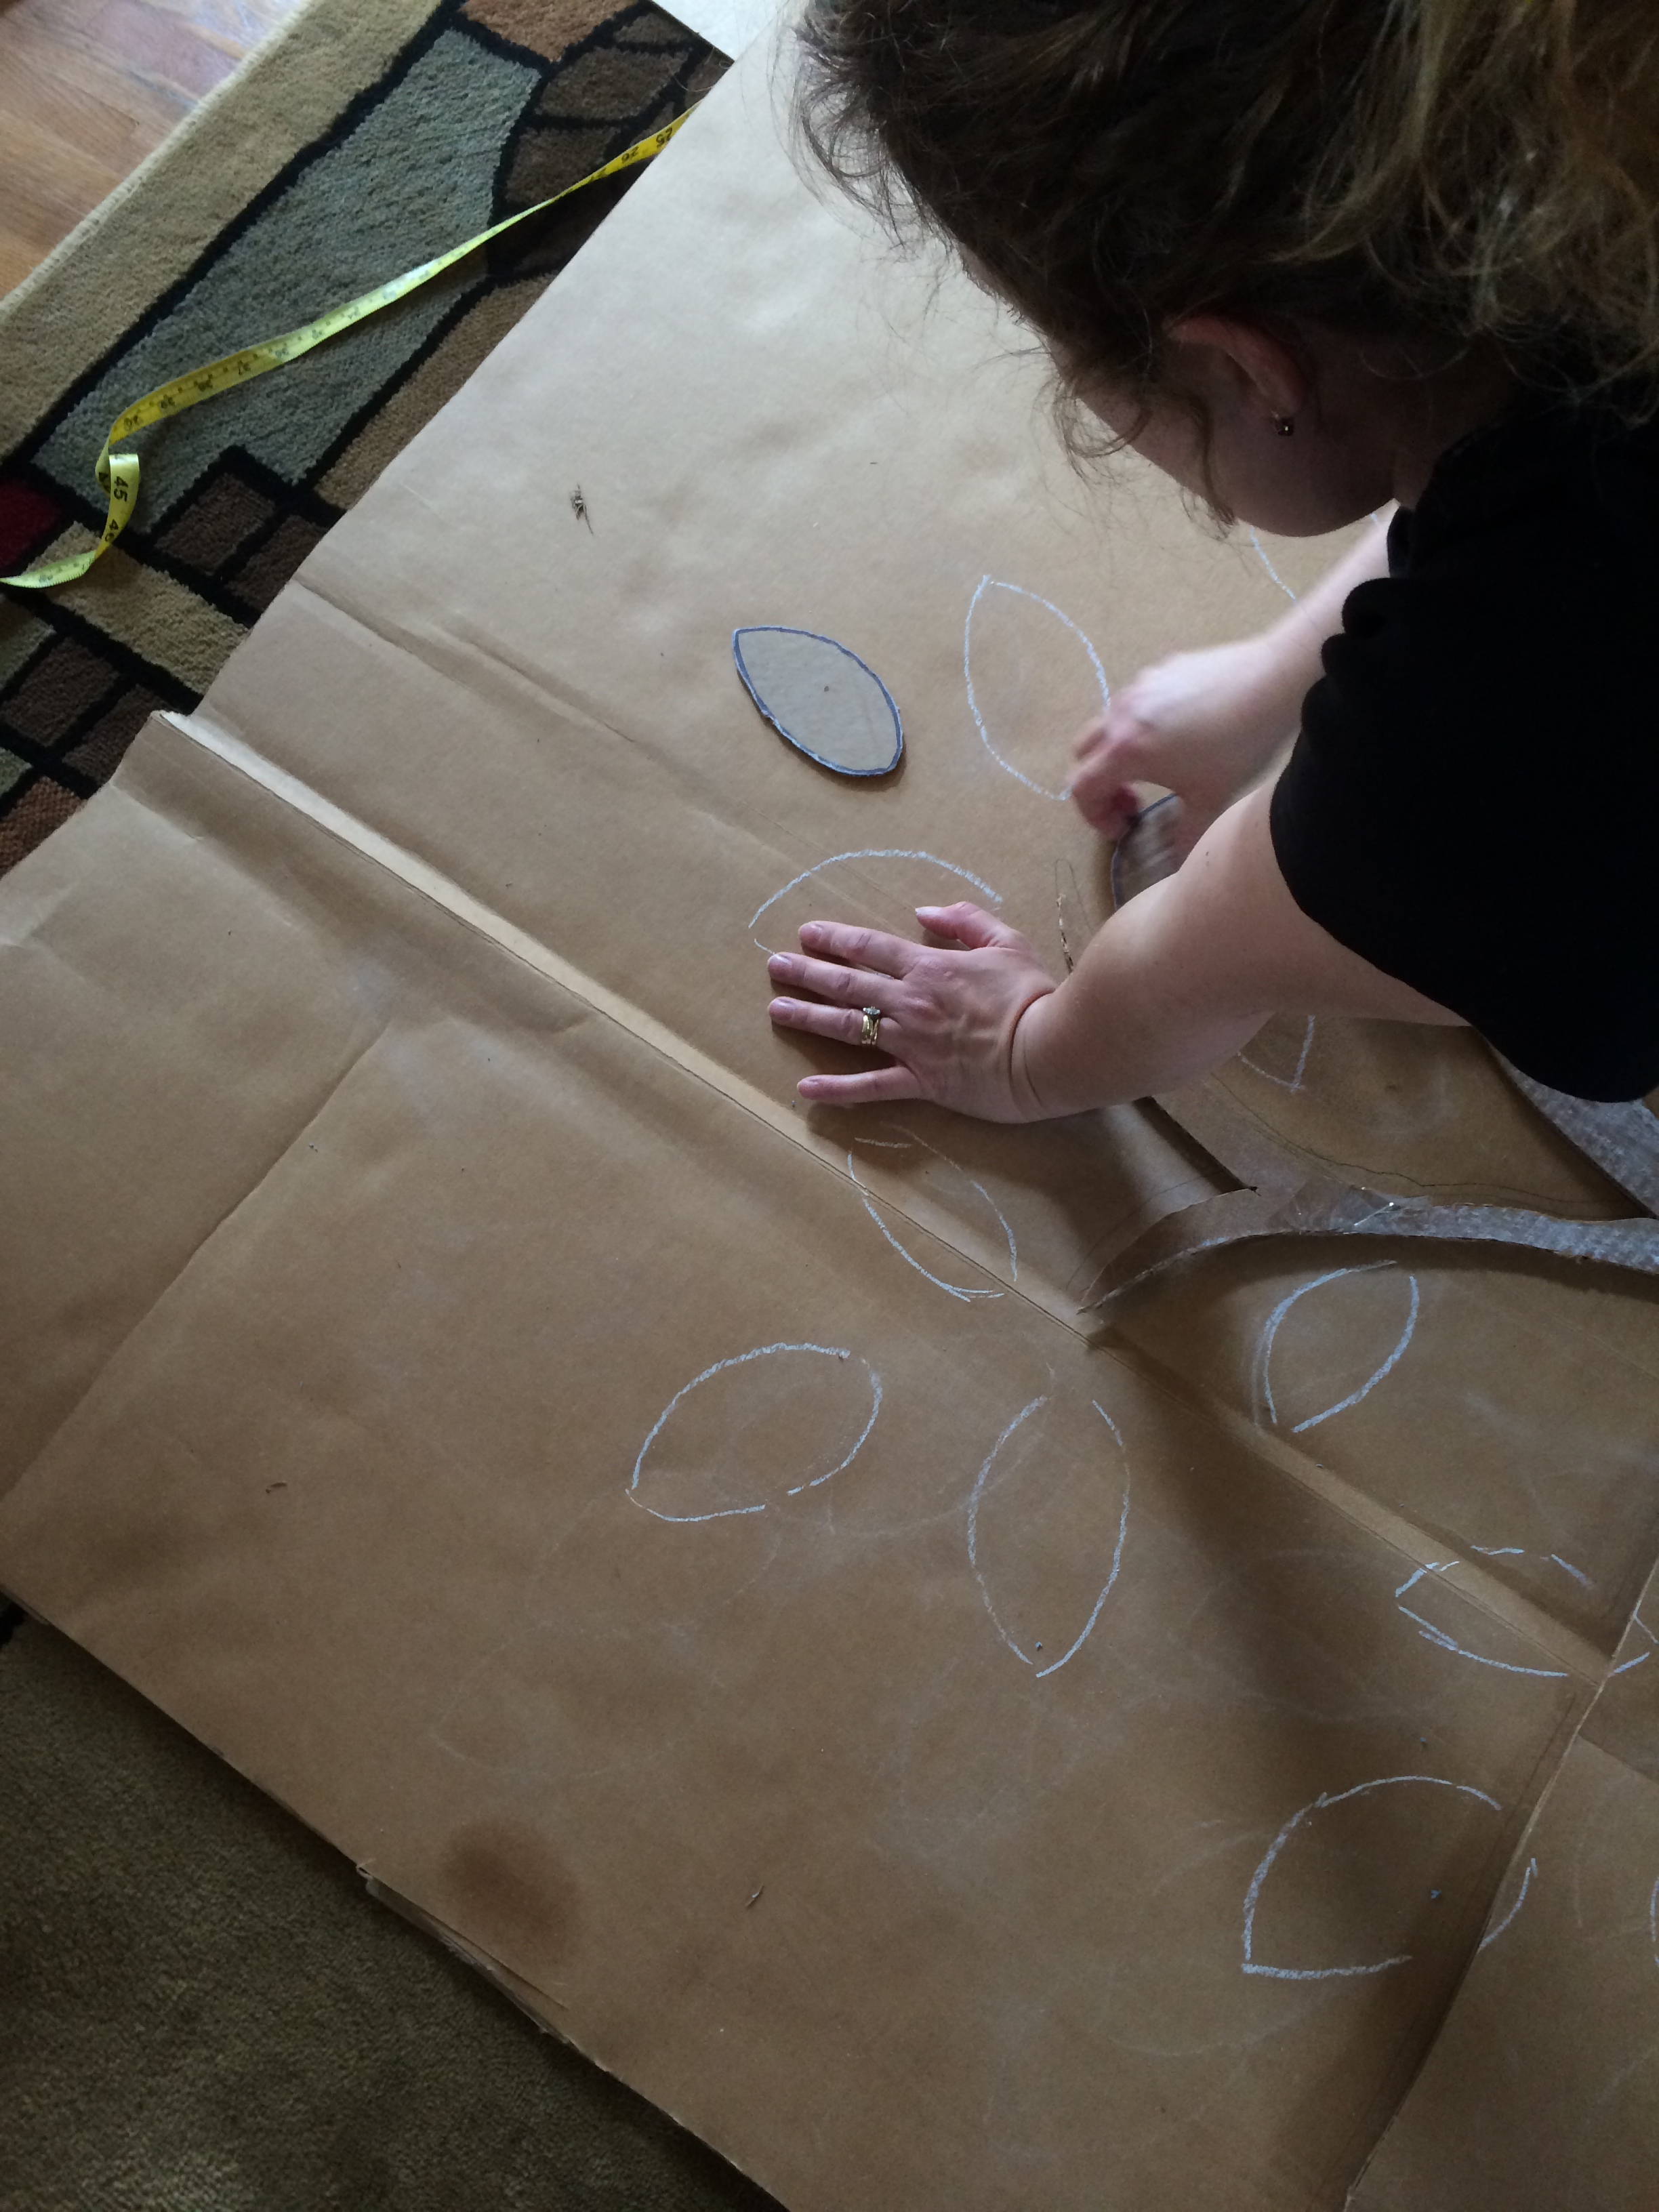
I couldn’t get this idea out of my head, and once something is in my head and won’t leave me alone, I know I have to find a way to make it work. Step in my artistic friend, Amy. I called Amy up and described the idea and she was ready to try. Oh, did I mention, we were on a deadline too, the showroom needed the template asap for they had to put it into production in order to get it finished to be installed before the opening…no pressure here!

Making tree template for shower mosaic

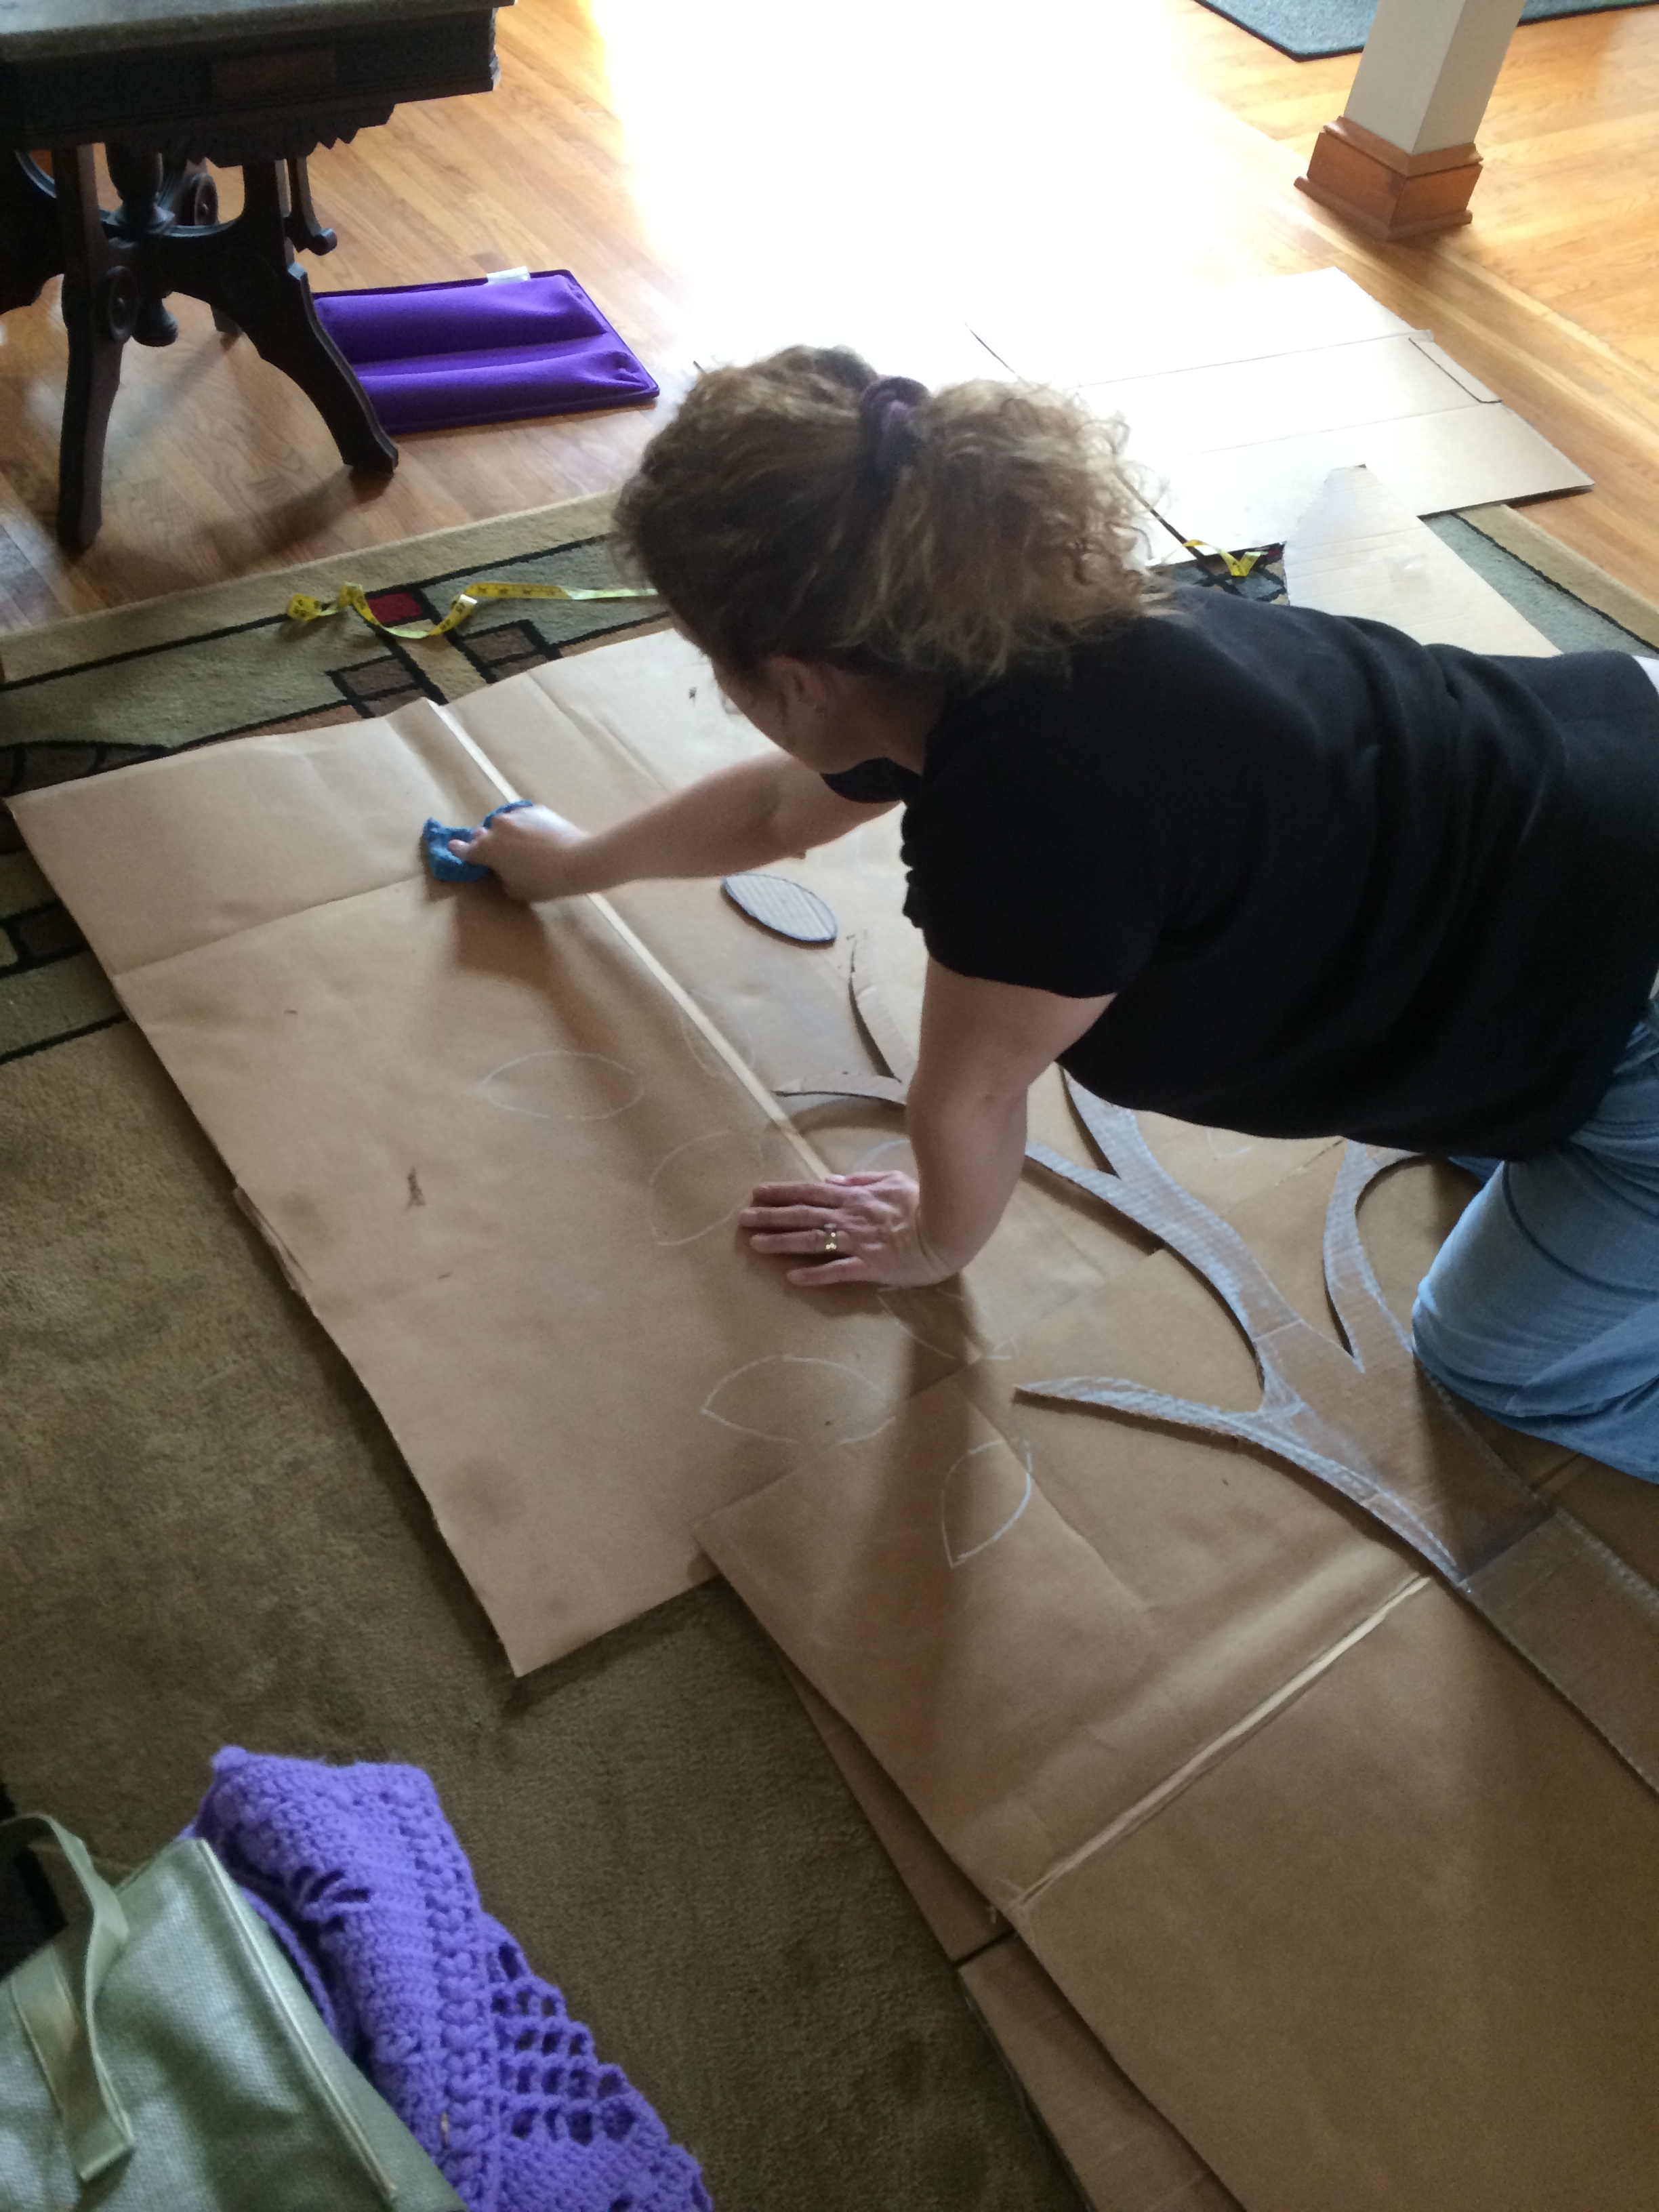
I cut down several large cardboard boxes that I had in the garage and drew a simple outline of a tree and a simple leaf pattern to use. I’m not good with scale, so I knew Amy would be able to help me with that. We spread out the cardboard on Amy’s living room floor and she did her magic, scaling the tree to the perfect proportions. Then there were the leaves- drawing them then cutting them out so the template would work. I decided on 3 different Quartz patterns to make up the leaves and the tree. After several attempts of figuring out which color would go where with duplicate leaves, we had our template ready. That template was like gold…being oh so careful not to rip it, bend it or loose any of the leaves.

leaf cutouts for tree template shower mosaic

After dropping off the template to the showroom, the cutter had me go back into the design room while he scanned the template into his computer. There it was, up on the screen, and we sat and tweaked a couple of the leaf placements and it was set to go into production. Once I signed off on the design, out on the factory floor they have these huge machines that are cutters run by a computer.  They lay the large slab of quartz on top of the machine, then the cutters cut out the pattern in the quartz from the template design.  The machine not only cut out the tree design into the large slab of quartz, but it also cut the tree and leaves from different colored slabs of quartz so the those pieces fit into the outline shape in the large quartz slab like a puzzle.   All inlaid as one piece when finished. I have never been so nervous about anything like this for a long time-you know how you envision something in your head, and pray that it will turn out the same? Well, I was praying up until the last leaf was placed in the shower wall. There went that burst balloon feeling again only this time it was the breath I had been holding for hours as they carried the slab up a flight of stairs with 4 guys, passing just painted corners and newly installed doors to the Master bath.

tree mosaic in shower wall

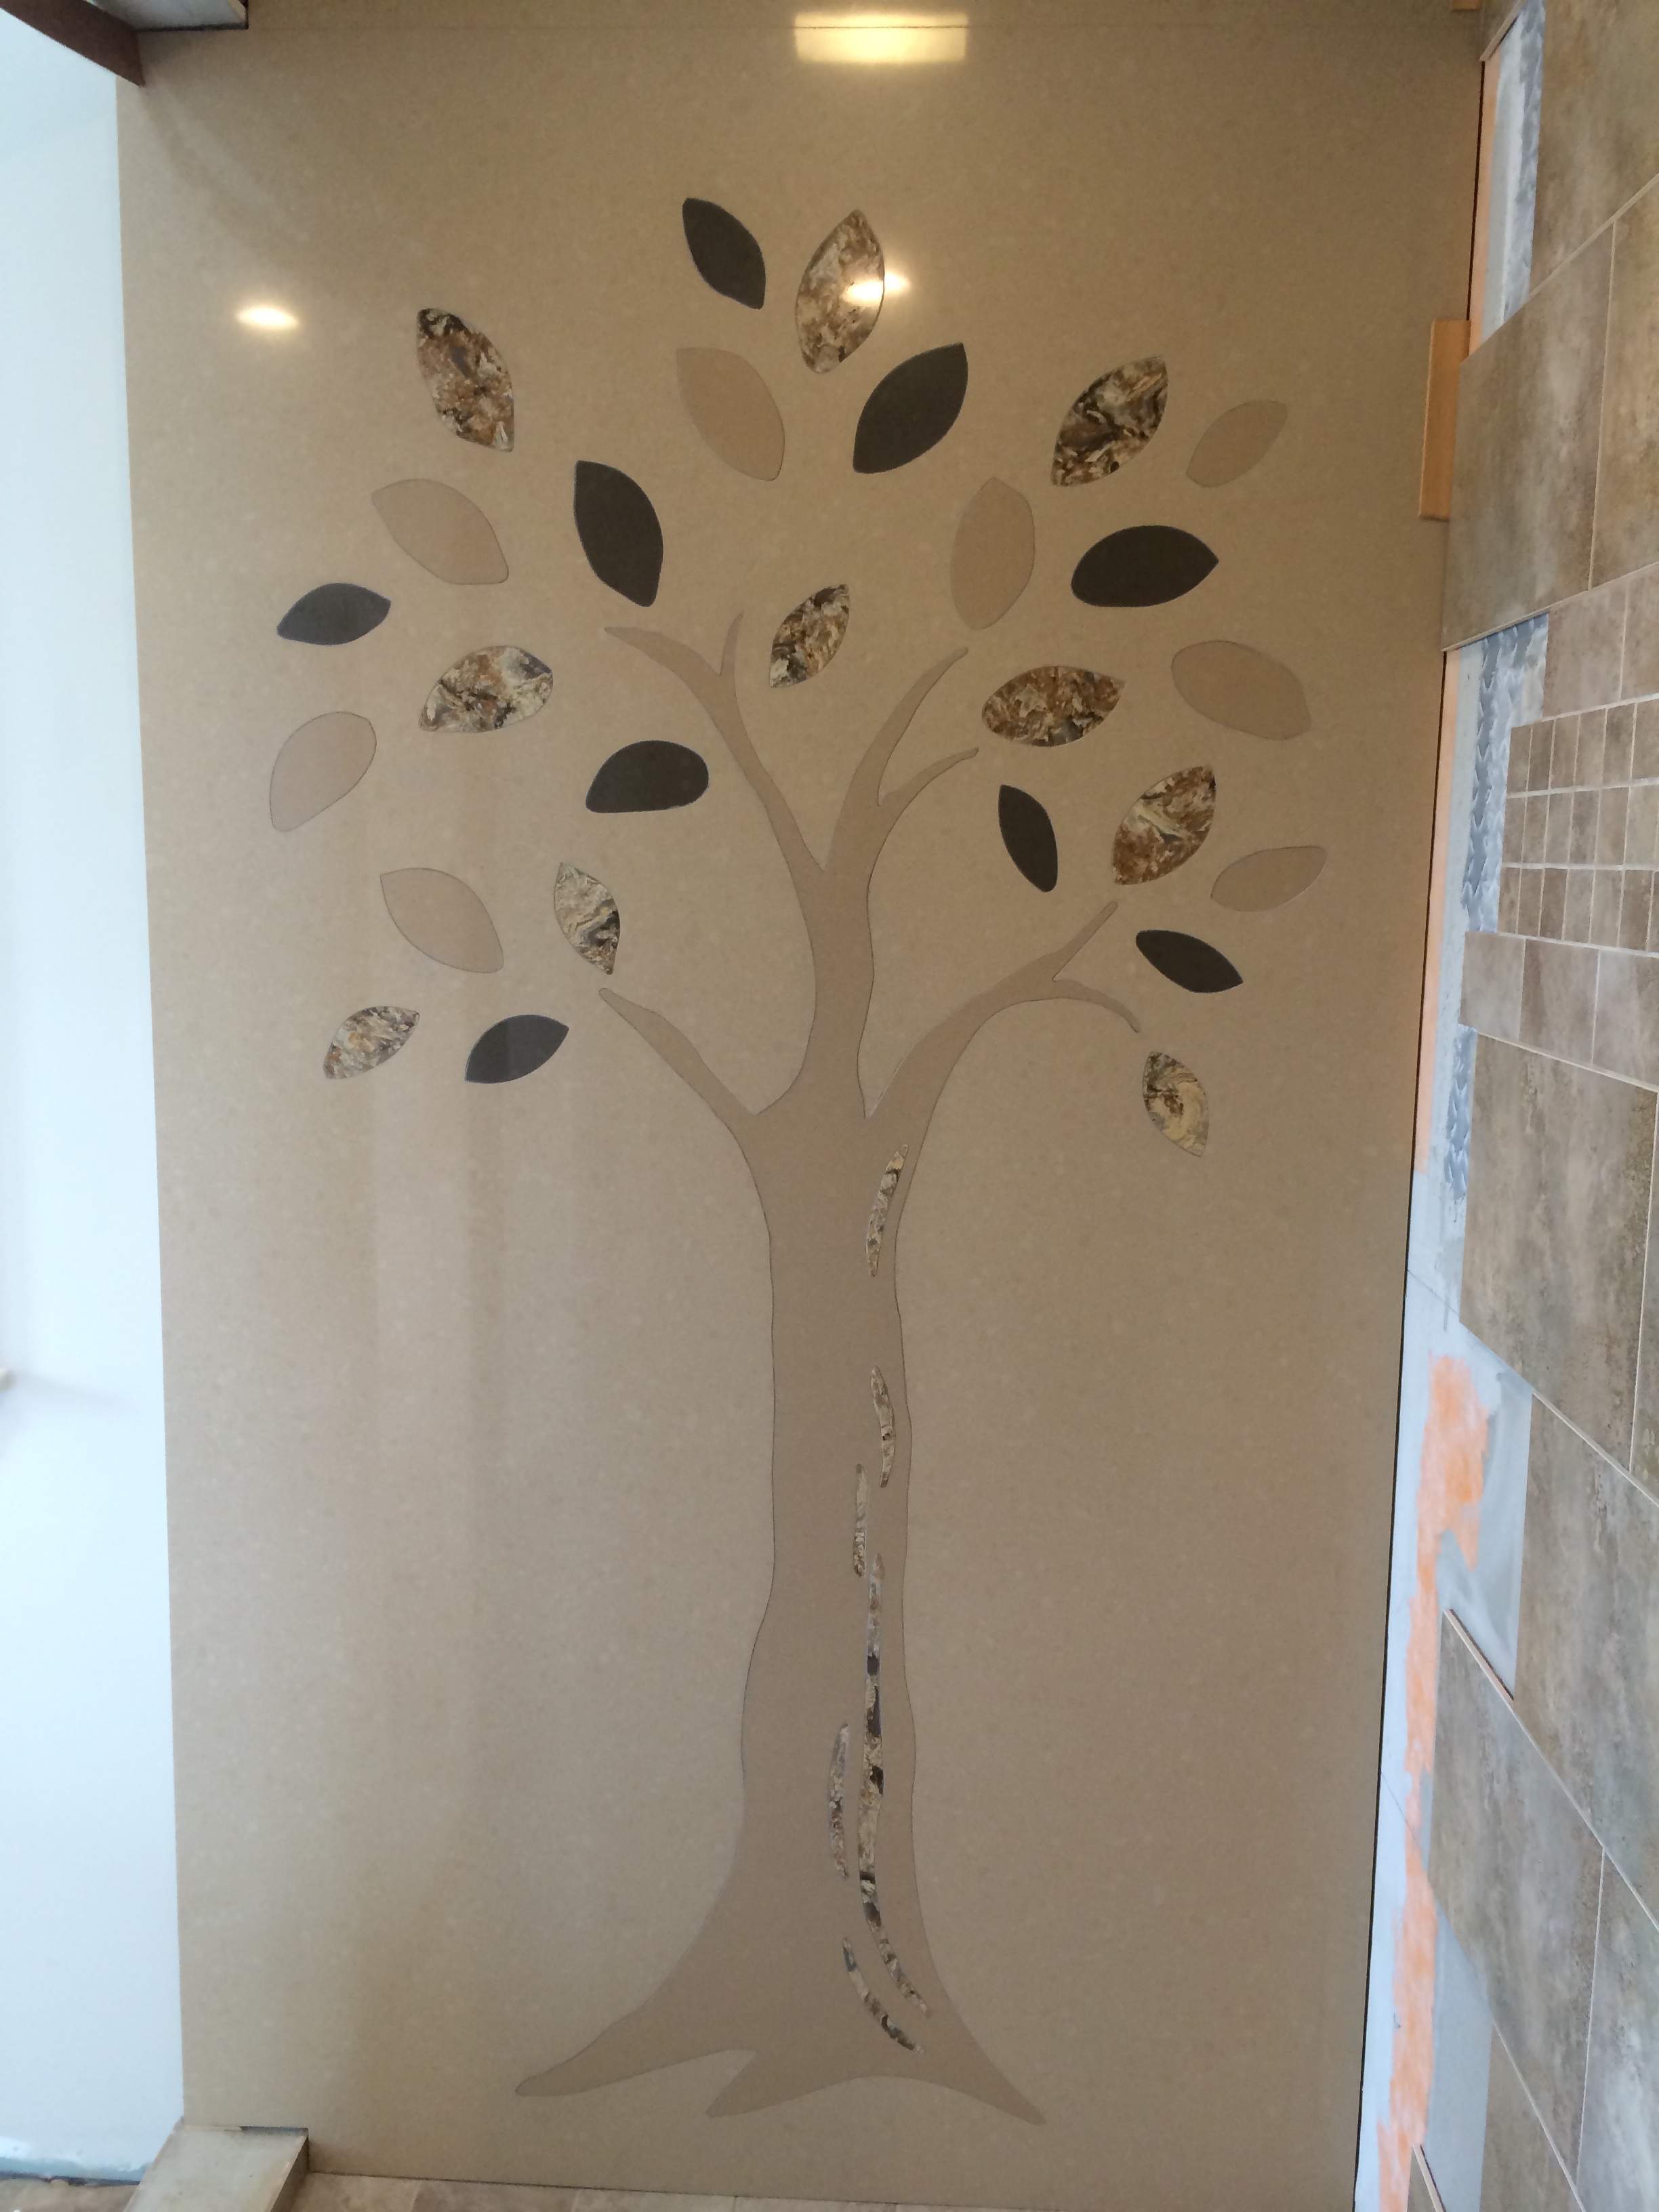
Hallelujah! It fit perfectly and looks amazing! Did I say, ah-may-zing? Oh yes!

Master bath Parade 2014-7986

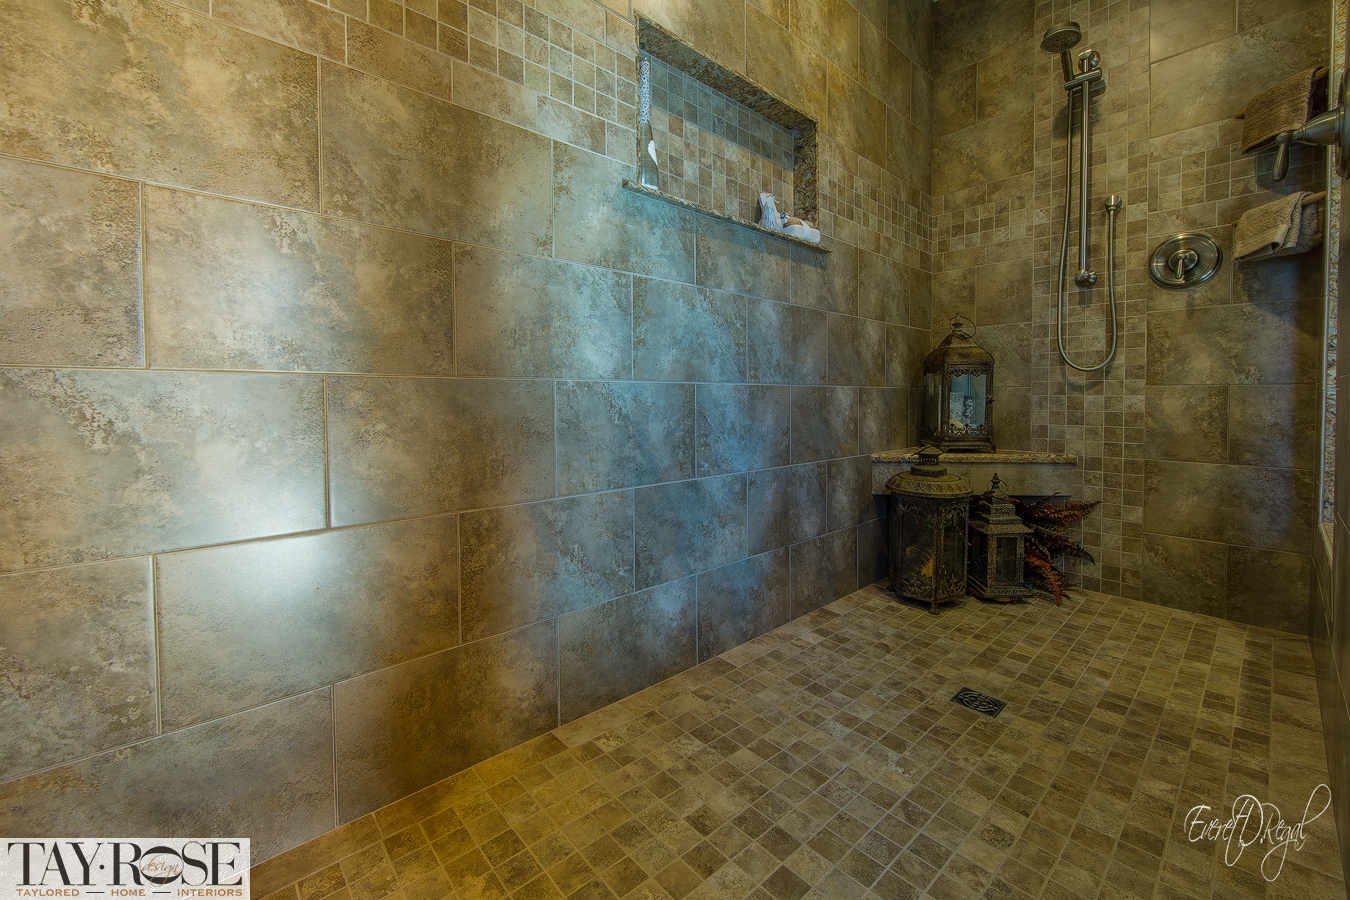
I picked the field tile and floor tile to be subtle and soft to not compete with the star of the room… the tree. The tree is tucked on the entrance wall of the walk in tiled shower and a glimpse can be seen from the full length windows to the shower.  I picked a tree for the mosaic design for it was universal and most people like trees plus it wasn’t something too specific…just simple…and amazing..ha!

Master bath mosaic tree Parade 2014-

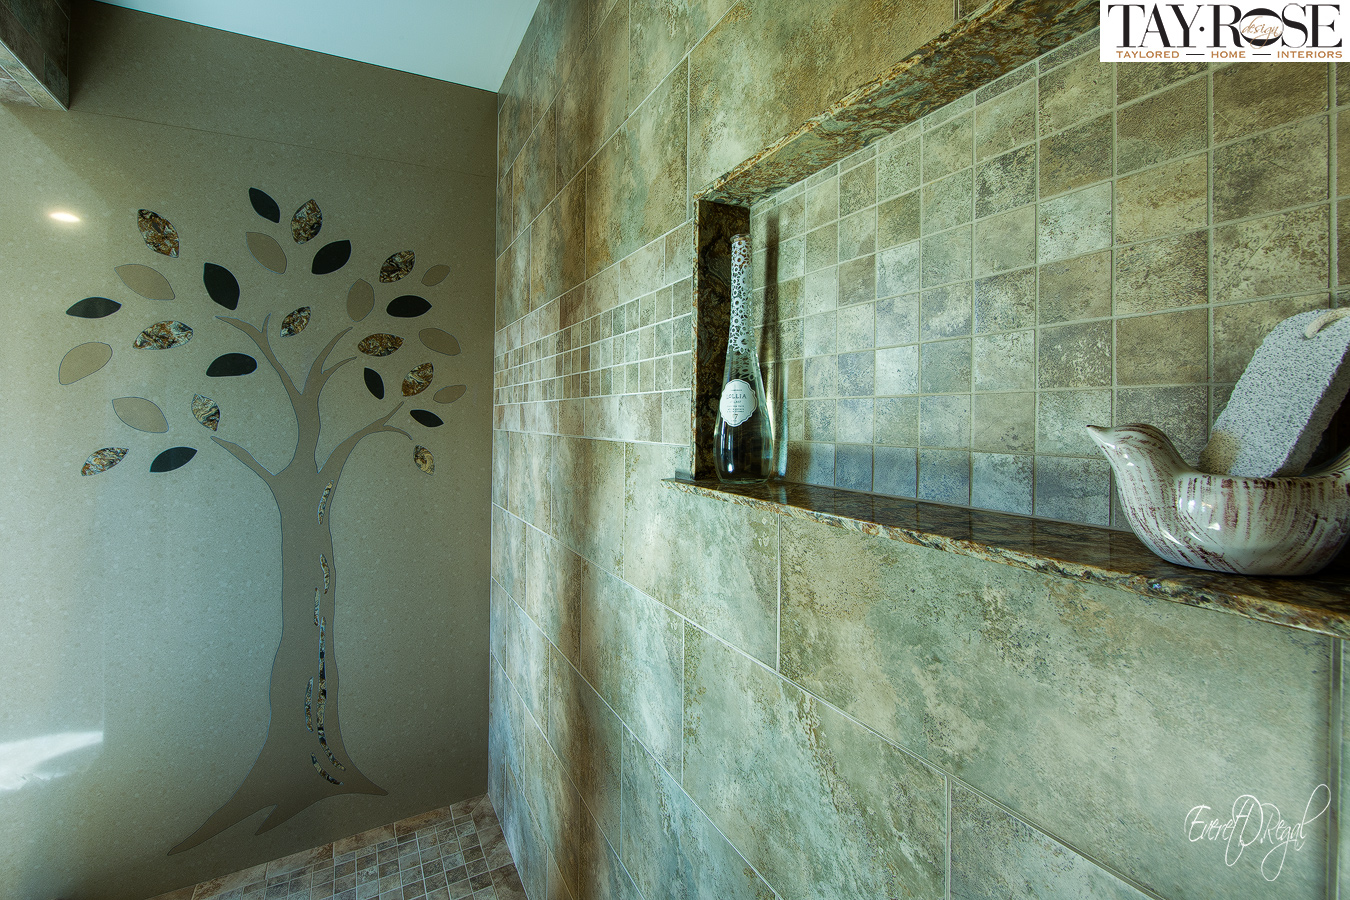
It definitely was something unexpected, which I love to do…it was something that Cambria had never done before, and now they can say they have, which I’m glad, and it is a special unique detail for the homeowner to enjoy, which is most important.

So, from the reactions of thousands of patrons who visited this show home, I think many people like having a tree in the shower, wouldn’t you?

To receive posts via email click HERE Subscribe in a reader or signup in Subscription box in sidebar.

Taylor Regal in Phoenix, NY on Houzz

“Rev” Up your Home Decor with Car Parts!

Taylor
21 Feb 2015
Art, Custom Design, DIY, Interior Design Room, Repurposed
Baldwinsville NY, Clay NY, coil, consultation, crankshaft, custom, decorator, designer, DIY, Home Interior Designs, junkyard, Liverpool NY, Man Cave, mirror, Phoenix NY, repurpose, reuse, side table, spring, Syracuse NY, tassel, TayRose Design, vase

I  have been known to find “art” in the most unexpected places.  I was designing a showcase home, to show how furniture and wall art can be made by using everyday items; thrown out items; stuff that was found at  the curb; or in thrift stores.  I didn’t have far to go for this design plan….

Have you ever been to a Pick & Pull?  Oh boy, first be sure you wear your grungy clothes and shoes, bring gloves and I didn’t know this, but be aware that prices are not cheap for many items.  That was my biggest surprise.

I wandered up and down aisles of discarded cars, smashed up cars, and parts laying on the ground.  It was eery walking around all of those car shells…. what stories they would tell-not good ones in most cases.

As I turned a corner, I saw this awesome sculptural piece of metal just sitting in the middle of the aisle like it was saying, “hey, here I am, just what you were looking for!”    I had no idea what part of the car it was, it was heavy, but I could still carry it, (oh, btw, you have to carry everything out yourself!)  The piece had beautiful rusty patina, and I thought it would serve perfectly as a side table base.  Now, if I could just carry it to the check out counter!

crankshaft piece from junkyard

I also found I think it was called an air cleaner that was metal, and I thought I could turn that piece into a wall art design.  So, I dragged my pieces to the checkout counter, had a bit of a sticker shock (I was very naive to costs, I thought being a junkyard it would be pennies to the pound or something similar…..oh no, more like $’s to the pound)  Anyway, I was happy with my purchases and now to get to work on creating my vision.

air cleaner mirror & vase

I started with the air cleaner.  I don’t have pictures of the process, but I can briefly tell you about it.  The air cleaner was black already, but I cleaned it up and spray painted it black again just to keep any rust at bay.  I found a round piece of mirror at the Dollar Store and glued it under the opening that was in the middle, then positioned it on the wall with the “arm” facing up so I could put some dried floral, then hung a tassel to complete the look.  This piece was for my client’s entry where we hung metal siding on one indented wall, then had a bench with custom pillows. He was thrilled- he loved the whole industrial look especially since being a race car driver, having car related “art” was what he had hoped for.

car coil vases

I also used some large coiled springs from his garage to place on both sides of the fireplace.  I inserted  large glass vases to hold floral sprigs.

For the side table, I found out that I had picked up a crankshaft from a car, and by turning it on end vertically, I was able to put a round glass top and bolt it on to a wooden round disk, found at Home Depot that I stained a dark brown.  I had cleaned up the crankshaft removing the grease, then sprayed it with a satin clear coat spray.  Super simple, and so interesting looking.  Being a small table, this table fits just about anywhere.  I love how something so industrial works inside a home.  This table would be perfect for a Man Cave, or set as I have it, in a corner next to a chair.

crankshaft table TayRose Design

Pick and pull parts from lots of sources to create unique items, and “Rev” up your decor!
To receive posts via email click HERE Subscribe in a reader or signup in Subscription box in sidebar.

How to apply silverware for Home Decor in unexpected ways

Taylor
11 Feb 2015
Interior Design Room

When I can, I like to look for unexpected ways to use everyday items when designing a space.  It doesn’t happen with every room, but, I still like to think about it.  Kitchens are rooms that are perfect for this challenge.

Kitchen silverware pendants Parade of Homes 2012 TayRose Design

While doing some revisions to our kitchen years ago, I wanted to do some sort of window treatment over the sink, and racked my brain for ideas that would be fun, kitchen related, budget friendly and of course, easy.  The window is tucked right between the upper cabinets, so there is just the wood frame and a soffit above with a light.

I already had installed a wood slat blind which is fine and works well in the space, but the window still looked a little dull.  I do want to replace the florescent tube up in the soffit one day to a pendant which will be great, I have something in mind for that later.  There is no room for a tie back curtain on the sides, plus I need all the light from the window that I can get.  I kept looking at the framed trim work.  I could paint it, yes, I’ll paint it in a contrast shade from the wall color…done.  Better, but still needed something…what was narrow enough, flat enough that could be applied to that trim to bring some interest?

As I was pondering this and washing the dishes at the sink, yes, sometimes I can do several things at once…lol…I was loading the dishwasher with silverware when the thought came to me…silverware!

silverware for kitchen window t


My husband had just acquired from his father’s garage a machine that flattens things…not sure what it is called, I’m terrible with tool names, but it works with air compression.  I took a spoon I had that had been chewed up by a garbage disposal, and tried it on the machine, and voila…flattened spoon.  I loved the way it looked.  Now, how to attach it to the trim?  I decided to use small “u” shaped nails in case I want to change out the look later, I would just have to fill in the small holes and repaint.

silverware attached to window frame in kitchen

I headed off to my local Thrift Store and picked up some bags of silverware, very cheap about 1.99 for about 8-12 pcs and one by one put them in the machine to flatten.   I lined them up on the trim, some up right, others facing down, and applied them all the way around the sides and top.  I’ve kept them there for 10 years and haven’t tired of the look yet!

Kitchen window with silverware surround

The other way I have used silverware is taking the same “flattening” procedure I used for the trim, then cut off the ends (which I saved the ends of course to use for jewelry) curl the cut end over, and then tie them on to the bottom of a valance or window shade as trim.  I did this trim for 2 Parade of Homes and it was a great unexpected hit!

silverware trim window treatment TayRose Design

I also have made silverware pendant shades which is what I think I will make again for the pendant I need over my kitchen sink.

silverware pendants TayRose Design

Silverware are a great resource for many Home Decor applications, and I’m sure there are many more ways to discover.   How do you wear your silver?

To receive posts via email click HERE Subscribe in a reader or signup in Subscription box in sidebar.

Vintage Radio “Lights up” to a new tune

Taylor
08 Feb 2015
DIY, Interior Design Room, Office, Repurposed
Baldwinsville NY, bookcases, Clay NY, consultation, credenza, custom, decorator, designer, DIY, flicker bulb, Home Interior Designs, Home Office, lamp, Liverpool NY, Phoenix NY, radio, repurpose, reuse, Syracuse NY, TayRose Design, vintage

When I was designing this  home office, I was thinking about what I could put on the credenza that was going to be on the wall behind the desk.

office at Parade of Homes 2014 TayRose Design

At an auction I spied an old radio shell.  I loved the arched lines and vintage speaker fabric amazingly, in fairly good condition.  The knobs were missing, unfortunately, but I still thought I wanted to try and buy it and find a new purpose for this bygone piece.  I was able to get the radio, and it sat in my work room for a long time.  I even tried to sell it on Craigs List as is, but no one seemed to be interested.

old vintage radio shell


The design of the office was eclectic in feel, with framed old portraits, some beautiful turtle shells hung on the wall and wood with iron standing bookshelves.  There were old atlas books, and old cameras on the shelves, so when I remembered the old radio, I thought this would be a great addition to this office.  I didn’t want just the shell of a radio sitting there, I wanted it to have more of a purpose.  I looked at the back and removed the back panel of the radio….there was quite a bit of room in there, enough for a small lamp of some kind.  A lamp where the light could glow out through the speaker fabric on the front of the radio…and if the light flickered, like a candle….ooo so much the nicer!!

inside old radio shell

I cleaned out the inside of the radio really well and re-stained the radio shell after a light sanding.  Some of the wood veneer was chipped and missing, but most of the radio was in good shape, and that coat of stain made a wonderful difference.  All I had to do was set my small little lamp inside, add the flickering light bulb I found at the Dollar Store, and plug it in….the bulb was an orangey color, so it really looked like a flame, which was really just the animated touch that warmed up that already cozy office.

flicker bulb for radio


I was really happy with the outcome, so glad something that was just a shell of it’s former self, now stood renewed not with a tune but with a warm glow.

radio lamp in office

“It’s a Jungle in here!”

Taylor
08 Feb 2015
Custom Design, Interior Design Room, Kids Room, Theme Room
Baldwinsville NY, bamboo, Clay NY, consultation, custom, decorator, designer, DIY, Hobby Lobby, Home Interior Designs, jungle, lion, Liverpool NY, Phoenix NY, plush animals, raffia, reading nook, repurpose, reuse, Syracuse NY, TayRose Design, theme room, tiger

If you haven’t already guessed, I love to design theme rooms.  I get lost in looking at everything asking myself how I can blend it into the theme I’ve decided on.  Such a challenge, but oh, so fun…so, for this past Parade of Homes, I decided that a jungle theme was in order..and a tall order it was!

Jungle Room at the 2014 Parade of Homes

It’s a Jungle in here! Parade of Homes Pigliavento Builder, TayRose Designs

I had been collecting large jungle animals from Thrift stores for several years just waiting for the right design to include them, and along with a couple of “borrowed” jungle friends, I really had the “wild” feel I was going for.

jungle animals for theme room


I also knew that I would have to construct the jungle arbor over the bed.  I had an old wooden ladder that must have reached up to the roof for it was very tall and could be taken apart into 2 pieces.  I cut them so they were the same heights to be the sides of  the arbor…perfect for hanging monkeys and jungle vines.   I purchased some inexpensive fence planks from Home Depot, brought them home and used a mixture of watered down acrylic paints in black, grey, white and biege to give them a “weathered” look-as if they had been out in the elements for years.  I had a college intern working with me for the summer, and she painted in the words, “It’s a jungle in here” on the top cross board of the arbor.

intern painting jungle sign

I had to be sure that the arbor was not too high, for I wanted that lion to be on top …lounging, well, he is the King of the Jungle you know!

jungle arbor design by TayRose design


I also found at a garage sale of all places, some bamboo fencing that stretched across the whole back wall plus some, so that brought more of the jungle feel in to the room.

bamboo fencing for jungle room wall

My hubby and I were able to design the arbor so it could be transported in pieces and assembled on site easily which was perfect.  It went up very easily, and I screwed the back to a stud in the wall to secure, then dangled monkeys and vines along with baskets from pulleys.  A twin bed was dressed up with a bed roll at the end and a custom made lathe frame enclosing a vintage feel zoo animal poster to hang above the bed.  Zebra patterned sheets with a tribal patterned blanket along with custom pillows made up the bed, where a leopard dozed.

raffia trim for bedskirt jungle room


I stuffed raffia trim along the mattress box spring to hang down to the floor.  For the show, I just pinned it, but it could be sewn onto a sheet as a proper bedskirt.

A large banana tree with real bananas I tucked among the leaves sat in the corner which also hid the cd player playing ” A lion sleeps tonight” in the background.  I purchased from IKEA, 2 large green leaves, and attached them to the arbor, and with the ceiling fan, they moved up and down, as if swaying to the music….lots of animation..love it!

Ikea large leaf canopy for jungle room

The curtains were inspired…I had found a zebra print curtain panel set at Hobby Lobby, then attached more of the raffia trim along the top, but I wanted to have more of a “jungle” way to hang the panels to the rod.  So I purchased online some jungle plush with velcro paws, and used them to hook the panels to the rod…I kept saying, “hang in there!” hoping they would hold up and they did, no prob!

jungle animal curtain tabs TayRose Design

In the corner of the room I wanted a little reading nook, so I had one of those netted canopies and hung it up where it draped down over large coffee bean bag covered floor cushions; a painted rattan glass top short table; a brass electrified lantern to read by; and a large tiger to lean on and read stories with….wouldn’t you want to read to a tiger?

Reading nook in Jungle Room 2014 Parade of Homes TayRose Designer

Reading nook in Jungle Room 2014 Parade of Homes TayRose Designer

From the inception of choosing the wall color to the rattan leaf ceiling fan; constructing the  arbor hut;collaborating on the crate dresser; stacked crate night stand; adding an empty coke bottle (remember “The gods must think I’m crazy?” movie?; custom painted giraffe wall art; jungle directional signs; to the canteen hanging at the end of the bed and the music in the background…this was a dream theme room, one that was amazing to be living in for a short time while pulling it all together…it really was a jungle in there!  Shhhh….the lion sleeps tonight….oh, and no more monkeys jumping on the bed!

crate dresser jungle roomjungle sign for jungle room

To receive posts via email click HERE Subscribe in a reader or signup in Subscription box in sidebar.

Taylor Regal in Phoenix, NY on Houzz
  • 1
  • 2
Recent Posts
  • Owl Inspired Theme Toddler Bedroom
  • Painted trunk blends with Decor
  • Create a “trunk” inspired look for a Nightstand
  • Decorate fireplace wall “naturally” on a budget
  • How to Inspire Design with Pinterest Photos
Archives
  • February 2018
  • January 2018
  • October 2016
  • January 2016
  • June 2015
  • April 2015
  • March 2015
  • February 2015
  • January 2015
  • December 2014
  • November 2014
  • June 2014
  • May 2014
Newsletter subscription form

Enter your email address:

Delivered by FeedBurner

Categories
  • Art
  • Bathroom
  • Craft Project
  • Custom Design
  • Dining Room
  • DIY
  • Entry
  • Holiday
  • Interior Design Room
  • Kids Room
  • Kitchen
  • Living room
  • Master Bedroom
  • Mudroom
  • Office
  • Repurposed
  • Theme Room
Houzz
Remodeling and Home Design
Instagram
Instagram
HomeTalk
Featured on Hometalk.com
Follow me on Facebook
TayRose Design

Promote Your Page Too
315.224.4142
© 2014 k.linndesign. All Rights Reserved.