• Shop
    • Antiques
    • Home Decor
    • Jewelry
      • Necklaces
      • Bracelets
      • Earrings
      • Rings
      • Pins
    • Upcycled handmade
      • upcycled womens tops
      • upcycled womens jackets
      • Upcycled womens pants
      • upcycled pillows
      • Upcycled Pickleball Shirts
      • upcycled purses
    • MacKenzie-Childs
      • MacKenzie-Childs Taylor Dinner Plate
      • MacKenzie-Childs Taylor Luncheon Plate
      • MacKenzie-Childs small oval dish
      • MacKenzie-Childs Taylor Bread & Butter
      • MacKenzie-Childs Taylor Mugs
      • MacKenzie-Childs Taylor Saucers
      • MacKenzie-Childs Taylor Breakfast Bowls
      • MacKenzie-Childs Taylor Berry Bowl
      • MacKenzie-Childs Taylor Chowder Bowls
      • MacKenzie-Childs Wallcourt pieces
      • MacKenzie-Childs Enamelware
      • MacKenzie-Childs Torquay dinnerware
      • MacKenzie-Childs MacLachlan Dinnerware
      • MacKenzie-Childs Taylor Serving Ware
      • MacKenzie-Childs Glass Goblets
      • MacKenzie-Childs glass tumbler
      • MacKenzie-Childs Glass Serving pieces
      • MacKenzie-Childs Decor pieces
      • MacKenzie-Childs Placemats & Coaster sets
      • MacKenzie-Childs Paper Products
      • MacKenzie-Childs Tile
    • Shoes
  • Home
  • About
    • I believe…
  • Gallery
    • Custom Design
    • Interior Design
      • Bath
      • Bedroom
      • Dining Room
      • Entry Way
      • Kitchen
      • Laundry
      • Living Room
      • Office
      • Mudroom
      • Themed Rooms
  • Color CCE
  • Services
    • Services
    • Design Process
    • New Construction
  • Journal
    • DIY
    • Repurposed
    • Art
    • Interior Design Room
    • Holiday
    • Theme Room
  • Press
  • Contact

Petite Rocking Chair gets “Rockin'” facelift

Taylor
23 Apr 2015
Custom Design, DIY, Interior Design Room, Repurposed
cotton piping, cushion, Home Decor, ikat, printing, rocking chair, TayRose Design

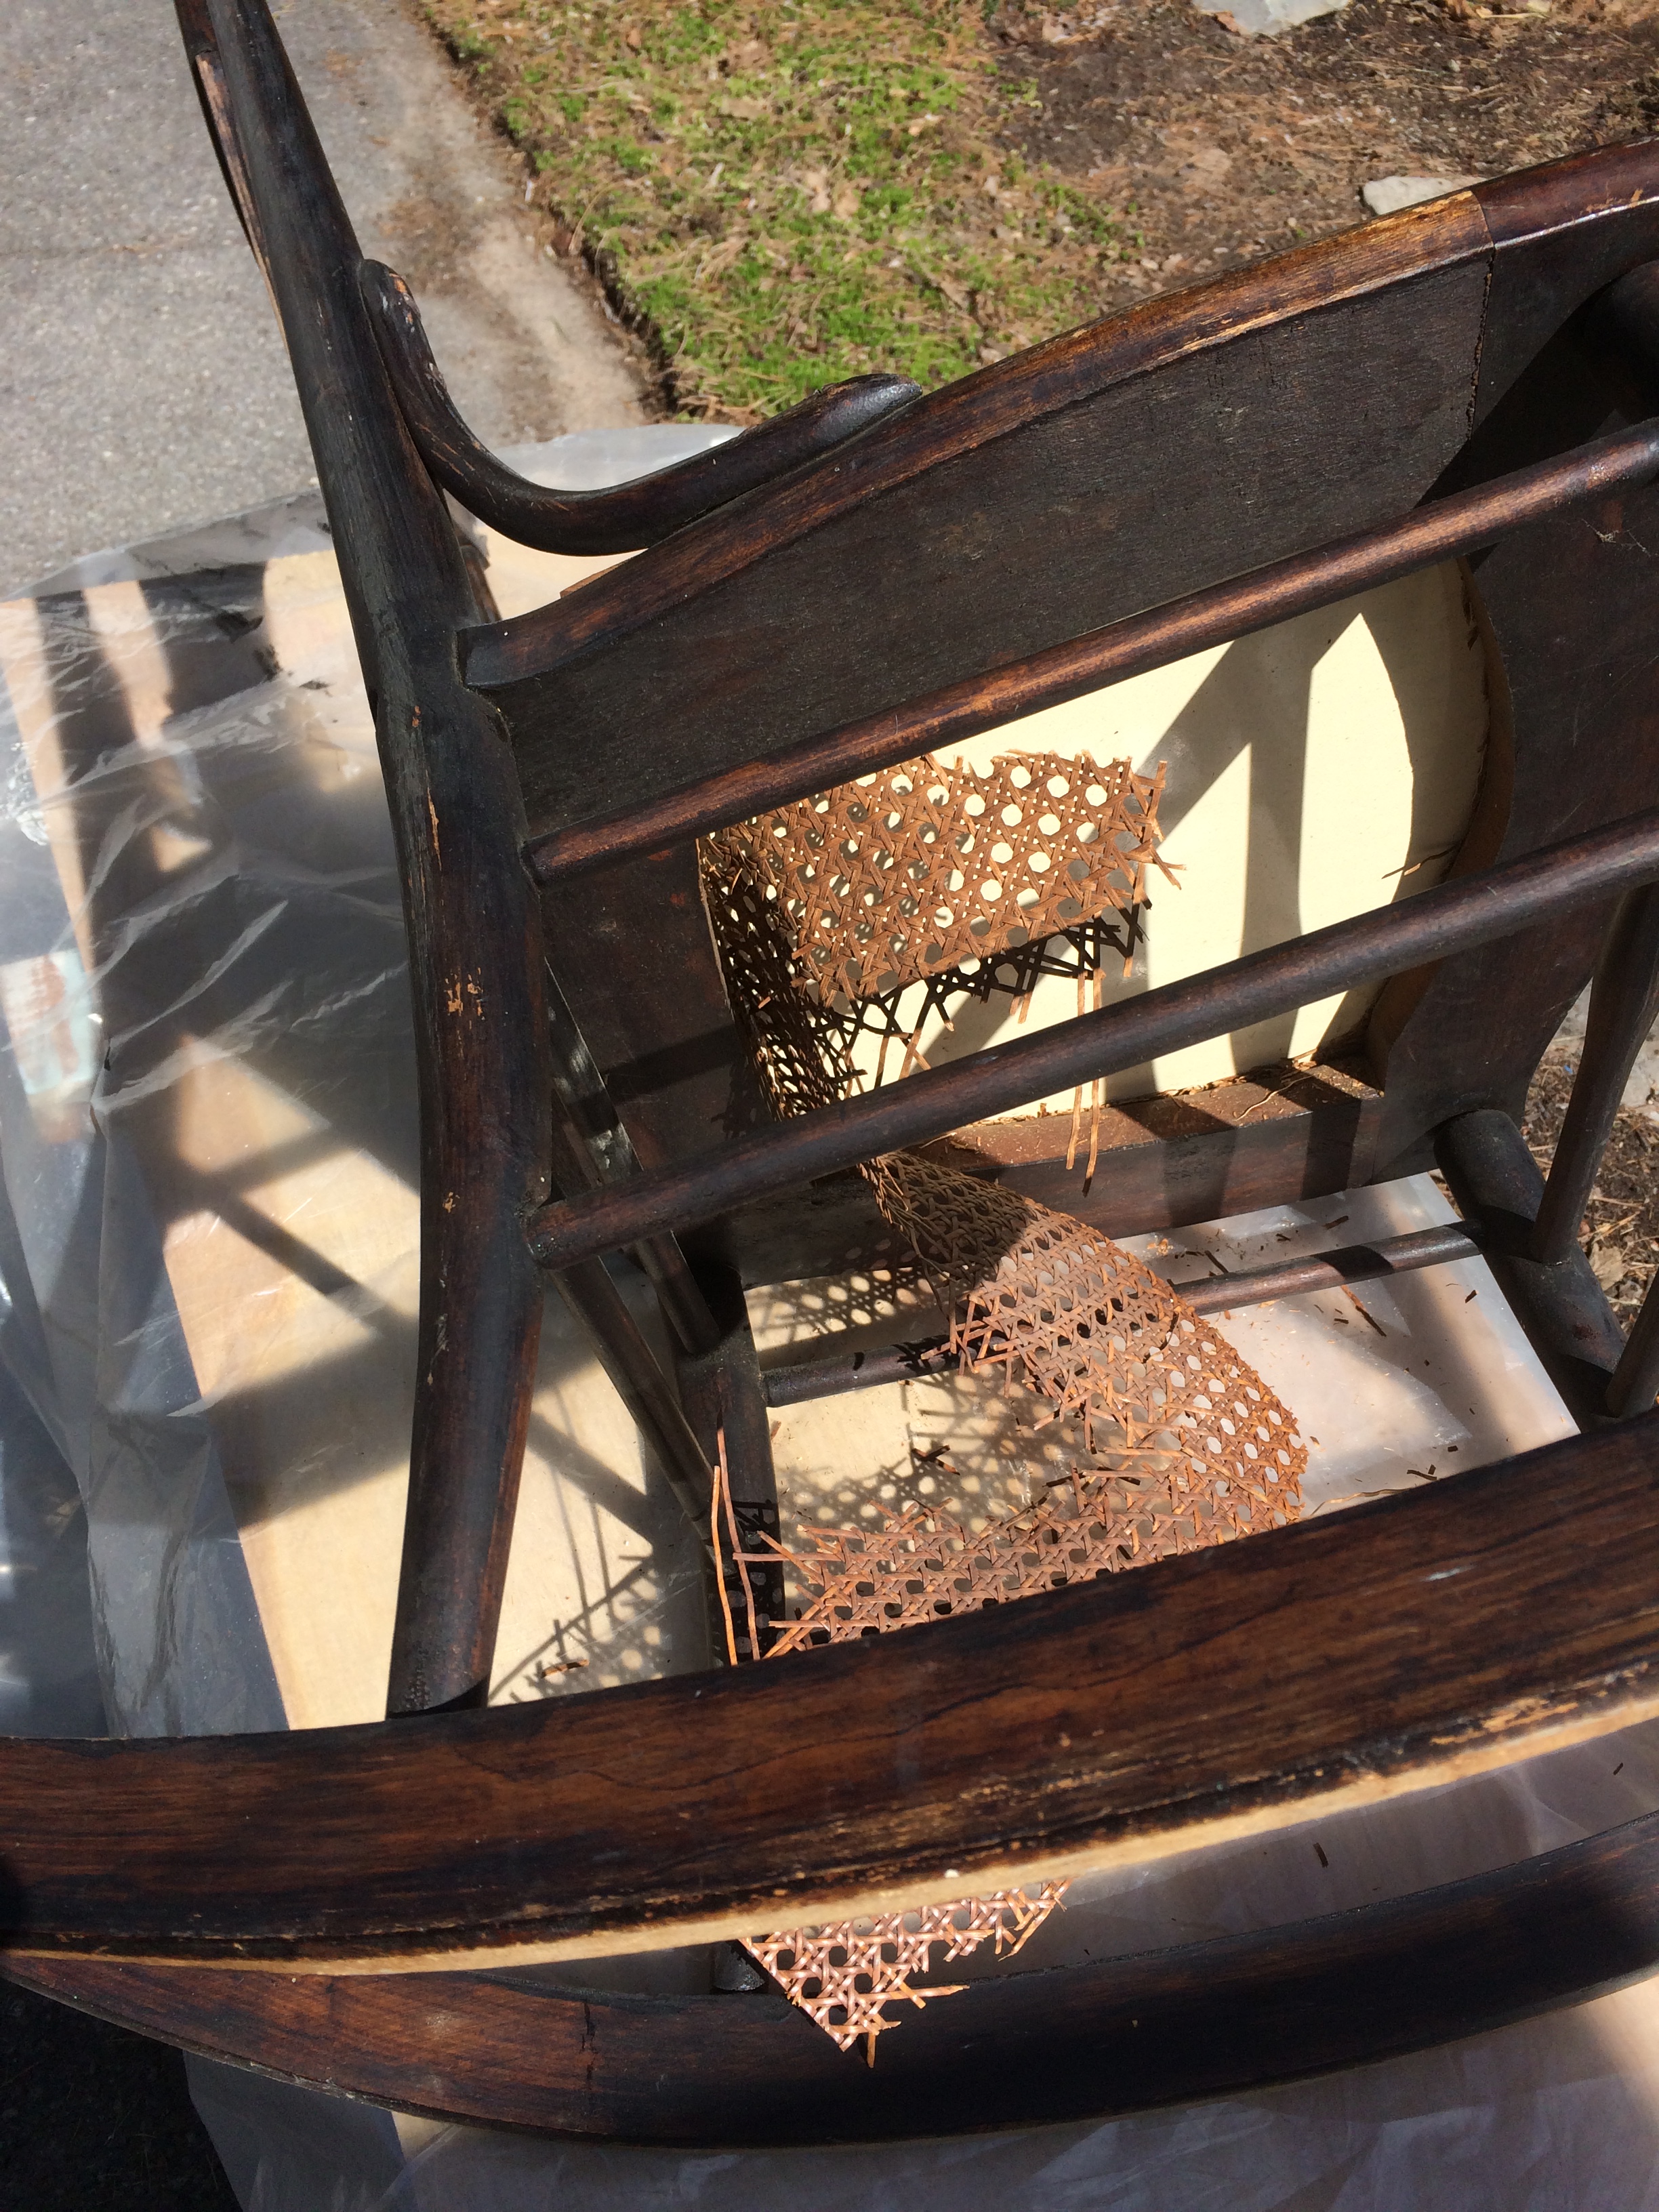
I found this sweet little rocker and I usually don’t buy rockers for they don’t sell at the shop, but this rocker was smaller, had some issues, and I thought that someone might want to put it in their garden with a pot of lovelies on the seat and wouldn’t really care too much about the condition.  The rocker was stained in dark walnut, but had some paint marks on it here and there. The seat was originally cane, but it was all broken through and had a nailed masonite board over the hole in the seat.    I brought it to the shop as is to use as display to set items on the seat, and it worked great!  I had thought about painting it a lighter color and fixing it up a bit, but I thought I would wait and offer that to a buyer so I could get their color preference.

rocker restained


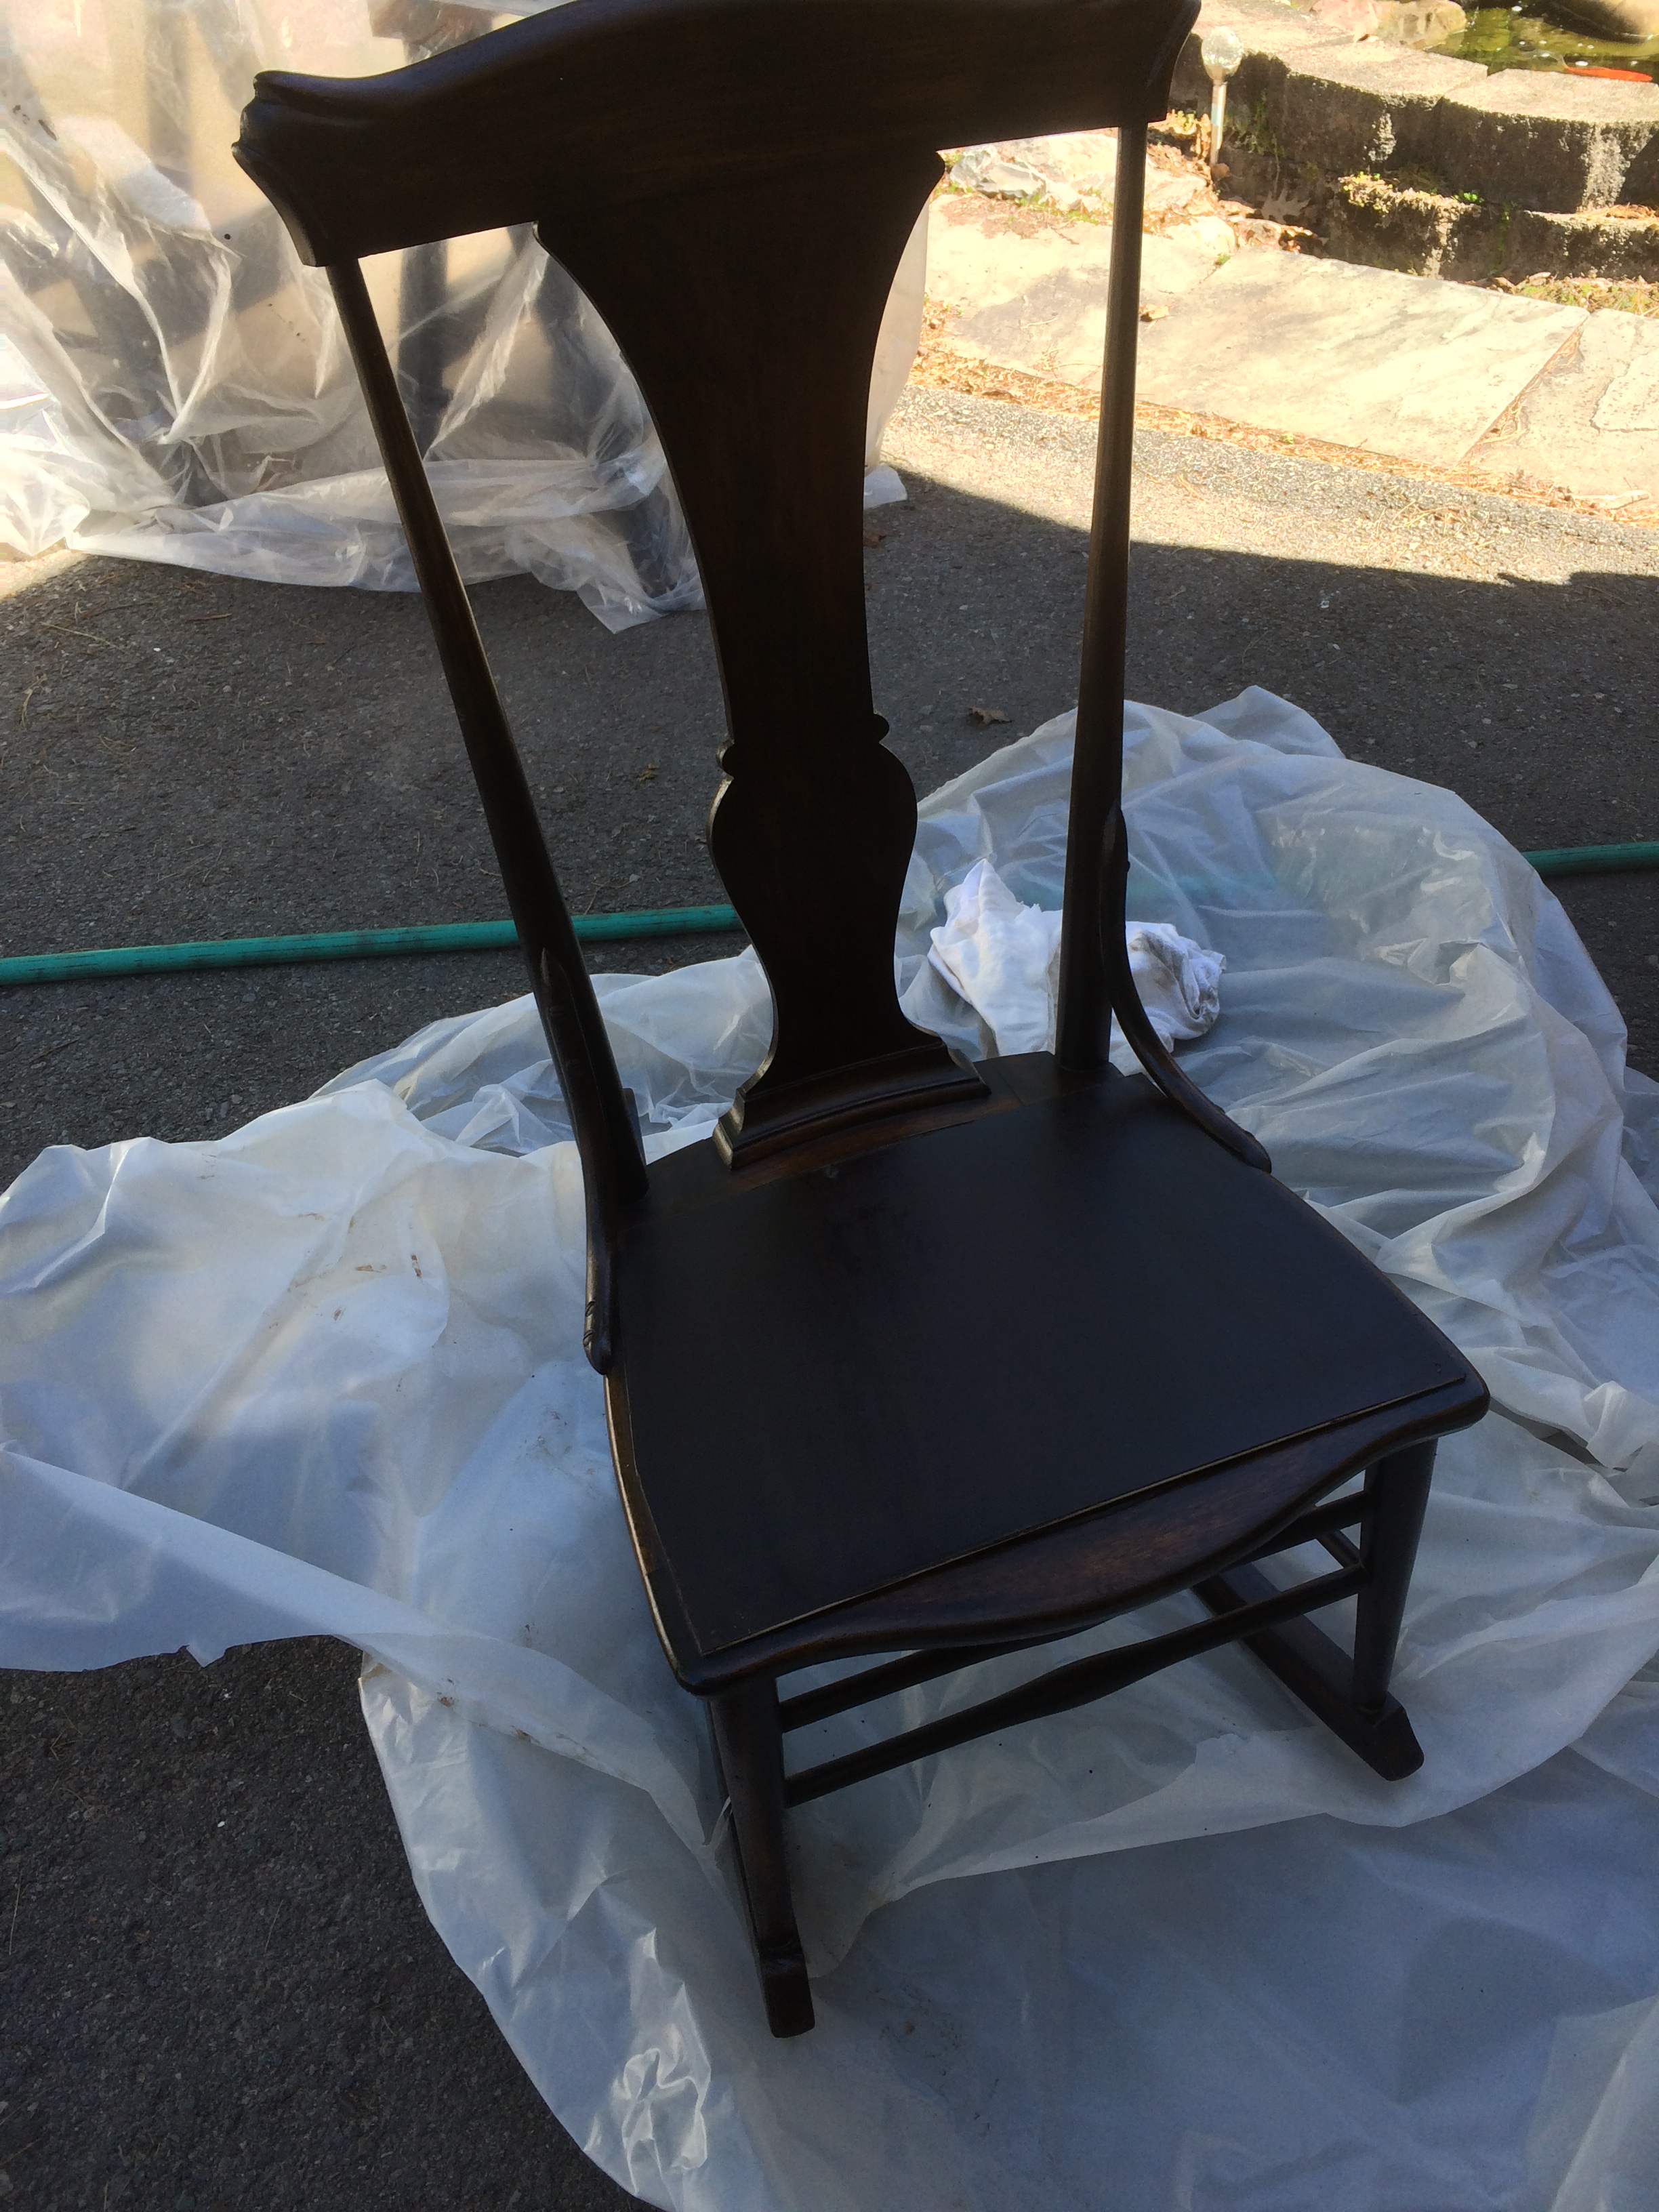
A buyer did come in and loved the chair just as it was but wanted to know about a cushion.  So I packed up the rocker, brought it home and started to look it over a bit closer since it was not going out in a garden, but will be going into a bedroom.  I decided to give the chair a facelift….a fresh look, retaining as much of the original surface as possible.  The paint marks were not coming off with paint remover, so my only other option was to sand them and then re-stain.  I was grateful to have a dark walnut stain on-hand, and started to sand off the paint; gave a light sanding over the whole chair; wiped off all  the sanding dust and then I re-stained the whole chair with the walnut stain.

The chair seat was brown, but it had water marks and didn’t match the stain color.  I turned the chair over and with an x-acto knife, I cut around the seat opening to remove all of the broken cane hanging down from the busted seat.  I first thought to paint the seat dark brown which I did with acrylics in brown and black mixed together.  It went on fine, but when it dried, I could still see the outline of the watermark.  So, I decided to stain it with the same walnut stain I used for the chair.  After the stain dried, it was perfect, no stains and the color matched the chair perfectly!  Whew!

Before rocker restaining

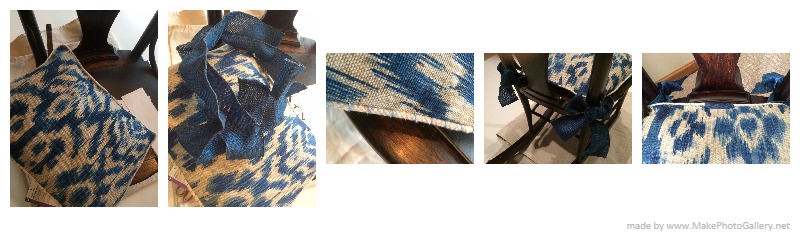
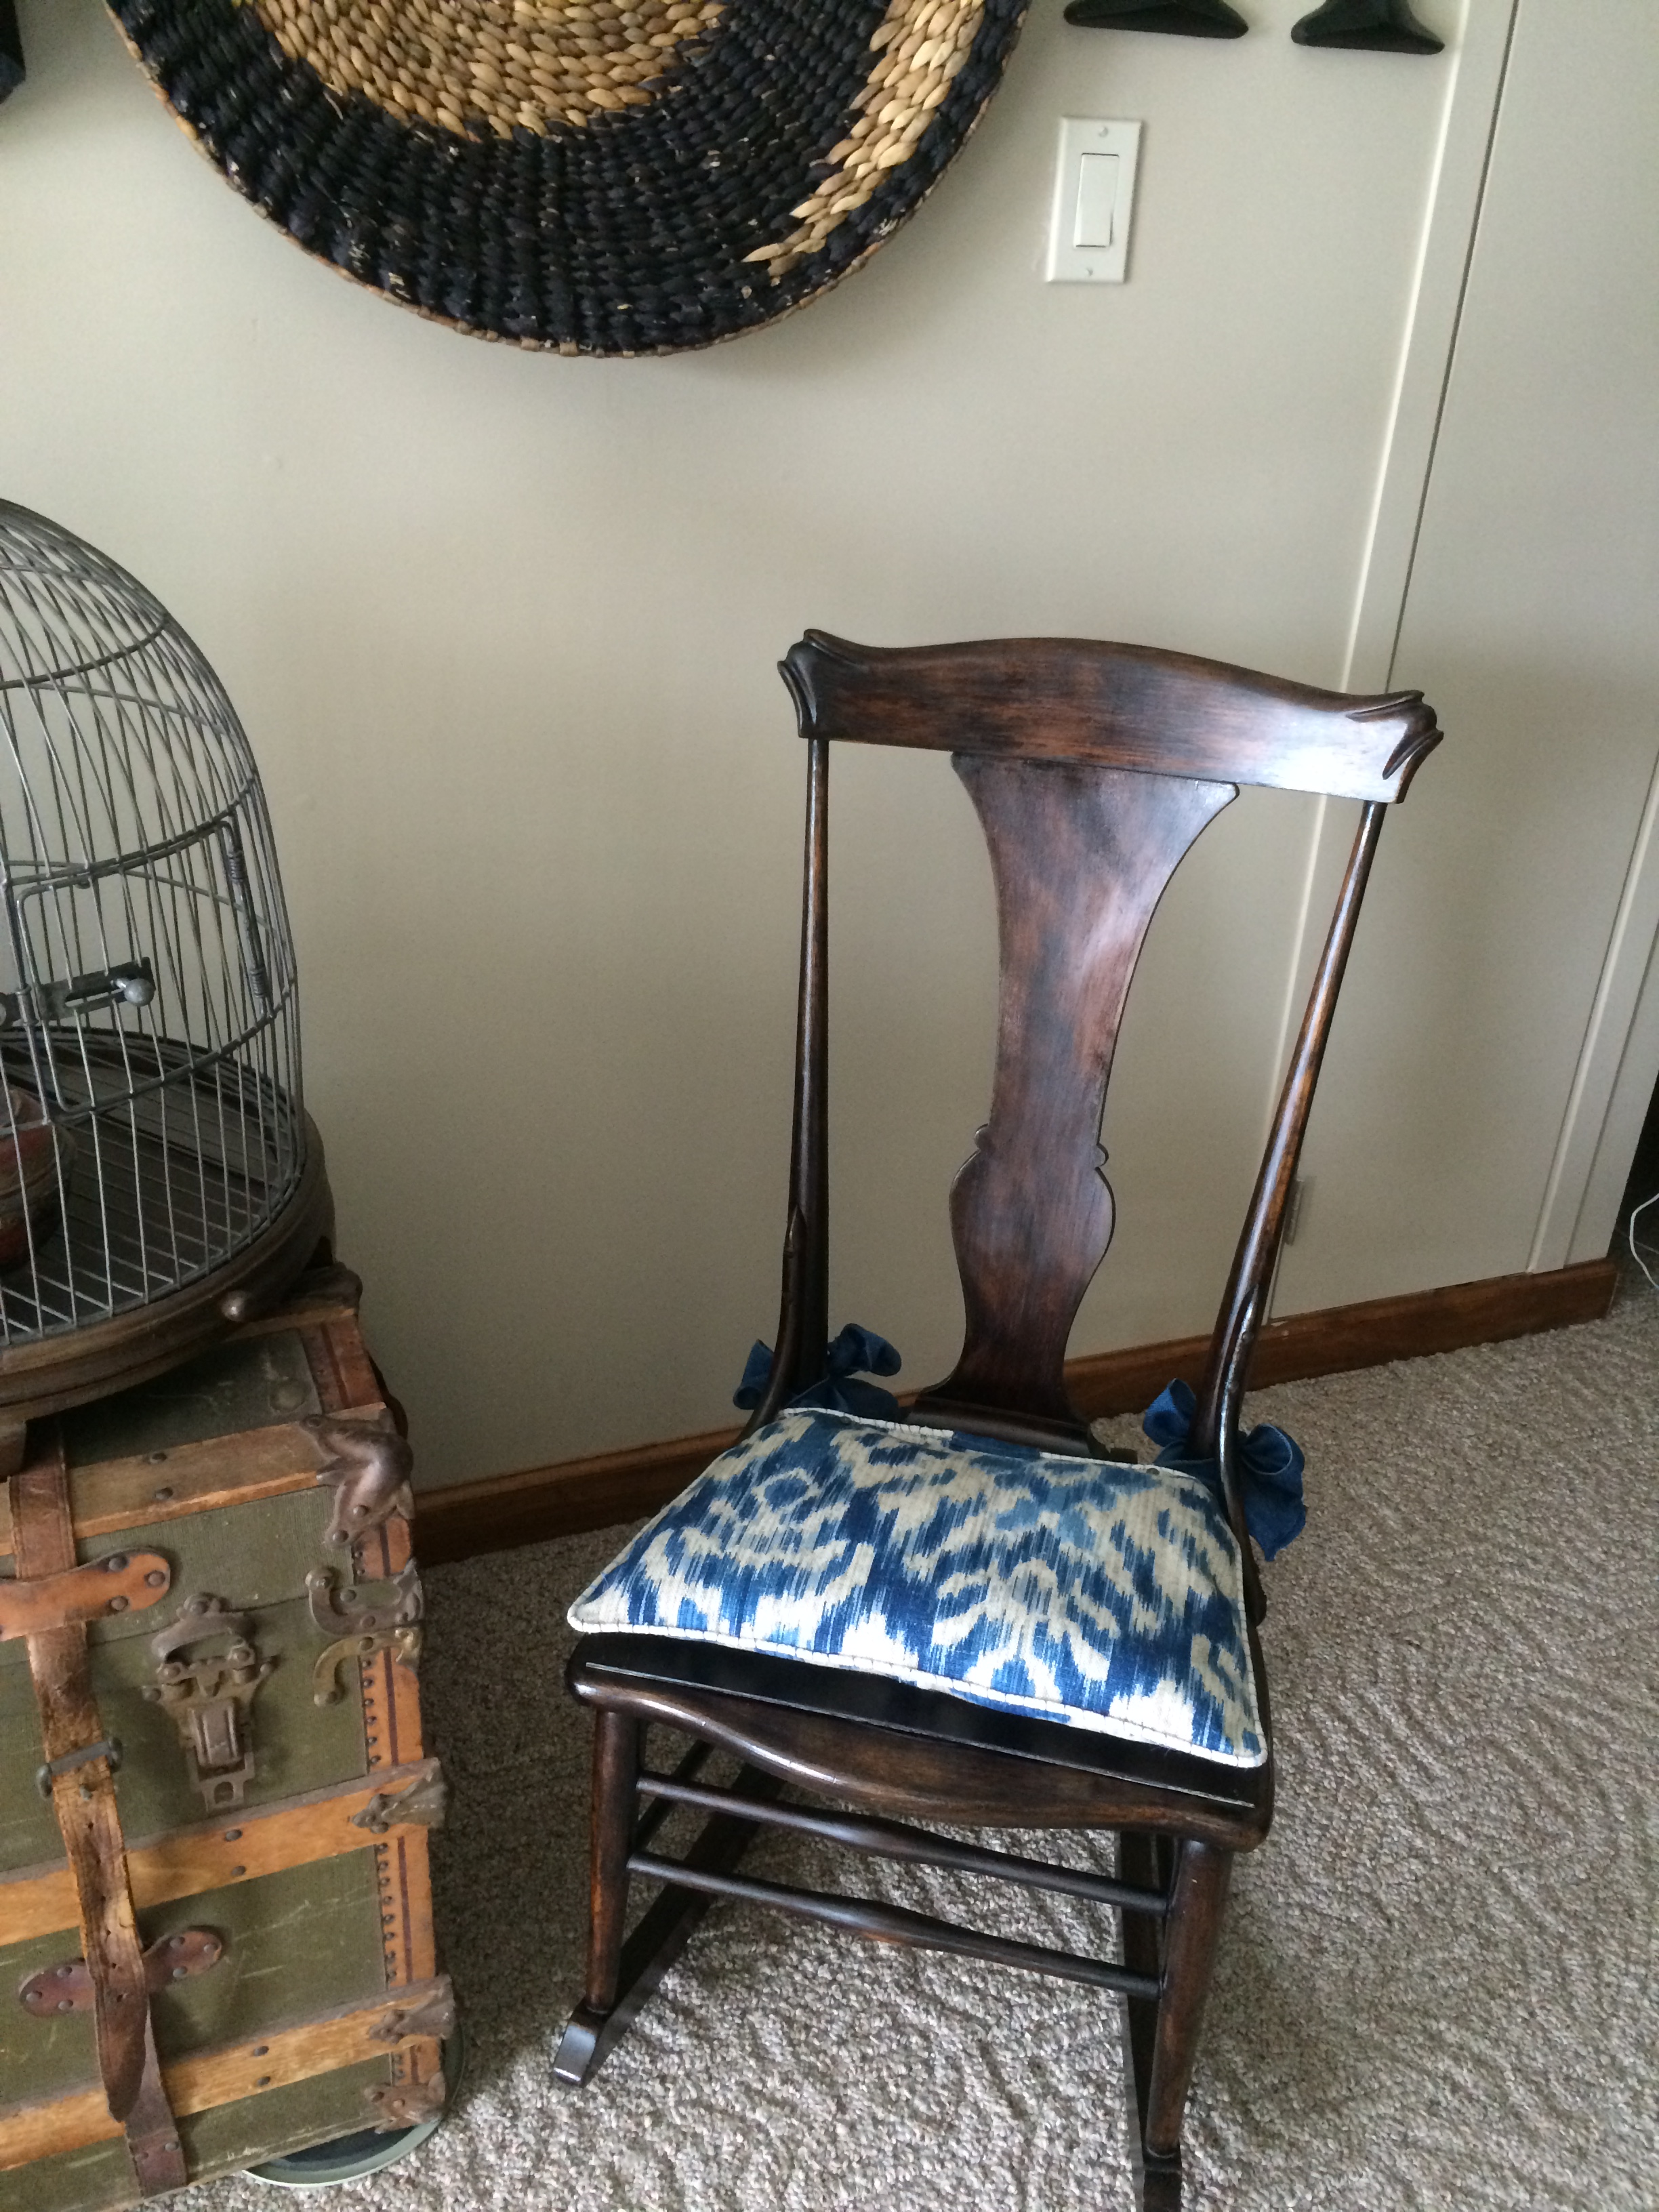
For the cushion, the buyer wanted blues, and I had just the right fabric in my stash which she loved.  The ikat pattern had several shades of blue which will blend with the blues in her room.  I made a pattern of the seat by tracing the shape with paper.  I wanted to have some sort of piping, and to save time and labor costs, I decided to use some cotton laundry line I had from a previous project and whip stitched it around the outside  edge in the seam of the sewn cushion with blue embroidery thread.  I wanted the ties to be out of a nice wide ribbon for bows, and found some wired ribbon at JoAnn Fabrics that not only matched the color, it had the same texture as the fabric on the cushion…awesome!  I used a small section of ribbon and folded it over where the piping ends came together and sewed it on by machine.  The ties were also sewn on by machine as close to the seam as possible at the top.  I added small buttons that I sewed in each corner for more detail.

rocker cushion process


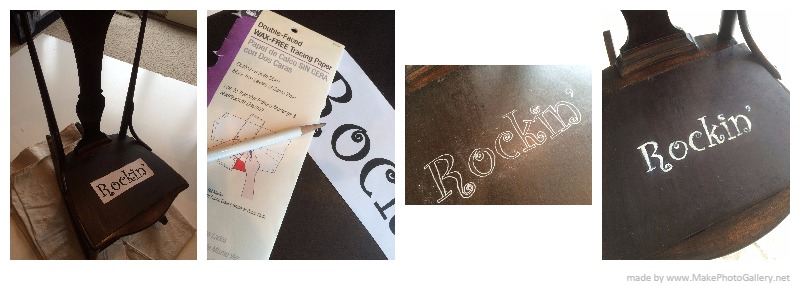
I always like adding a bit of unexpected surprise to items I work on when the inspiration hits me, and I decided to add the word, “Rockin” to the masonite seat top.  Not that it will be seen on a daily basis, or maybe ever….but when it is, I can just envision the smiles it will bring and that makes it all worth it.   I don’t have fancy printers and special paper, and I didn’t want to make stencils, so I decided to make the words on the computer in the size and font I liked, printed it off, then I thought, now what?  I used to take a pencil and rub the back of the paper with the words and then trace the top with a pencil so the words would carbon off on the surface, but this wood seat was dark so that wouldn’t work.  Then the inspiration hit me to use dressmaker transfer paper! The transfer paper worked like a charm, I just placed a sheet under my word sheet, and traced the words with a pencil and lifted up the paper and voila!  The word was all traced out.  I then painted inside the letters with white acrylic paint and then outlined the letters with a black marker.  I lightly sanded it with 320 grid so it would look a little worn, and then I wiped on a coat of poly over the whole seat and let dry.

rocker words on sea

It was fun to bring a worn, sad little chair to a “rockin” fresher version of herself….plus knowing that it will be loved in a new home makes it all the more special!

**Update on rocker, client backed out of sale unfortunately, so chair is still available and I may be painting some blue accents to break up some of the stained wood.  This happens sometimes, when clients back out of a custom order and gratefully it doesn’t happen too often…all lessons learned.


finished rocker with cushion


To receive posts via email click HERE Subscribe in a reader or signup in Subscription box in sidebar.

« Photo-Art pillows add big punch to Home Decor
How to add “light weight” wall art »

Related Posts

  • Taking a vintage pendant lamp and adding wallpaper for a fresh look
    I was given the opportunity to try a new wallpaper...
  • Shareathon Cutting Edge Stencil Project - Sofa Table and Pillow

    I again was invited by...

  • Owls emerge from remnants
    For the past couple of weeks, while trying to...
  • Bath-2011 Master Bath Parade of Homes by TayRose Design
    What an honor to be chosen by a builder to design...
  • Room chosen for Good Housekeeping article
    Do you know how when you receive a nice...
  • Curbside throw away makes great Nursery addition

    While out driving...

  • "It's a Jungle in here!"
    If you haven't already guessed, I love to design...
  • Vintage Radio "Lights up" to a new tune
    When I was designing this  home office, I was...
  • 2012 Parade of Homes Guest bath in "Riverside" model
      While working with the builder, Jack...
  • Inspired way to display earrings
    I've been rushing around to quickly make items to...
  • Create a "trunk" inspired look for a Nightstand
    [caption id="attachment_1354" align="aligncenter"...
  • Who doesn't like a tree in the shower?
    The trends for bathrooms it seems, is that they...
  • Headboard gets new life as Message Center in Mudroom
    While planning the design for the Parade of Homes...
  • Quick and Easy Burlap Christmas Stocking with Pom-Pom Toe
      I had a request for a tutorial on how to...
  • Decorate fireplace wall "naturally" on a budget
    [caption id="attachment_1374" align="aligncenter"...
  • Old kitchen chair gets makeover to a child's desk chair
    While working on a client's bedroom for their...
  • Transforming a student Globe to a Basketball Floorlamp
    I love designing themed rooms....it can be...
  • Surprise hit of the Parade of Homes 2014 Pigliavento Builder Home
    It's been a quick several months preparing for the...
  • New Home, new furnishings Part 2 Master Suite
    [caption id="attachment_1224" align="aligncenter"...
  • Accent Cabinet gets Island makeover
    We all have read about similar dilemmas...small...
Back
Recent Posts
  • Owl Inspired Theme Toddler Bedroom
  • Painted trunk blends with Decor
  • Create a “trunk” inspired look for a Nightstand
  • Decorate fireplace wall “naturally” on a budget
  • How to Inspire Design with Pinterest Photos
Archives
  • February 2018
  • January 2018
  • October 2016
  • January 2016
  • June 2015
  • April 2015
  • March 2015
  • February 2015
  • January 2015
  • December 2014
  • November 2014
  • June 2014
  • May 2014
Newsletter subscription form

Enter your email address:

Delivered by FeedBurner

Categories
  • Art
  • Bathroom
  • Craft Project
  • Custom Design
  • Dining Room
  • DIY
  • Entry
  • Holiday
  • Interior Design Room
  • Kids Room
  • Kitchen
  • Living room
  • Master Bedroom
  • Mudroom
  • Office
  • Repurposed
  • Theme Room
Houzz
Remodeling and Home Design
Instagram
Instagram
HomeTalk
Featured on Hometalk.com
Follow me on Facebook
TayRose Design

Promote Your Page Too
315.224.4142
© 2014 k.linndesign. All Rights Reserved.