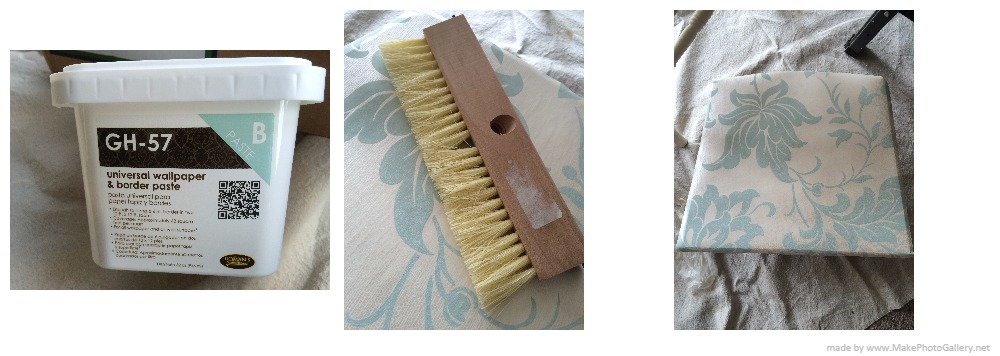
I had an invitation asking if I would be interested in a new program called “Share-A-thon”. They were inviting a few contributors to try out a product and then “share” the step by step project to inspire others. When I heard it was wallpaper I was intrigued, for I have never used wallpaper before except to line drawers, so I thought this would be something new to try. We were sent a link to the product, who in this case is Walls Republic found here, http://www.wallsrepublic.com/ that have beautiful online candy for the eye, pages and dreamy pages of wallpaper samples (plus you can get up to 5 sample swatches for free). We had a list of samples to choose from and I chose a paper called Adeline in the color, Duck Egg #97411.

These papers use a newer, “paste to the wall” technology, where you paste the item you are attaching the paper to without having to paste the paper first. The papers are hung dry, so no soaking before hand…a nice one less step. Another awesome feature, is that the papers are dry strippable, which means they are easy to remove by just peeling back a corner and the whole paper comes off in one sheet….no more stripper and heaters and scrapers…just peel and go! Do you know how many times I have wanted to try wallpaper somewhere but because of the hassle to remove it I didn’t? This feature alone has me going room by room looking at the walls much differently now….
I started thinking about how I would use the wallpaper. I knew that I wanted to make something that would show what to do with remnants after papering a wall. I decided on 3 items: a chair, a hanging lamp and a bi-fold door. I figured that these items could be used in a bedroom, a large bath or guest room.
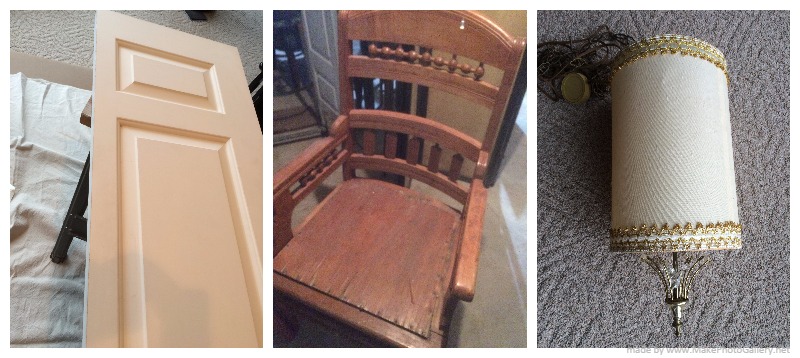
3 before items for wallpaper project
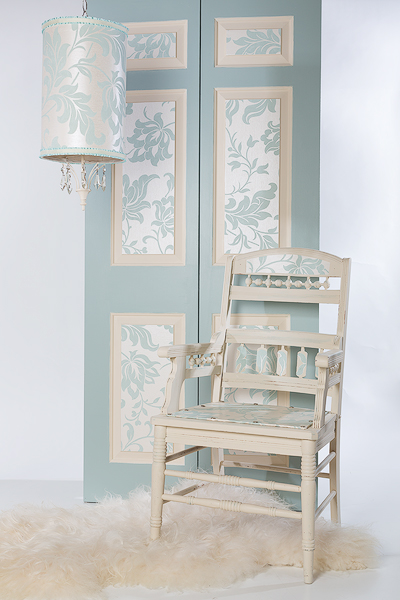
After 3 pieces wallpapered with Walls Republic wallpaper
For the chair, I needed to shellac the chair first so that the tannin pigment of the stain would not bleed through the chalky mineral paint I planned to use. I found 2 colors that matched very closely to the colors in the wallpaper from Country Chic paints- Cheesecake, and Elegance. I applied the blue Elegance in various areas so it would show through the creamy cheesecake color when I distressed it.
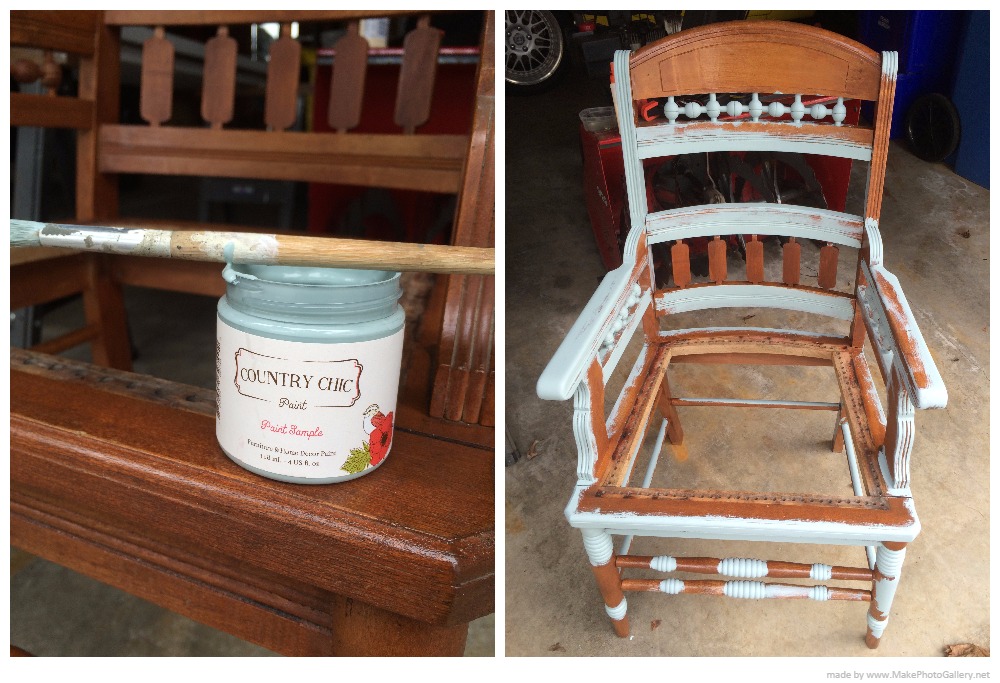
After painting on the blue Elegance color, I applied 2 coats of the cream Cheesecake color. After drying for a day, I did some distressing and more blending of the 2 colors as per product directions…Country Chic has great tutorials on their website, which is so helpful for us diy’s. For the finishing coat on the painted areas of the chair, I used the Country Chic natural wax brushed on lightly then buffed off with a clean cloth for a smooth finish
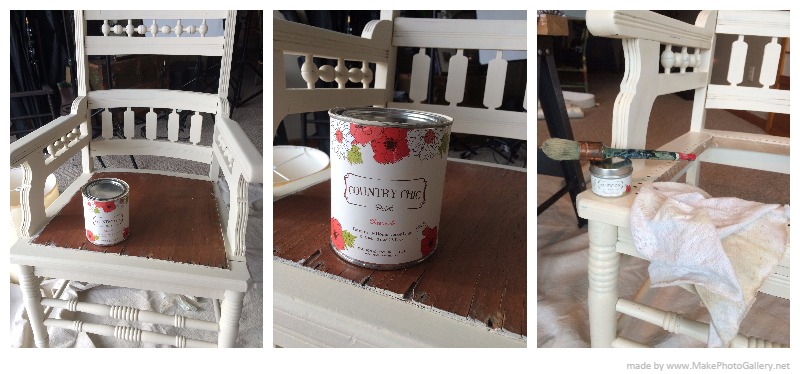
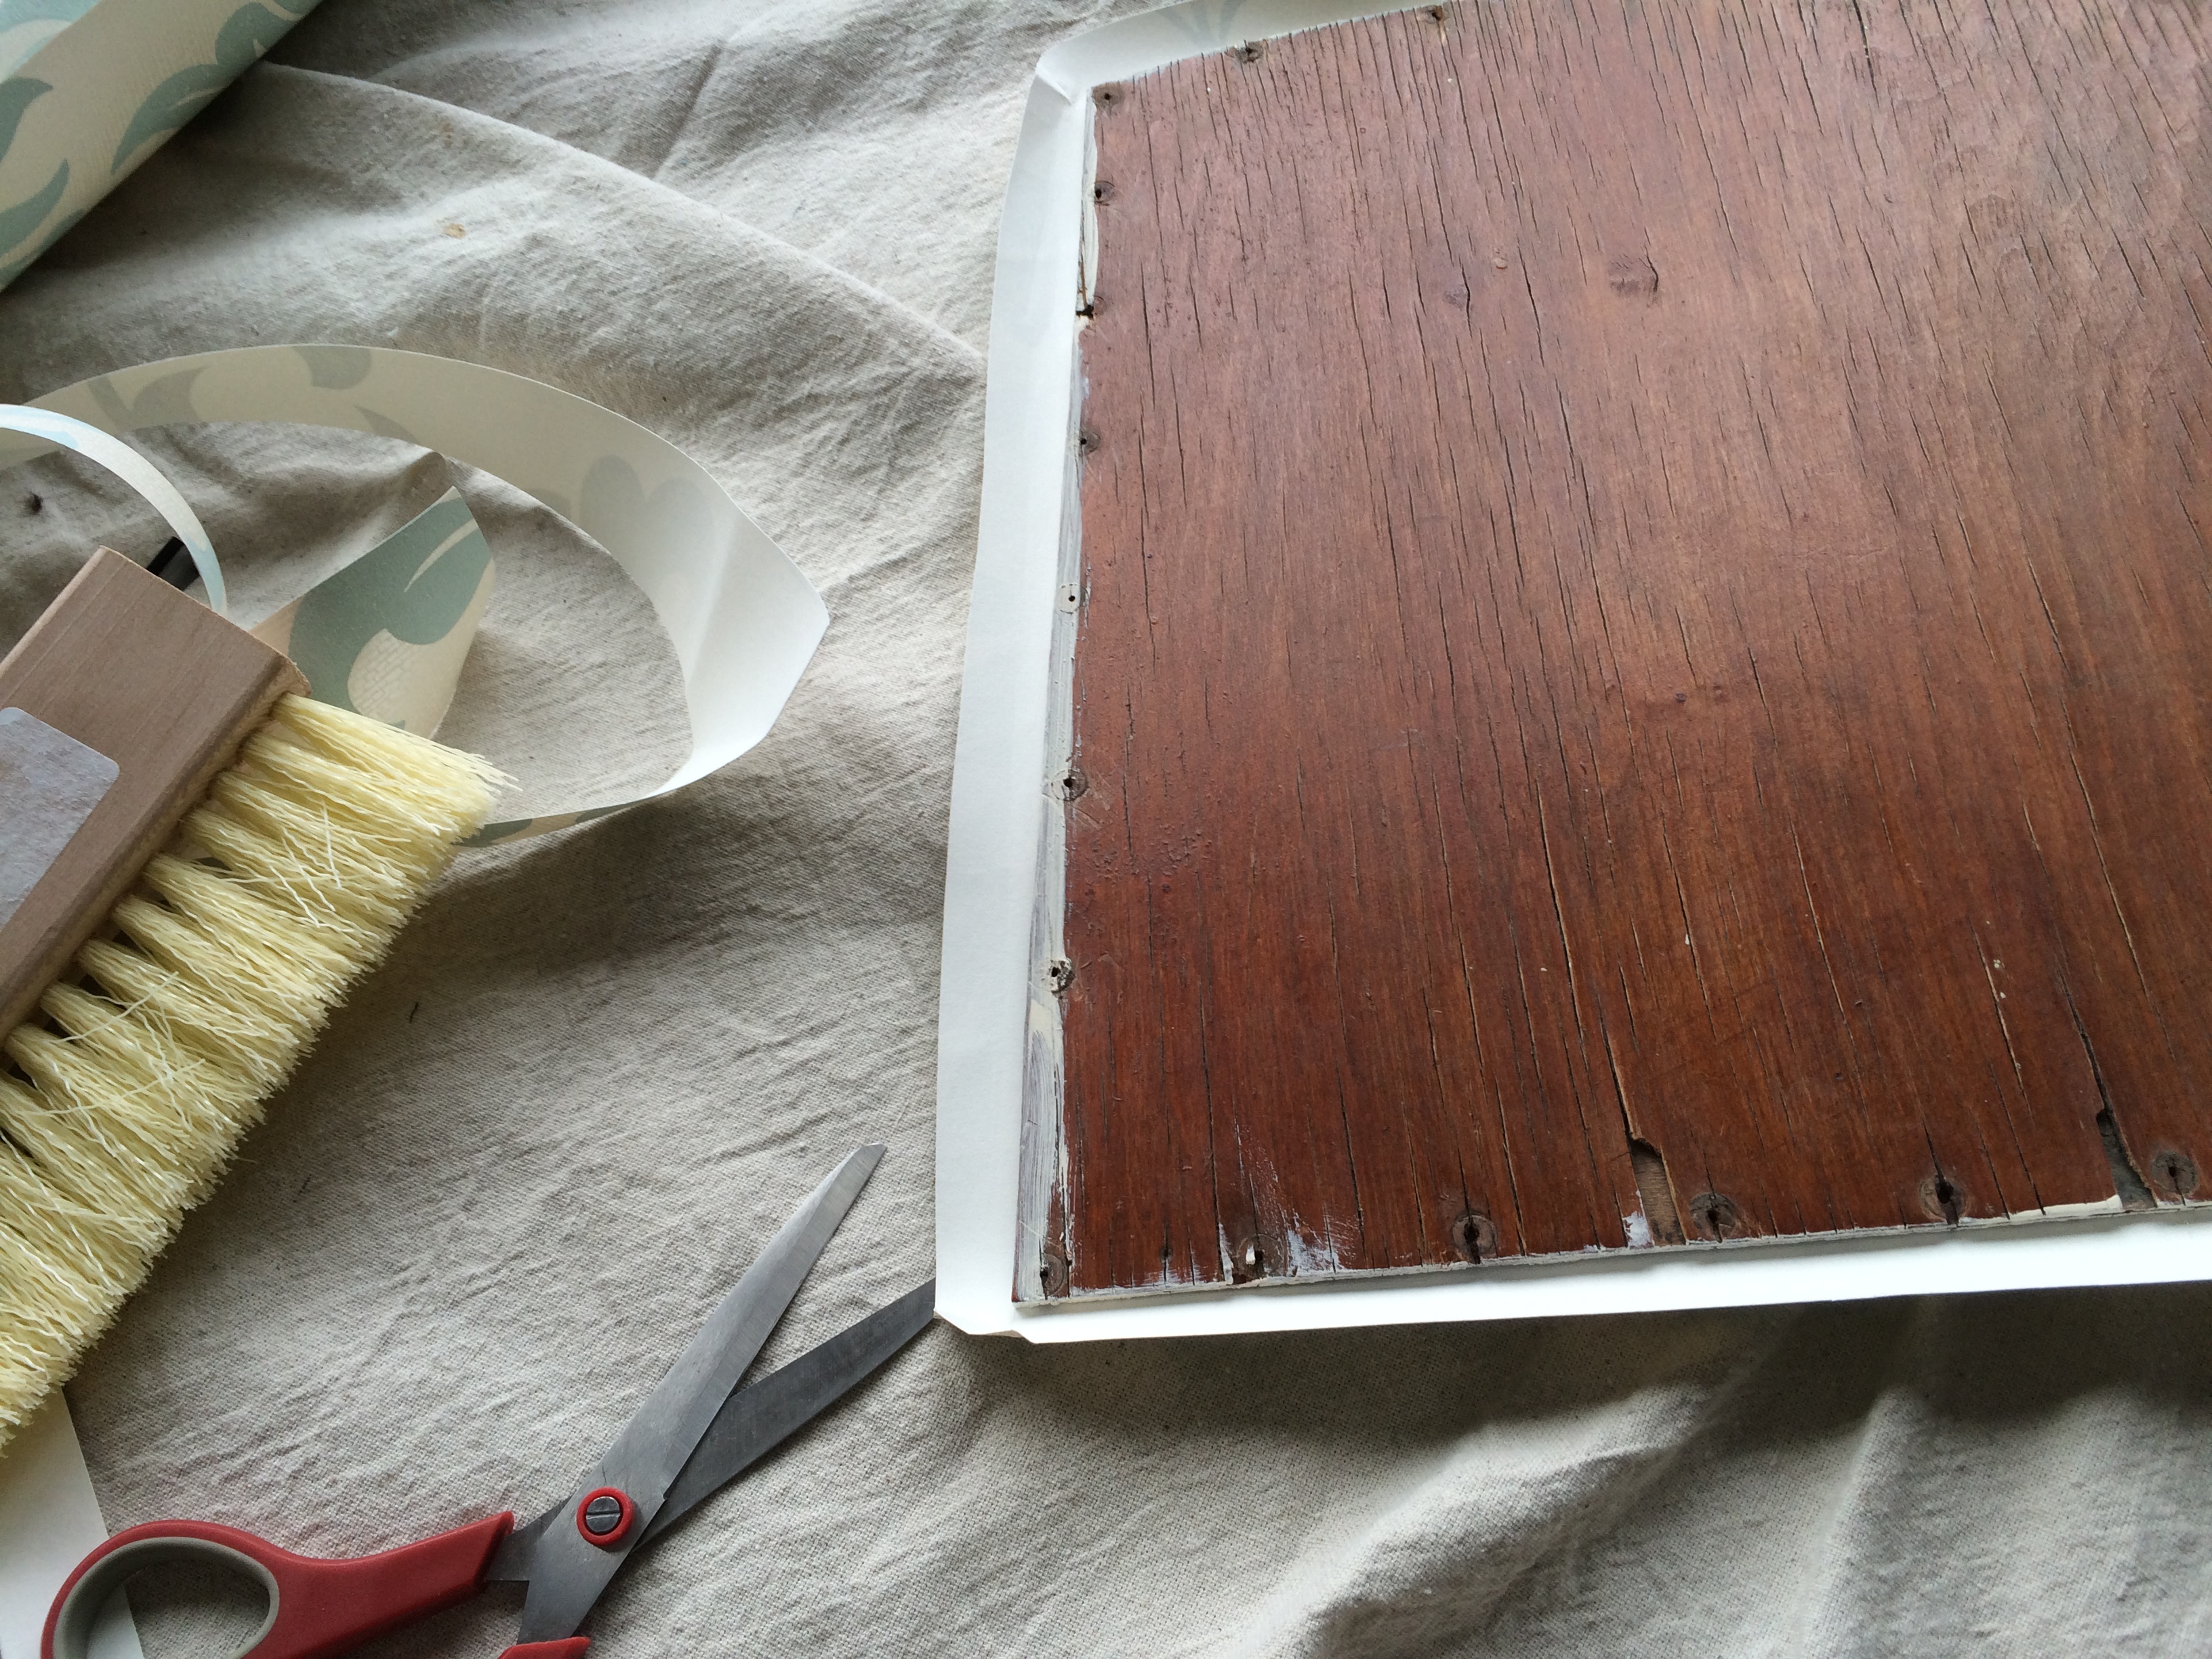
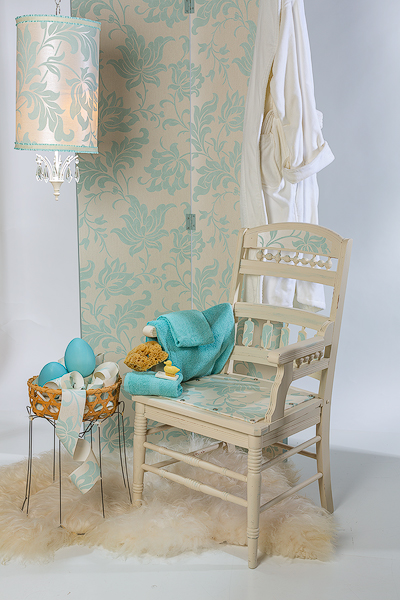
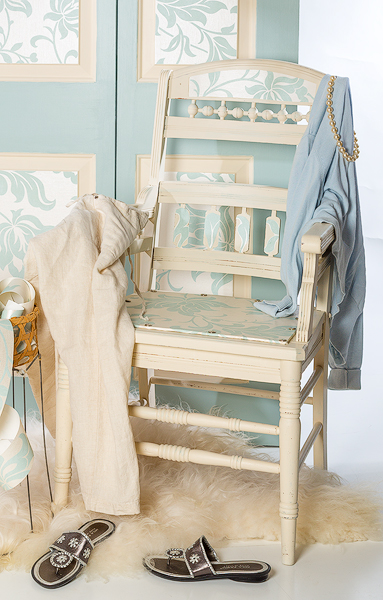
Since the chair seat was wood, I thought it would be perfect to cover with the wallpaper. Mind you, this chair is meant to be an “accent” chair, not really used to sit on, but as a holder of sorts which you will see how further in the post. Also, the thick spindles along the back of the chair would be a great place to try some appliques with the wallpaper as well as an outlined curve on the top of the chair. I pried up the chair seat and painted the seat with a latex primer/paint mixture in white that I already had on hand. I painted 2 coats just to be sure no bleeding after the shellac layer and 2 primer/paint coats.

Once thoroughly dried as per can instructions, I unrolled some of the wallpaper out and laid the wooden seat on the paper and cut out leaving about and inch width around the perimeter to turn under the seat. I set the seat up on some risers ( I used all the same size paint cans) and proceeded to lightly bend the paper down along the edges so I can see the outline of the seat and know where the paper is supposed to lie. I picked up the recommended paste that Walls Republic had suggested from Lowes, the Roman brand adhesive and I brushed a liberal amount to the top of the wooden chair seat. Trying not to get any paste/glue on the top of the paper was the biggest challenge, then proceeded to lay my cut out piece on the seat starting from the top and laying down, pushing gently the air bubbles to the sides as I lowered the paper all the way down. Then I took my wallpaper brush I picked up at the Dollar Store, yeah..and smoothed more bubbles out to the sides for smooth surface. If I did happen to get a bit of glue on the paper, I tried to wipe off quickly with a damp rag.
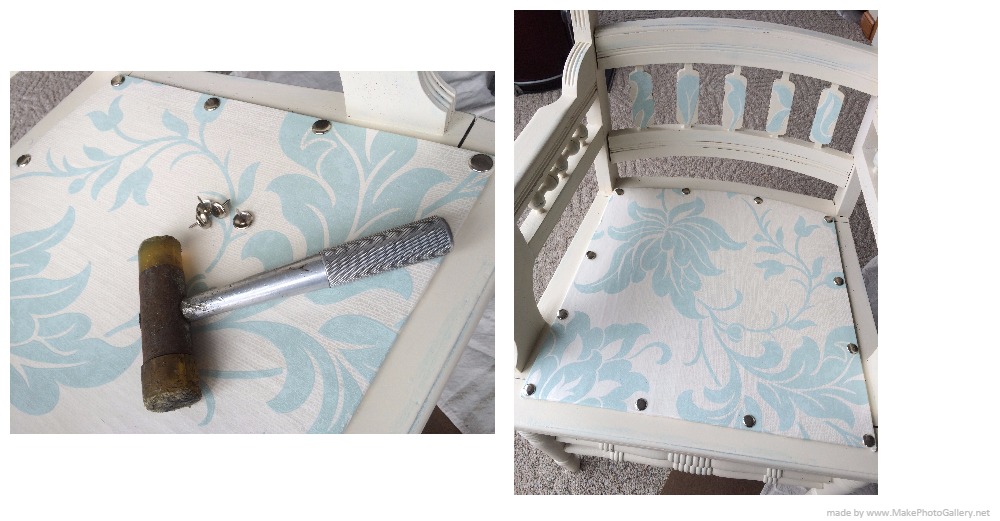
Once the paper was dry, I really let it set overnight, I decided the best way to secure the ends under the chair seat was to hot glue along the underneath edge and it worked fine. For a little more added protection, I brushed a coat of Modge Podge to the surface and it dried clear and didn’t affect the paper, which was a great relief! (I did sample the Modge Podge on a small scrap to be sure it didn’t discolor the paper before actually applying to wood seat)
I decided rather than use the same nail heads which most of them were bent anyway, I had some large headed silver nail heads that my husband pre-drilled small holes around the perimeter of the seat and then hammered in the tacks. I like how the little bit of shimmer in the paper picks up the shimmer of the metal nail heads.
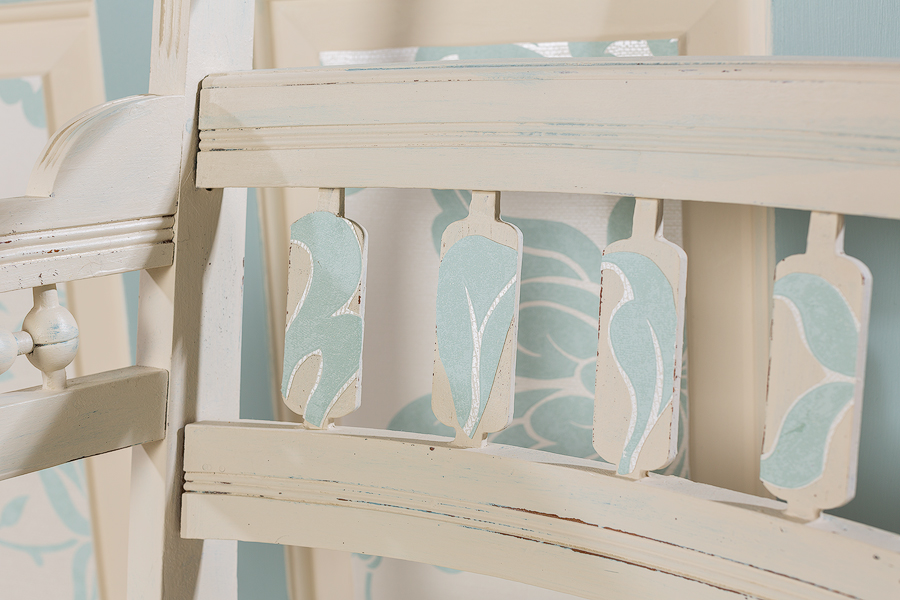
There is a part of the chair at the top that is outlined and I thought this would be a great place for an accent of this pretty paper. I made a pattern of the area on tracing paper and cut the wallpaper and applied it in the same way…paste, smooth out bubbles, clean off glue, modge podge. For the spindles cut “appliques” from the wallpaper and pasted them to the front of the spindles, smoothing the paper out with my fingers and wiping up the excess glue. When dry, I trimmed off the edges that stuck out with a razor blade.
Here are a couple of ways to use this trio of wallpapered items- in the bath:
Also in a bedroom, to catch tossed off clothing…
You could also use the bi-fold doors hinged together as a headboard for a twin or queen sized bed.
All in all, I learned more about wallpaper than when I started this project, and working with this new type of wallpaper, I think I was spoiled. W
hat turned out as a challenge ended up easier than I thought….I have a feeling that as I look around the house, many things just may end up with a wallpaper accent somehow…. try it, you’ll like it!!
To read about the other posts on wallpaper, find them here: http://tayrose.com/2015/04/16/taking-a-vintage-pendant-and-adding-wallpaper-for-a-fresh-look/ http://tayrose.com/2015/04/16/how-to-wallpaper-a-bi-fold-door-to-use-as-a-headboard-or-screen/
http://www.eregalstudio.com/ credit for finished group photo of wallpapered items.
To receive posts via email click HERE  Subscribe in a reader or signup in Subscription box in sidebar.