• Shop
    • Antiques
    • Home Decor
    • Jewelry
      • Necklaces
      • Bracelets
      • Earrings
      • Rings
      • Pins
    • Upcycled handmade
      • upcycled womens tops
      • upcycled womens jackets
      • Upcycled womens pants
      • upcycled pillows
      • Upcycled Pickleball Shirts
      • upcycled purses
    • MacKenzie-Childs
      • MacKenzie-Childs Taylor Dinner Plate
      • MacKenzie-Childs Taylor Luncheon Plate
      • MacKenzie-Childs small oval dish
      • MacKenzie-Childs Taylor Bread & Butter
      • MacKenzie-Childs Taylor Mugs
      • MacKenzie-Childs Taylor Saucers
      • MacKenzie-Childs Taylor Breakfast Bowls
      • MacKenzie-Childs Taylor Berry Bowl
      • MacKenzie-Childs Taylor Chowder Bowls
      • MacKenzie-Childs Wallcourt pieces
      • MacKenzie-Childs Enamelware
      • MacKenzie-Childs Torquay dinnerware
      • MacKenzie-Childs MacLachlan Dinnerware
      • MacKenzie-Childs Taylor Serving Ware
      • MacKenzie-Childs Glass Goblets
      • MacKenzie-Childs glass tumbler
      • MacKenzie-Childs Glass Serving pieces
      • MacKenzie-Childs Decor pieces
      • MacKenzie-Childs Placemats & Coaster sets
      • MacKenzie-Childs Paper Products
      • MacKenzie-Childs Tile
    • Shoes
  • Home
  • About
    • I believe…
  • Gallery
    • Custom Design
    • Interior Design
      • Bath
      • Bedroom
      • Dining Room
      • Entry Way
      • Kitchen
      • Laundry
      • Living Room
      • Office
      • Mudroom
      • Themed Rooms
  • Color CCE
  • Services
    • Services
    • Design Process
    • New Construction
  • Journal
    • DIY
    • Repurposed
    • Art
    • Interior Design Room
    • Holiday
    • Theme Room
  • Press
  • Contact

How to apply silverware for Home Decor in unexpected ways

Taylor
11 Feb 2015
Interior Design Room

When I can, I like to look for unexpected ways to use everyday items when designing a space.  It doesn’t happen with every room, but, I still like to think about it.  Kitchens are rooms that are perfect for this challenge.

Kitchen silverware pendants Parade of Homes 2012 TayRose Design

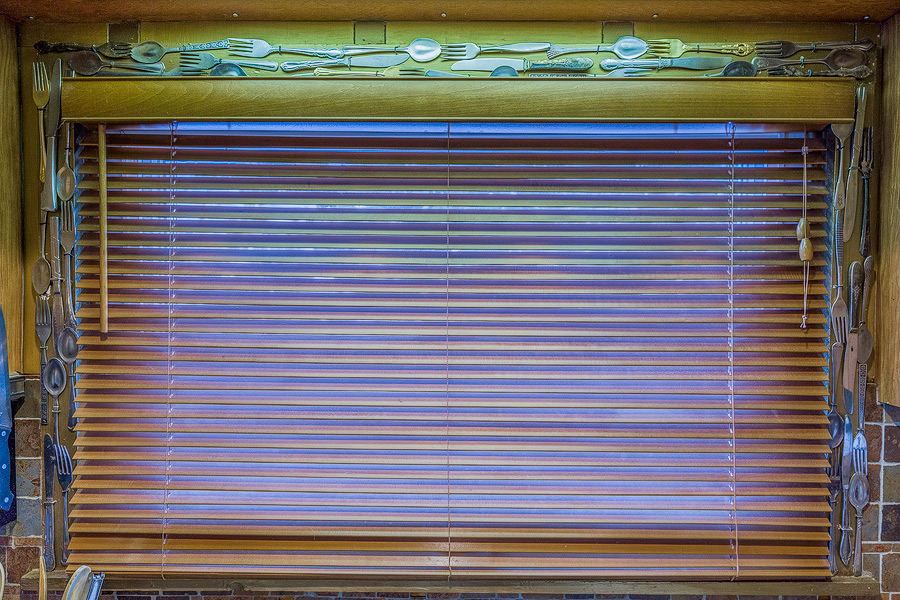
While doing some revisions to our kitchen years ago, I wanted to do some sort of window treatment over the sink, and racked my brain for ideas that would be fun, kitchen related, budget friendly and of course, easy.  The window is tucked right between the upper cabinets, so there is just the wood frame and a soffit above with a light.

I already had installed a wood slat blind which is fine and works well in the space, but the window still looked a little dull.  I do want to replace the florescent tube up in the soffit one day to a pendant which will be great, I have something in mind for that later.  There is no room for a tie back curtain on the sides, plus I need all the light from the window that I can get.  I kept looking at the framed trim work.  I could paint it, yes, I’ll paint it in a contrast shade from the wall color…done.  Better, but still needed something…what was narrow enough, flat enough that could be applied to that trim to bring some interest?

As I was pondering this and washing the dishes at the sink, yes, sometimes I can do several things at once…lol…I was loading the dishwasher with silverware when the thought came to me…silverware!

silverware for kitchen window t


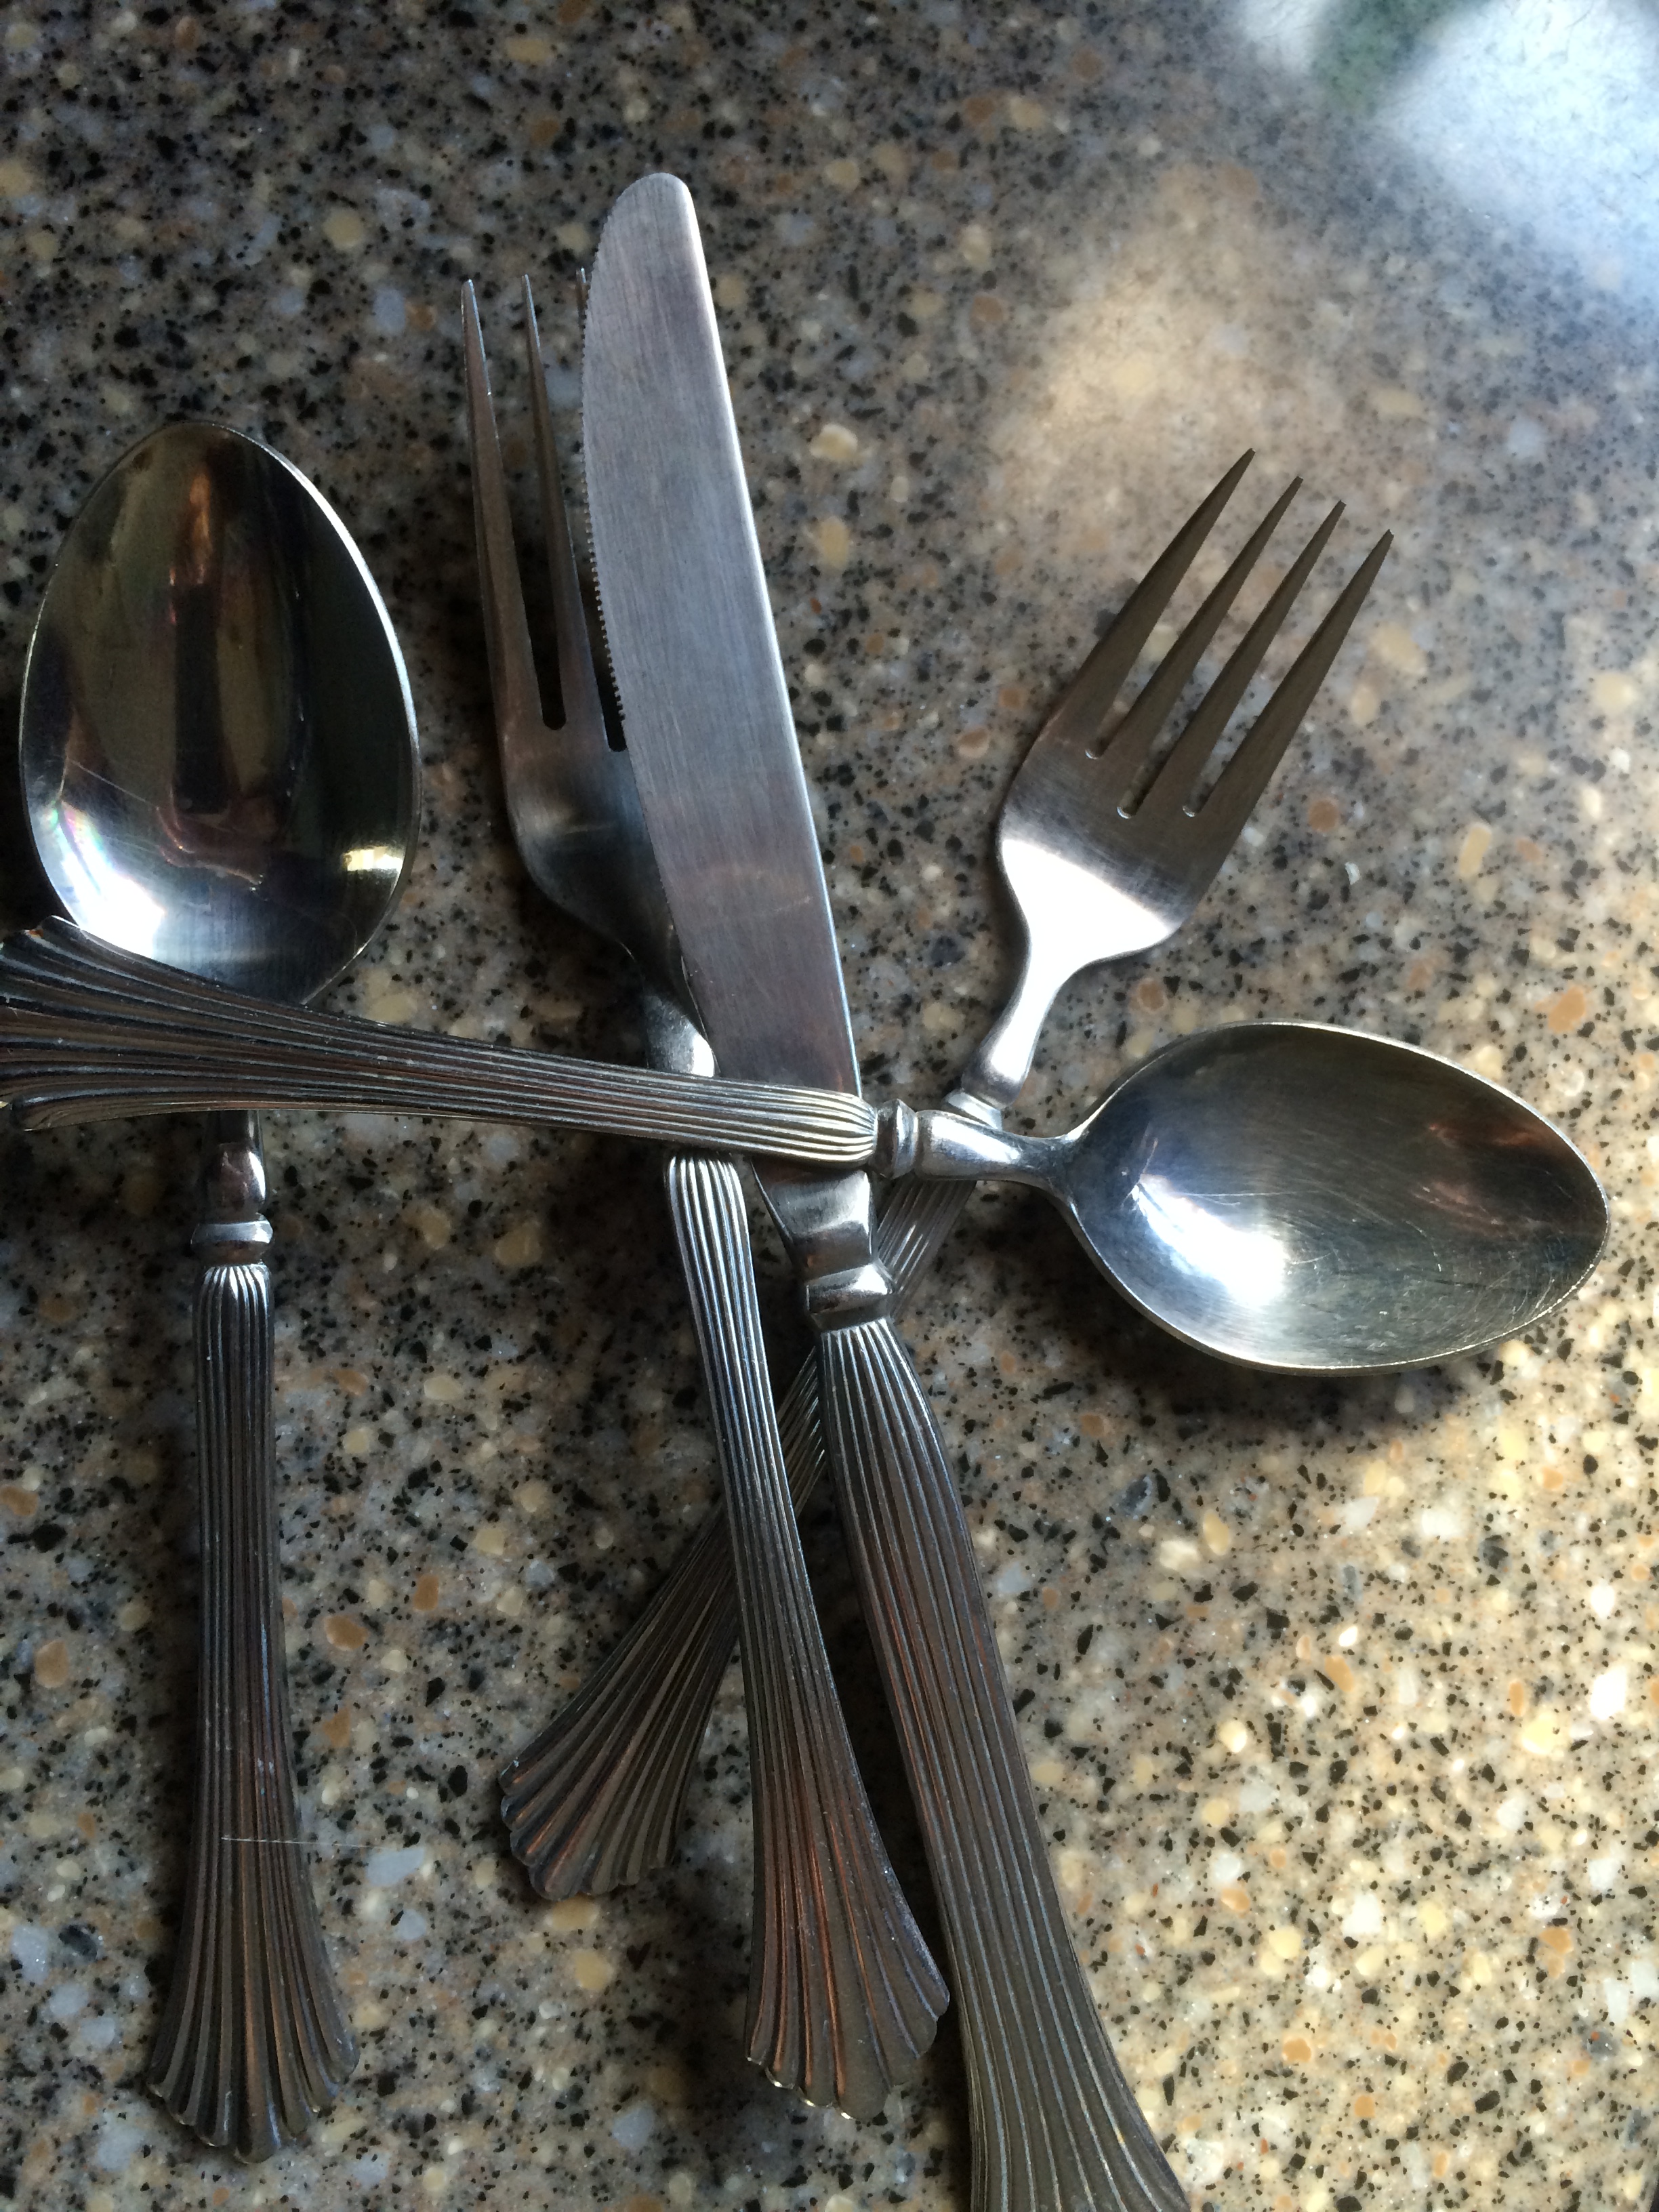
My husband had just acquired from his father’s garage a machine that flattens things…not sure what it is called, I’m terrible with tool names, but it works with air compression.  I took a spoon I had that had been chewed up by a garbage disposal, and tried it on the machine, and voila…flattened spoon.  I loved the way it looked.  Now, how to attach it to the trim?  I decided to use small “u” shaped nails in case I want to change out the look later, I would just have to fill in the small holes and repaint.

silverware attached to window frame in kitchen

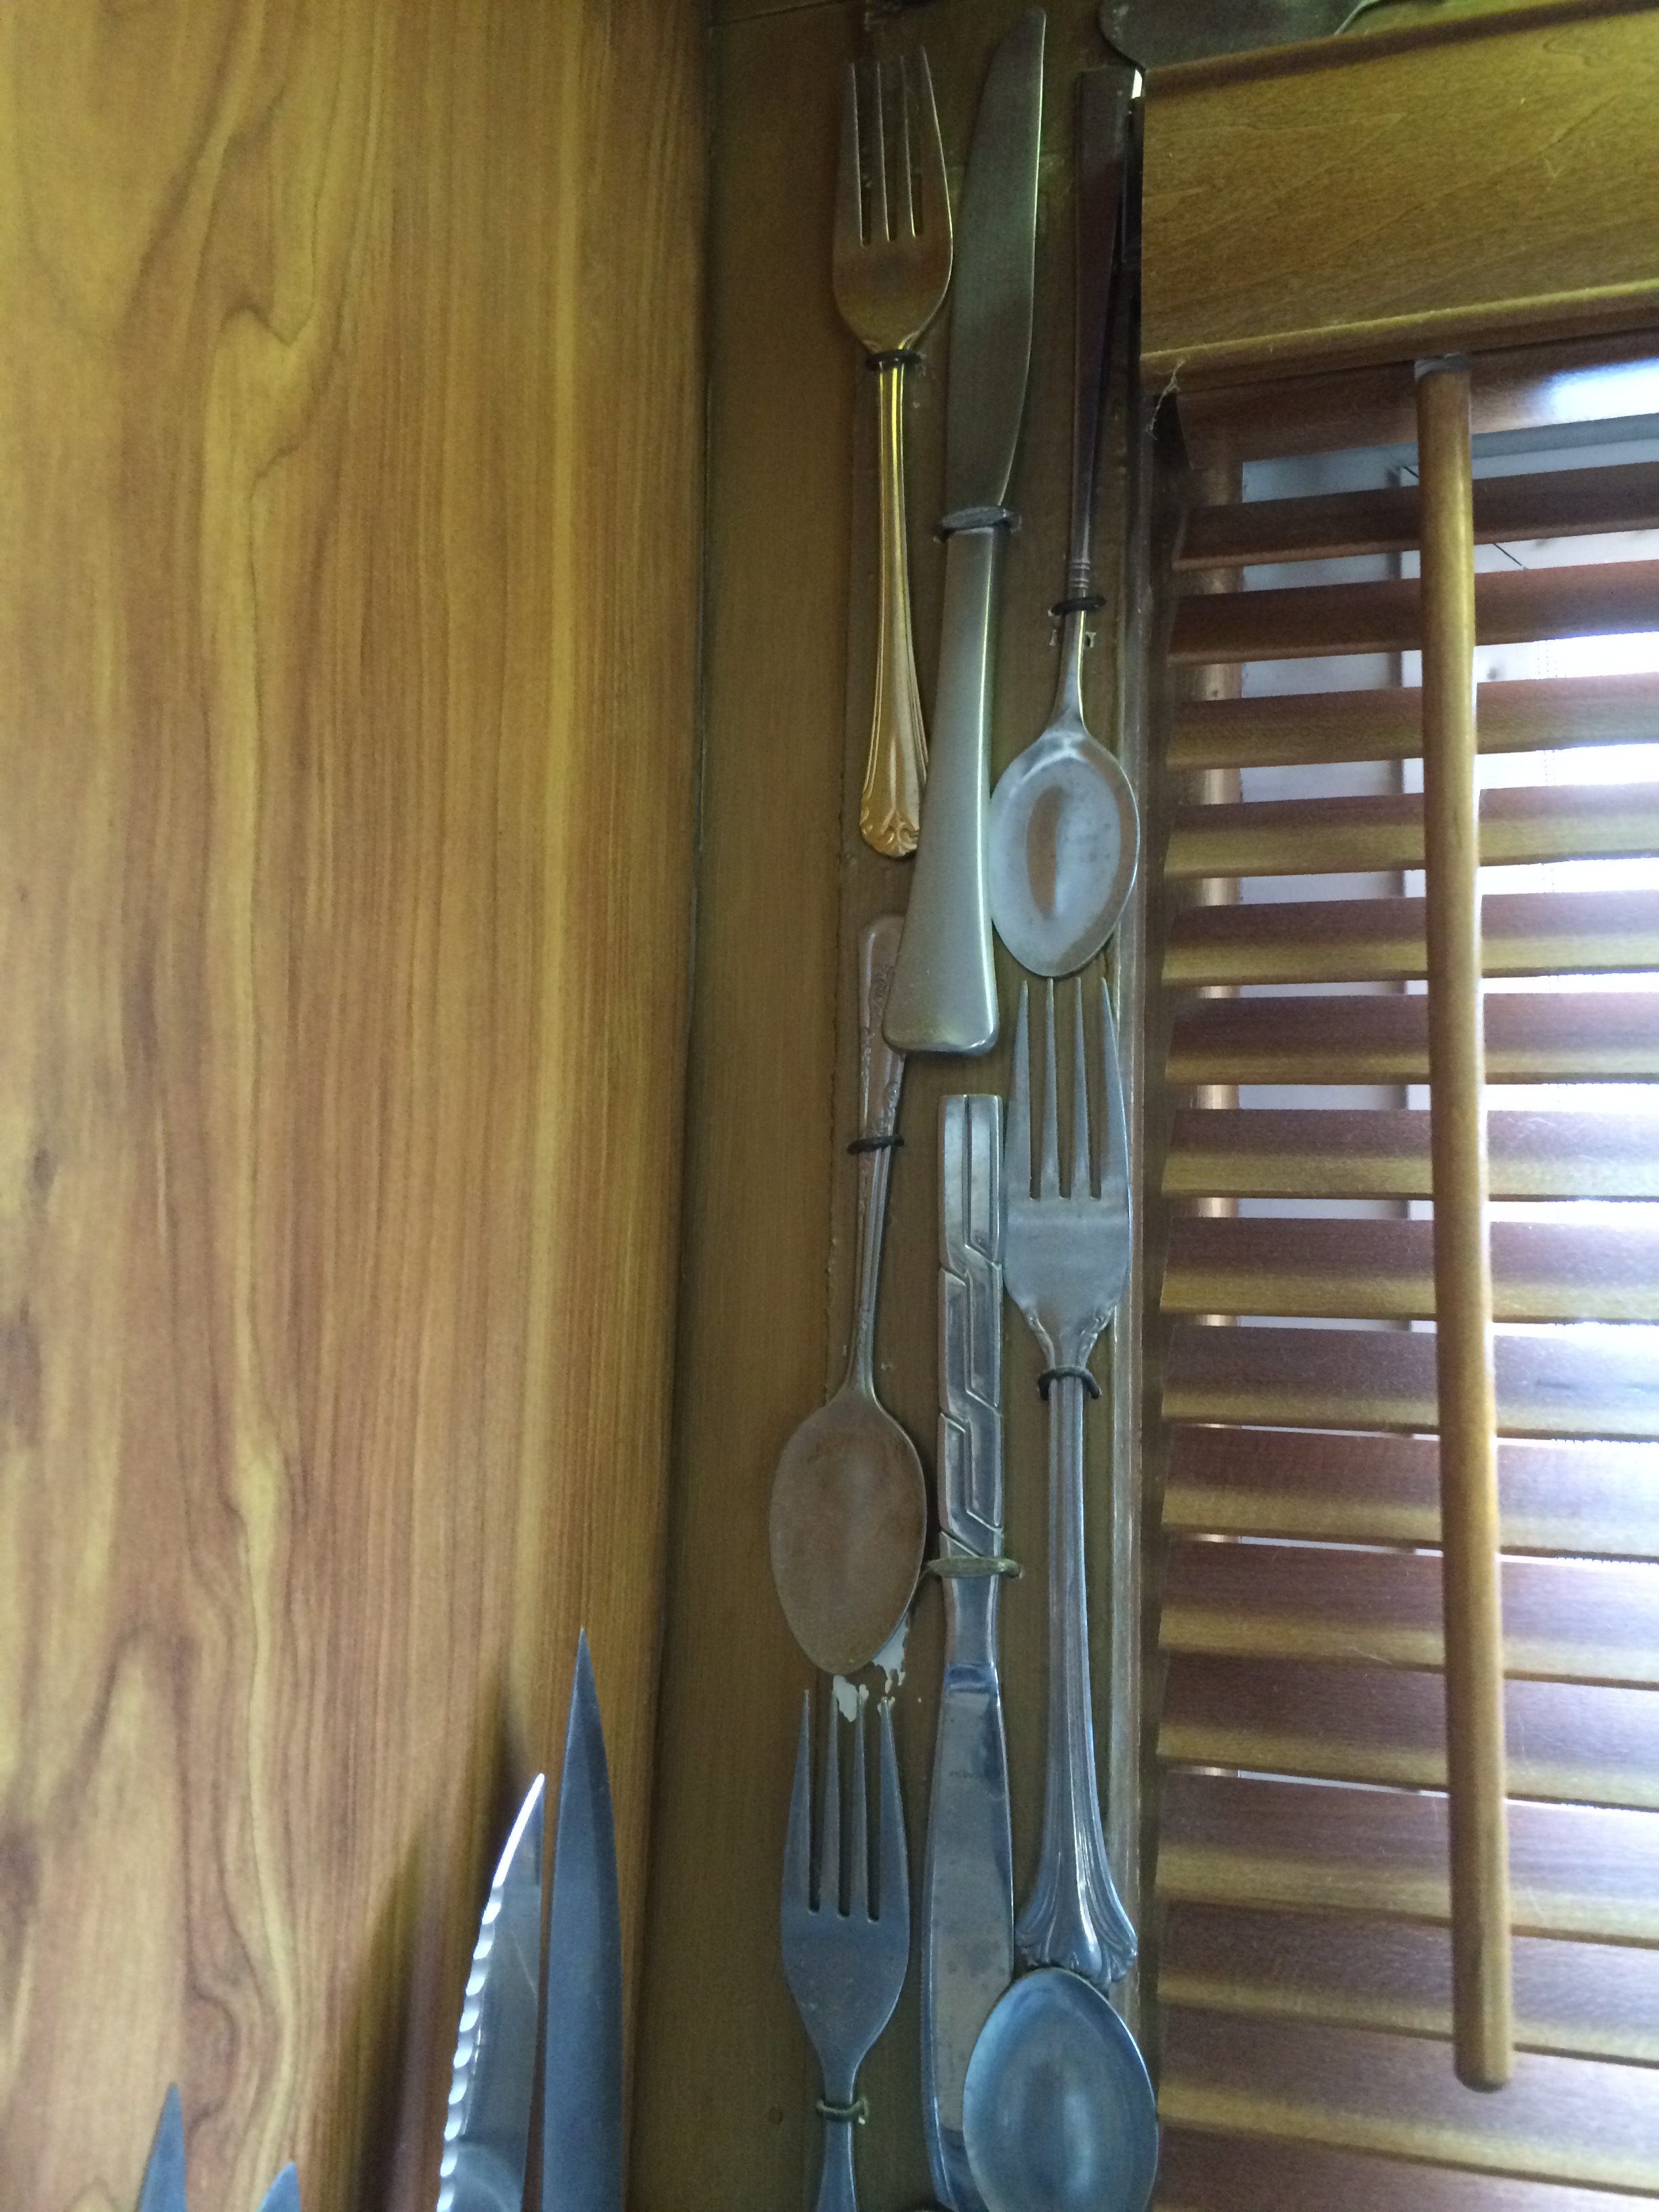
I headed off to my local Thrift Store and picked up some bags of silverware, very cheap about 1.99 for about 8-12 pcs and one by one put them in the machine to flatten.   I lined them up on the trim, some up right, others facing down, and applied them all the way around the sides and top.  I’ve kept them there for 10 years and haven’t tired of the look yet!

Kitchen window with silverware surround

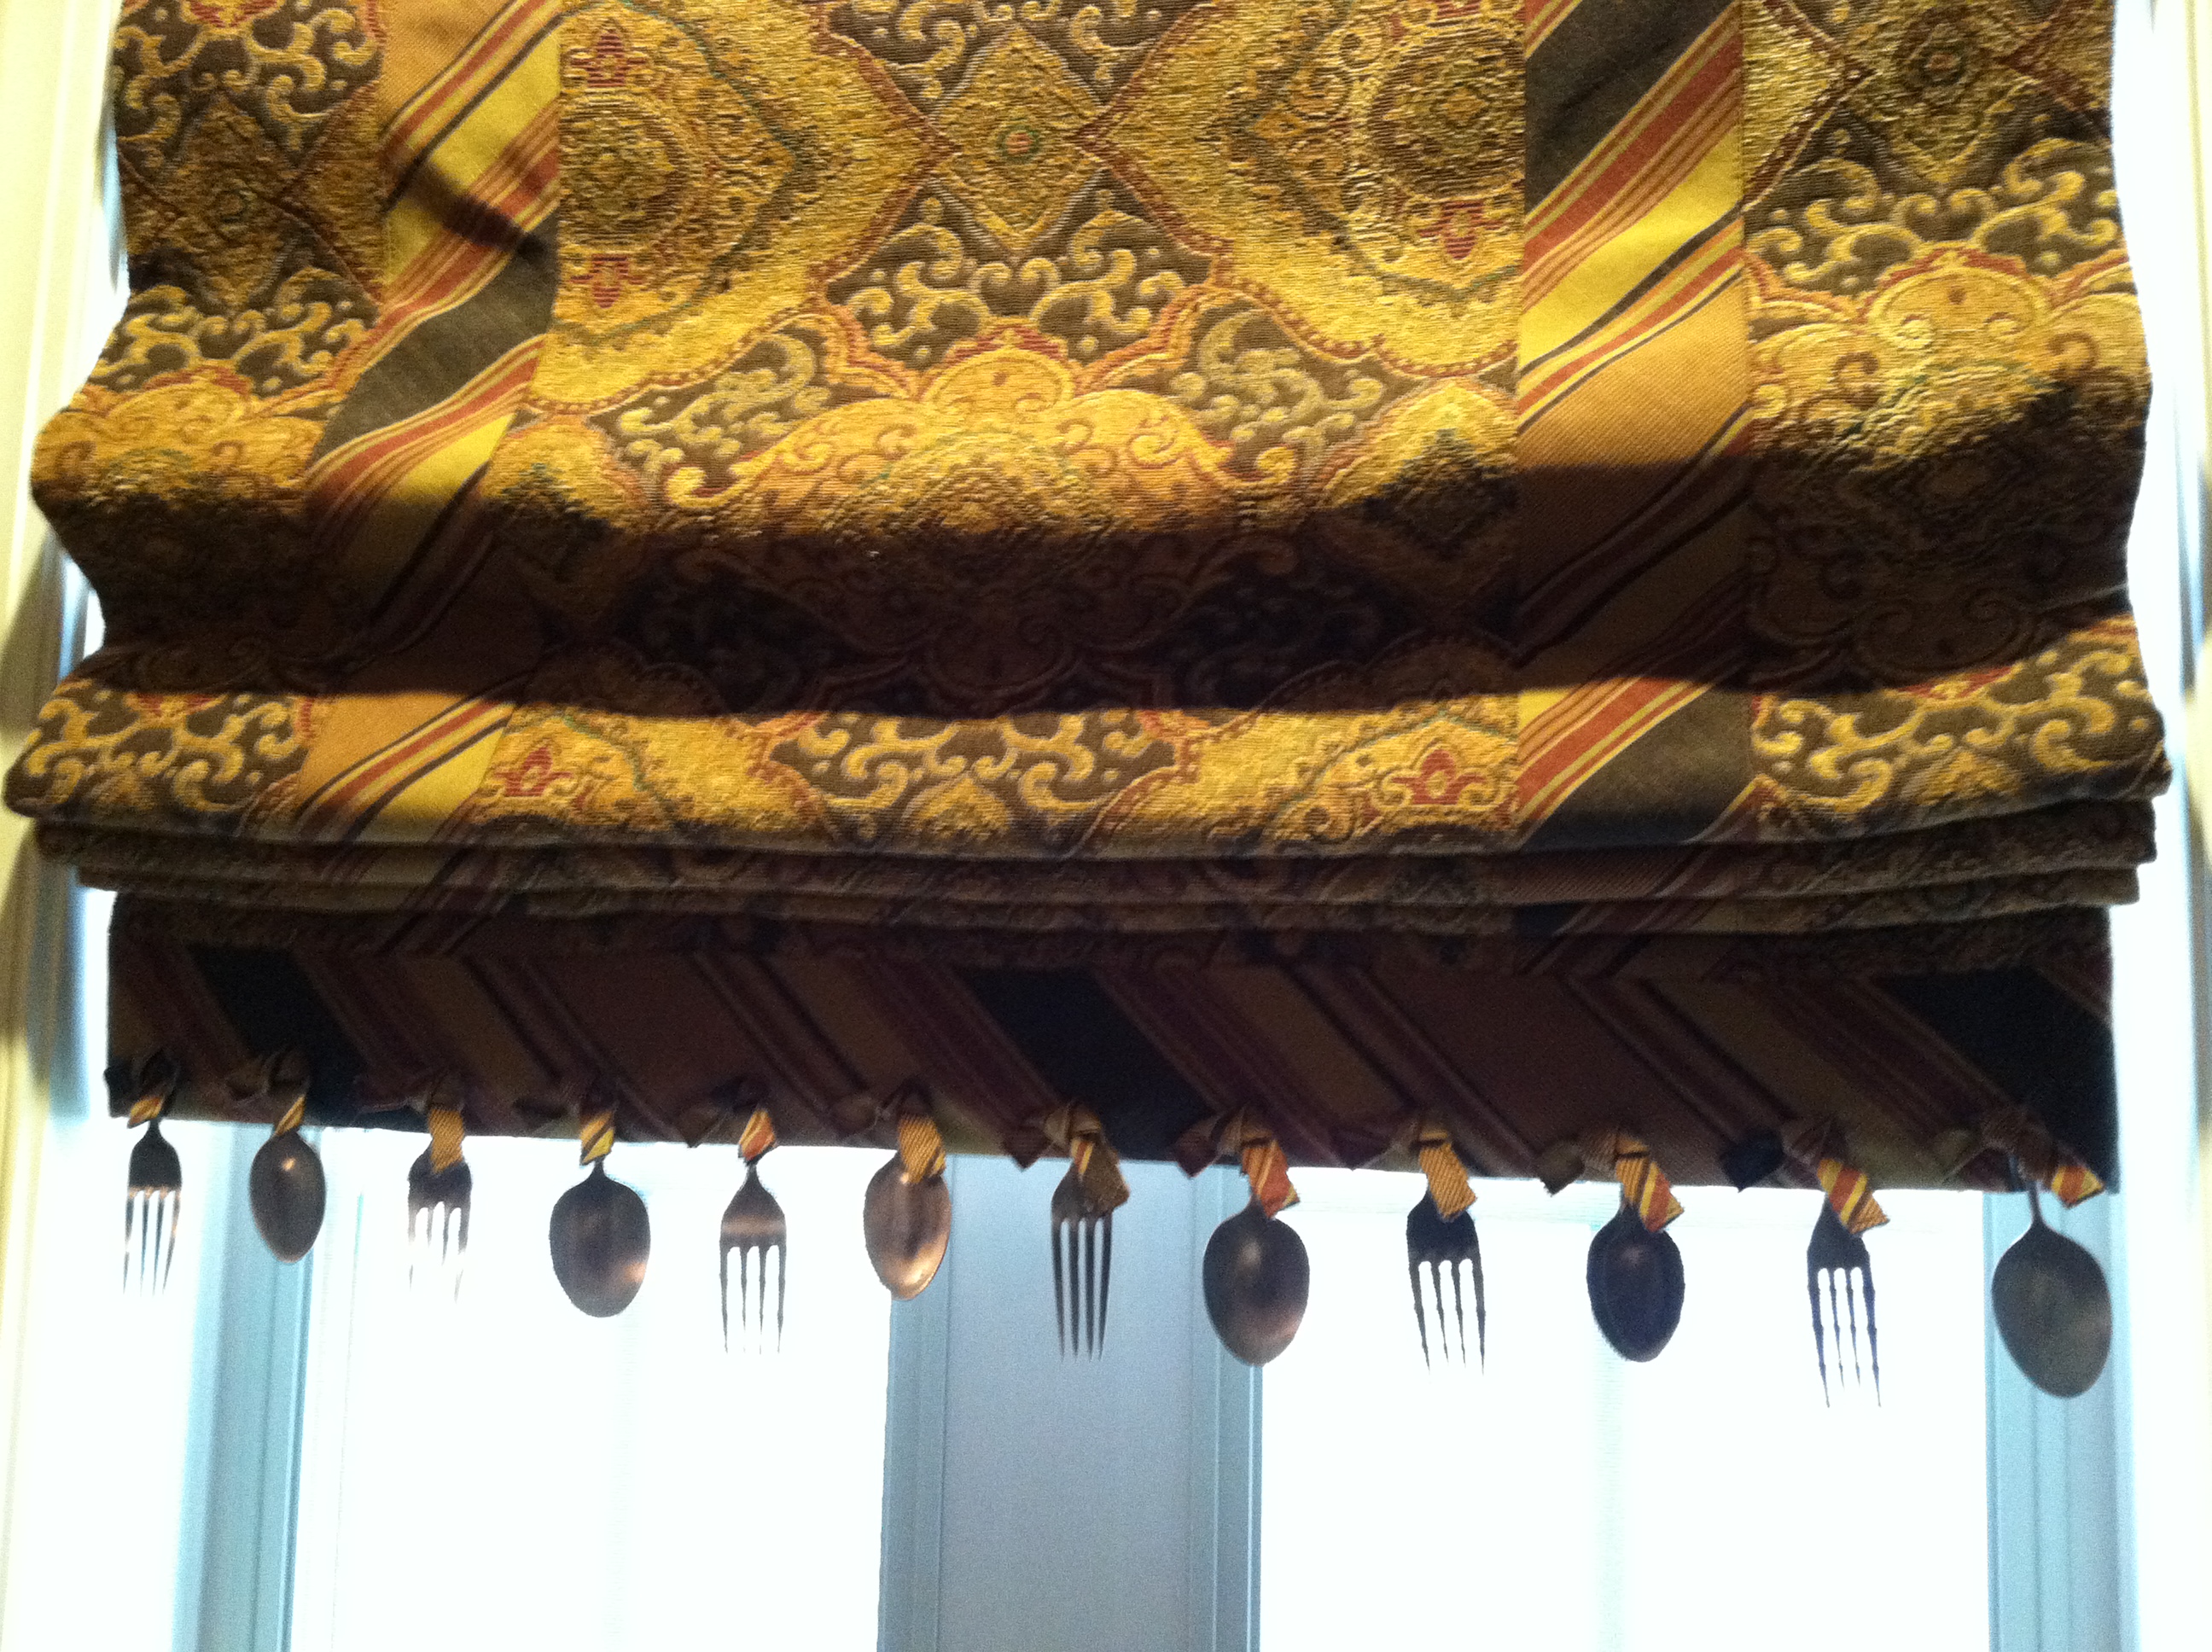
The other way I have used silverware is taking the same “flattening” procedure I used for the trim, then cut off the ends (which I saved the ends of course to use for jewelry) curl the cut end over, and then tie them on to the bottom of a valance or window shade as trim.  I did this trim for 2 Parade of Homes and it was a great unexpected hit!

silverware trim window treatment TayRose Design

I also have made silverware pendant shades which is what I think I will make again for the pendant I need over my kitchen sink.

silverware pendants TayRose Design

Silverware are a great resource for many Home Decor applications, and I’m sure there are many more ways to discover.   How do you wear your silver?

To receive posts via email click HERE Subscribe in a reader or signup in Subscription box in sidebar.

Vintage Radio “Lights up” to a new tune

Taylor
08 Feb 2015
DIY, Interior Design Room, Office, Repurposed
Baldwinsville NY, bookcases, Clay NY, consultation, credenza, custom, decorator, designer, DIY, flicker bulb, Home Interior Designs, Home Office, lamp, Liverpool NY, Phoenix NY, radio, repurpose, reuse, Syracuse NY, TayRose Design, vintage

When I was designing this  home office, I was thinking about what I could put on the credenza that was going to be on the wall behind the desk.

office at Parade of Homes 2014 TayRose Design

At an auction I spied an old radio shell.  I loved the arched lines and vintage speaker fabric amazingly, in fairly good condition.  The knobs were missing, unfortunately, but I still thought I wanted to try and buy it and find a new purpose for this bygone piece.  I was able to get the radio, and it sat in my work room for a long time.  I even tried to sell it on Craigs List as is, but no one seemed to be interested.

old vintage radio shell


The design of the office was eclectic in feel, with framed old portraits, some beautiful turtle shells hung on the wall and wood with iron standing bookshelves.  There were old atlas books, and old cameras on the shelves, so when I remembered the old radio, I thought this would be a great addition to this office.  I didn’t want just the shell of a radio sitting there, I wanted it to have more of a purpose.  I looked at the back and removed the back panel of the radio….there was quite a bit of room in there, enough for a small lamp of some kind.  A lamp where the light could glow out through the speaker fabric on the front of the radio…and if the light flickered, like a candle….ooo so much the nicer!!

inside old radio shell

I cleaned out the inside of the radio really well and re-stained the radio shell after a light sanding.  Some of the wood veneer was chipped and missing, but most of the radio was in good shape, and that coat of stain made a wonderful difference.  All I had to do was set my small little lamp inside, add the flickering light bulb I found at the Dollar Store, and plug it in….the bulb was an orangey color, so it really looked like a flame, which was really just the animated touch that warmed up that already cozy office.

flicker bulb for radio


I was really happy with the outcome, so glad something that was just a shell of it’s former self, now stood renewed not with a tune but with a warm glow.

radio lamp in office

“It’s a Jungle in here!”

Taylor
08 Feb 2015
Custom Design, Interior Design Room, Kids Room, Theme Room
Baldwinsville NY, bamboo, Clay NY, consultation, custom, decorator, designer, DIY, Hobby Lobby, Home Interior Designs, jungle, lion, Liverpool NY, Phoenix NY, plush animals, raffia, reading nook, repurpose, reuse, Syracuse NY, TayRose Design, theme room, tiger

If you haven’t already guessed, I love to design theme rooms.  I get lost in looking at everything asking myself how I can blend it into the theme I’ve decided on.  Such a challenge, but oh, so fun…so, for this past Parade of Homes, I decided that a jungle theme was in order..and a tall order it was!

Jungle Room at the 2014 Parade of Homes

It’s a Jungle in here! Parade of Homes Pigliavento Builder, TayRose Designs

I had been collecting large jungle animals from Thrift stores for several years just waiting for the right design to include them, and along with a couple of “borrowed” jungle friends, I really had the “wild” feel I was going for.

jungle animals for theme room


I also knew that I would have to construct the jungle arbor over the bed.  I had an old wooden ladder that must have reached up to the roof for it was very tall and could be taken apart into 2 pieces.  I cut them so they were the same heights to be the sides of  the arbor…perfect for hanging monkeys and jungle vines.   I purchased some inexpensive fence planks from Home Depot, brought them home and used a mixture of watered down acrylic paints in black, grey, white and biege to give them a “weathered” look-as if they had been out in the elements for years.  I had a college intern working with me for the summer, and she painted in the words, “It’s a jungle in here” on the top cross board of the arbor.

intern painting jungle sign

I had to be sure that the arbor was not too high, for I wanted that lion to be on top …lounging, well, he is the King of the Jungle you know!

jungle arbor design by TayRose design


I also found at a garage sale of all places, some bamboo fencing that stretched across the whole back wall plus some, so that brought more of the jungle feel in to the room.

bamboo fencing for jungle room wall

My hubby and I were able to design the arbor so it could be transported in pieces and assembled on site easily which was perfect.  It went up very easily, and I screwed the back to a stud in the wall to secure, then dangled monkeys and vines along with baskets from pulleys.  A twin bed was dressed up with a bed roll at the end and a custom made lathe frame enclosing a vintage feel zoo animal poster to hang above the bed.  Zebra patterned sheets with a tribal patterned blanket along with custom pillows made up the bed, where a leopard dozed.

raffia trim for bedskirt jungle room


I stuffed raffia trim along the mattress box spring to hang down to the floor.  For the show, I just pinned it, but it could be sewn onto a sheet as a proper bedskirt.

A large banana tree with real bananas I tucked among the leaves sat in the corner which also hid the cd player playing ” A lion sleeps tonight” in the background.  I purchased from IKEA, 2 large green leaves, and attached them to the arbor, and with the ceiling fan, they moved up and down, as if swaying to the music….lots of animation..love it!

Ikea large leaf canopy for jungle room

The curtains were inspired…I had found a zebra print curtain panel set at Hobby Lobby, then attached more of the raffia trim along the top, but I wanted to have more of a “jungle” way to hang the panels to the rod.  So I purchased online some jungle plush with velcro paws, and used them to hook the panels to the rod…I kept saying, “hang in there!” hoping they would hold up and they did, no prob!

jungle animal curtain tabs TayRose Design

In the corner of the room I wanted a little reading nook, so I had one of those netted canopies and hung it up where it draped down over large coffee bean bag covered floor cushions; a painted rattan glass top short table; a brass electrified lantern to read by; and a large tiger to lean on and read stories with….wouldn’t you want to read to a tiger?

Reading nook in Jungle Room 2014 Parade of Homes TayRose Designer

Reading nook in Jungle Room 2014 Parade of Homes TayRose Designer

From the inception of choosing the wall color to the rattan leaf ceiling fan; constructing the  arbor hut;collaborating on the crate dresser; stacked crate night stand; adding an empty coke bottle (remember “The gods must think I’m crazy?” movie?; custom painted giraffe wall art; jungle directional signs; to the canteen hanging at the end of the bed and the music in the background…this was a dream theme room, one that was amazing to be living in for a short time while pulling it all together…it really was a jungle in there!  Shhhh….the lion sleeps tonight….oh, and no more monkeys jumping on the bed!

crate dresser jungle roomjungle sign for jungle room

To receive posts via email click HERE Subscribe in a reader or signup in Subscription box in sidebar.

Taylor Regal in Phoenix, NY on Houzz

Footstool to server….riser to occasion

Taylor
02 Feb 2015
Custom Design, Dining Room, DIY, Repurposed
Baldwinsville NY, Clay NY, consultation, custom, decorator, designer, DIY, footstool, hand painted, Home Interior Designs, Liverpool NY, Parade of Homes, Phoenix NY, repurpose, reupholster, reuse, riser, serving tray, Syracuse NY, TayRose Design

During my usual scouting days at the Thrift Stores, I seemed to find quite a few small footstools. Some had storage and some had handles and some just spindley legs and all of them in need of some TLC. I couldn’t pass up the meager prices they were asking, and gathered them up knowing I would have a use for them sometime…and it didn’t take long before they solved a tablescape dilemma for me.
Interior design dining room  Parade Home by TayRose Design

I was designing for the Parade of Homes this past year, and since the formal dining room was the first room you noticed when walking through the front door, I wanted a real “wow” moment. The table setting would be over the top..not something that would be practical for a dinner with friends, but a really fun tablescape to keep on the table when not in use.
Tablescape Design dining room  TayRose Design

I had a china cabinet/buffet where I wanted to set various sized vegetable dishes and tureens, plus on the table, have different decor that I wanted to be at different heights so everything wasn’t all just sitting flat on the table. So, what could I use as a riser to lift up tableware so heights are staggered?…hmm…that stool over there is just the right height…I could reupholster the top to coordinate with my colors, and maybe paint the legs in a fun way.

Stool before with handles


So, over the next few days, I removed the old upholstery and replaced with new, adding some upholstery tacks along the edge for accent detail, painted designs on the wooden legs and handles, and sanded and restained the wood surface as needed. I even added wheels to the bottom of an extra storage stool lid I had leftover. storage stool for riser TayRose Design

The stools worked perfectly for risers both on the buffet and table. I was able to put dishes as well as centerpiece decor on top of the stools to create different heights but in a pretty way without having to stack books, or stick boxes under tablecloths. I love using my stools in different areas of the house, here is the after of that stool above where I reupholstered it and painted accent colors on the handles.   I use it to hold a tray of goblets ready for guests.
Stool holding goblets as riser TayRose Design

I will always look at a small footstool in the same way again…..

To receive posts via email click HERE Subscribe in a reader or signup in Subscription box in sidebar.

Accent Cabinet gets Island makeover

Taylor
30 Jan 2015
Custom Design, DIY, Interior Design Room, Kitchen, Repurposed
Baldwinsville NY, cabinet, Clay NY, consultation, countertop, custom, decorator, designer, DIY, Home Interior Designs, kitchen island, knobs, Liverpool NY, pegboard, Phoenix NY, Pier 1, pots and pans, recipe books, repurpose, reuse, Syracuse NY, TayRose Design

We all have read about similar dilemmas…small kitchens, wishes for that extra counterspace- dare we even dream of having room for an island?   

Kitchen Island cabinet TayRose Design

Well, I came across one of those kitchens…my own!  When I moved to my husband’s house, which was a small camp built in the 40’s on the river, I had to downsize from a 3 bedroom 2 bath house filled with furniture and decor I had been collecting for years.   I really had to think creatively on how to stretch what space I had in this kitchen.

Our kitchen is still a work in progress- a wish list for new cabinet fronts someday, but we did remodel ourselves adding a new back-splash and appliances with as much as we could at the time.   That is definitely another subject for a blog post…so on with the story..

During this whole semi-remodel, I really wanted something that would somehow partition the kitchen from the entry into the house since the mudroom comes right into the kitchen area.

Kitchen island storage view  TayRose Design

While out on one of my many shopping trips, this time at Pier 1, I was with my hubby (this doesn’t happen too often so fate was in our midst) we spied out of the corner of our eyes, this cabinet with an Asian theme which seemed to be just the right size.  Could this work?  Since it was on sale, and we were afraid it would be gone if we left it there to think about, we bought it and brought it home to try.  It was perfect, I loved it and I love the idea of repurposing an accent cabinet into a kitchen island.  Top Fabricators, the firm making our countertops http://www.countertopsbytopfab.com/had no trouble at all measuring and fitting the countertop onto the top of the cabinet….it fit like a glove!

I also wanted the island to be functional all the way around, so hubby got creative and got some peg board that I painted and we screwed to the back side facing the sink where I now can hang pots and pans at easy reach to the stove.  We also made great use of the ends of the cabinet, adding brass knobs over Chinese coins to hang up the pot lids, allowing for more room in the cabinets for other needs.  My recipe books are kept inside the cabinet and the drawers are perfect for our tools/junk, bottle openers, and cat treats.

Pot storage on Kitchen island

Although I didn’t have room for an island to sit at, I’m still very grateful for my island.  It not only didn’t take up much floor space, it gave me an additional surface for food prep, pot storage, and recipe book housing.

I’m so glad we opted to try an accent cabinet and not a standard kitchen cabinet for our kitchen…it’s more of a piece of furniture that greets you at the door and reveals it’s pretty practicalities!

To receive posts via email click HERE Subscribe in a reader or signup in Subscription box in sidebar.

  • 1
  • 2
  • 3
  • 4
  • 5
  • 6
  • 7
  • 8
  • 9
Recent Posts
  • Owl Inspired Theme Toddler Bedroom
  • Painted trunk blends with Decor
  • Create a “trunk” inspired look for a Nightstand
  • Decorate fireplace wall “naturally” on a budget
  • How to Inspire Design with Pinterest Photos
Archives
  • February 2018
  • January 2018
  • October 2016
  • January 2016
  • June 2015
  • April 2015
  • March 2015
  • February 2015
  • January 2015
  • December 2014
  • November 2014
  • June 2014
  • May 2014
Newsletter subscription form

Enter your email address:

Delivered by FeedBurner

Categories
  • Art
  • Bathroom
  • Craft Project
  • Custom Design
  • Dining Room
  • DIY
  • Entry
  • Holiday
  • Interior Design Room
  • Kids Room
  • Kitchen
  • Living room
  • Master Bedroom
  • Mudroom
  • Office
  • Repurposed
  • Theme Room
Houzz
Remodeling and Home Design
Instagram
Instagram
HomeTalk
Featured on Hometalk.com
Follow me on Facebook
TayRose Design

Promote Your Page Too
315.224.4142
© 2014 k.linndesign. All Rights Reserved.