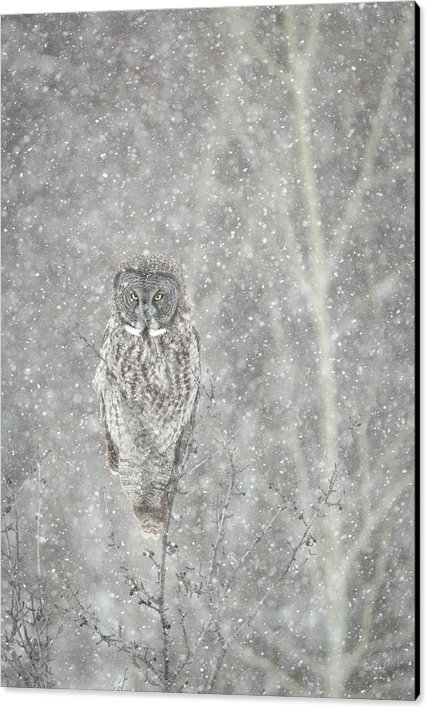
large canvas owl photograph by Everet Regal
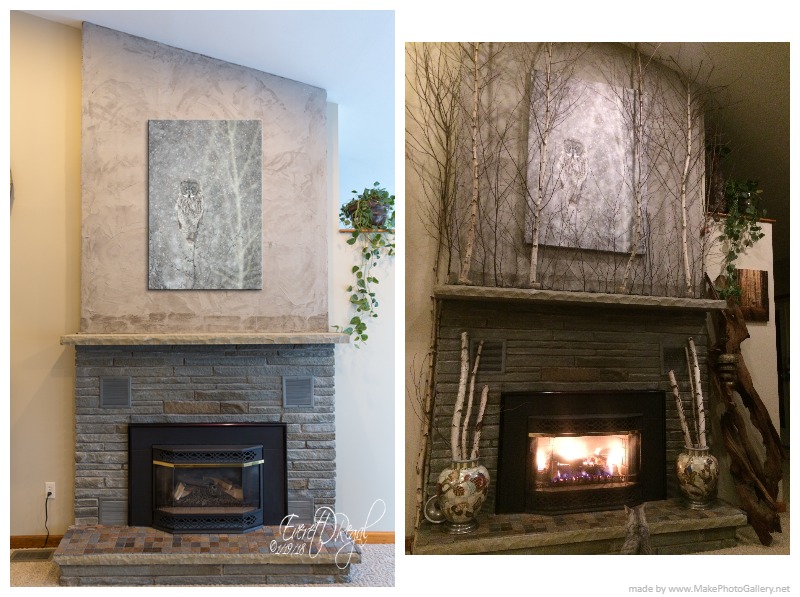
Before and after fireplace wall project
What to do? Our fireplace place wall was enlarged when we removed the ceiling and vaulted it, and after tirelessly trying to match the vintage stone below the mantle to no avail, we had to think about another budget friendly way to finish the space above. We thought of reclaimed wood, but that would require framing it and that would be very heavy and the ceiling is so tall we don’t have ladders high enough to get to the ceiling to secure any materials we chose.
So, for several years I just decorated the mantle with decor items, but they just didn’t fill the empty space above as much as we would have liked.
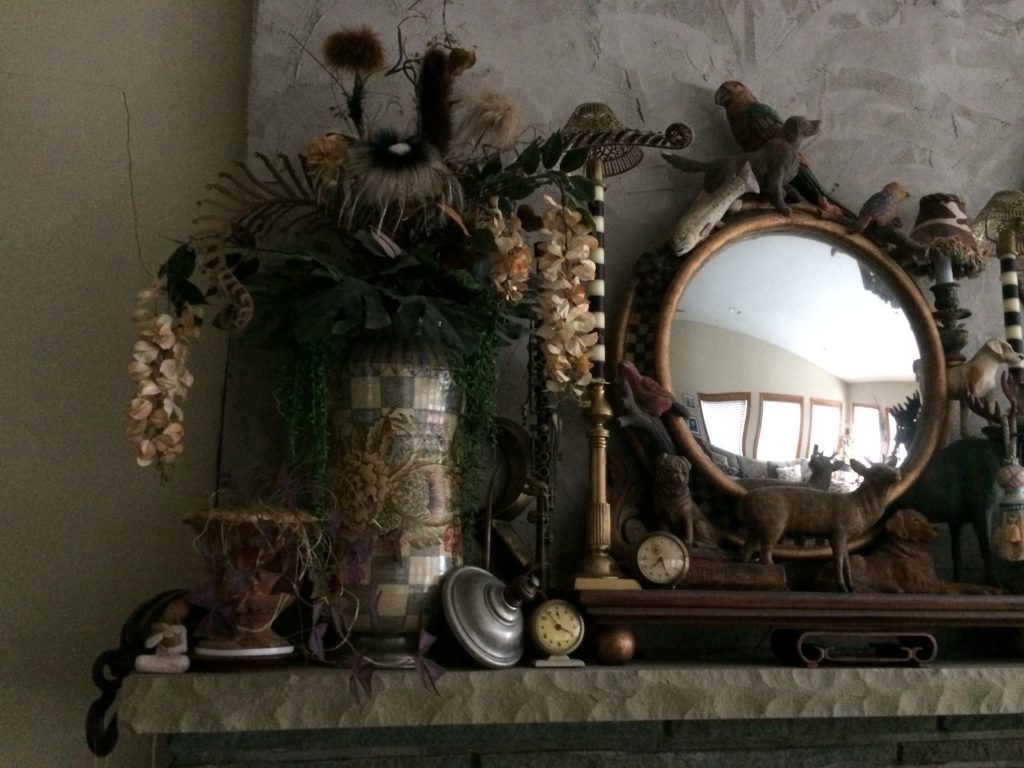
Mantle decor before revamping fireplace wall
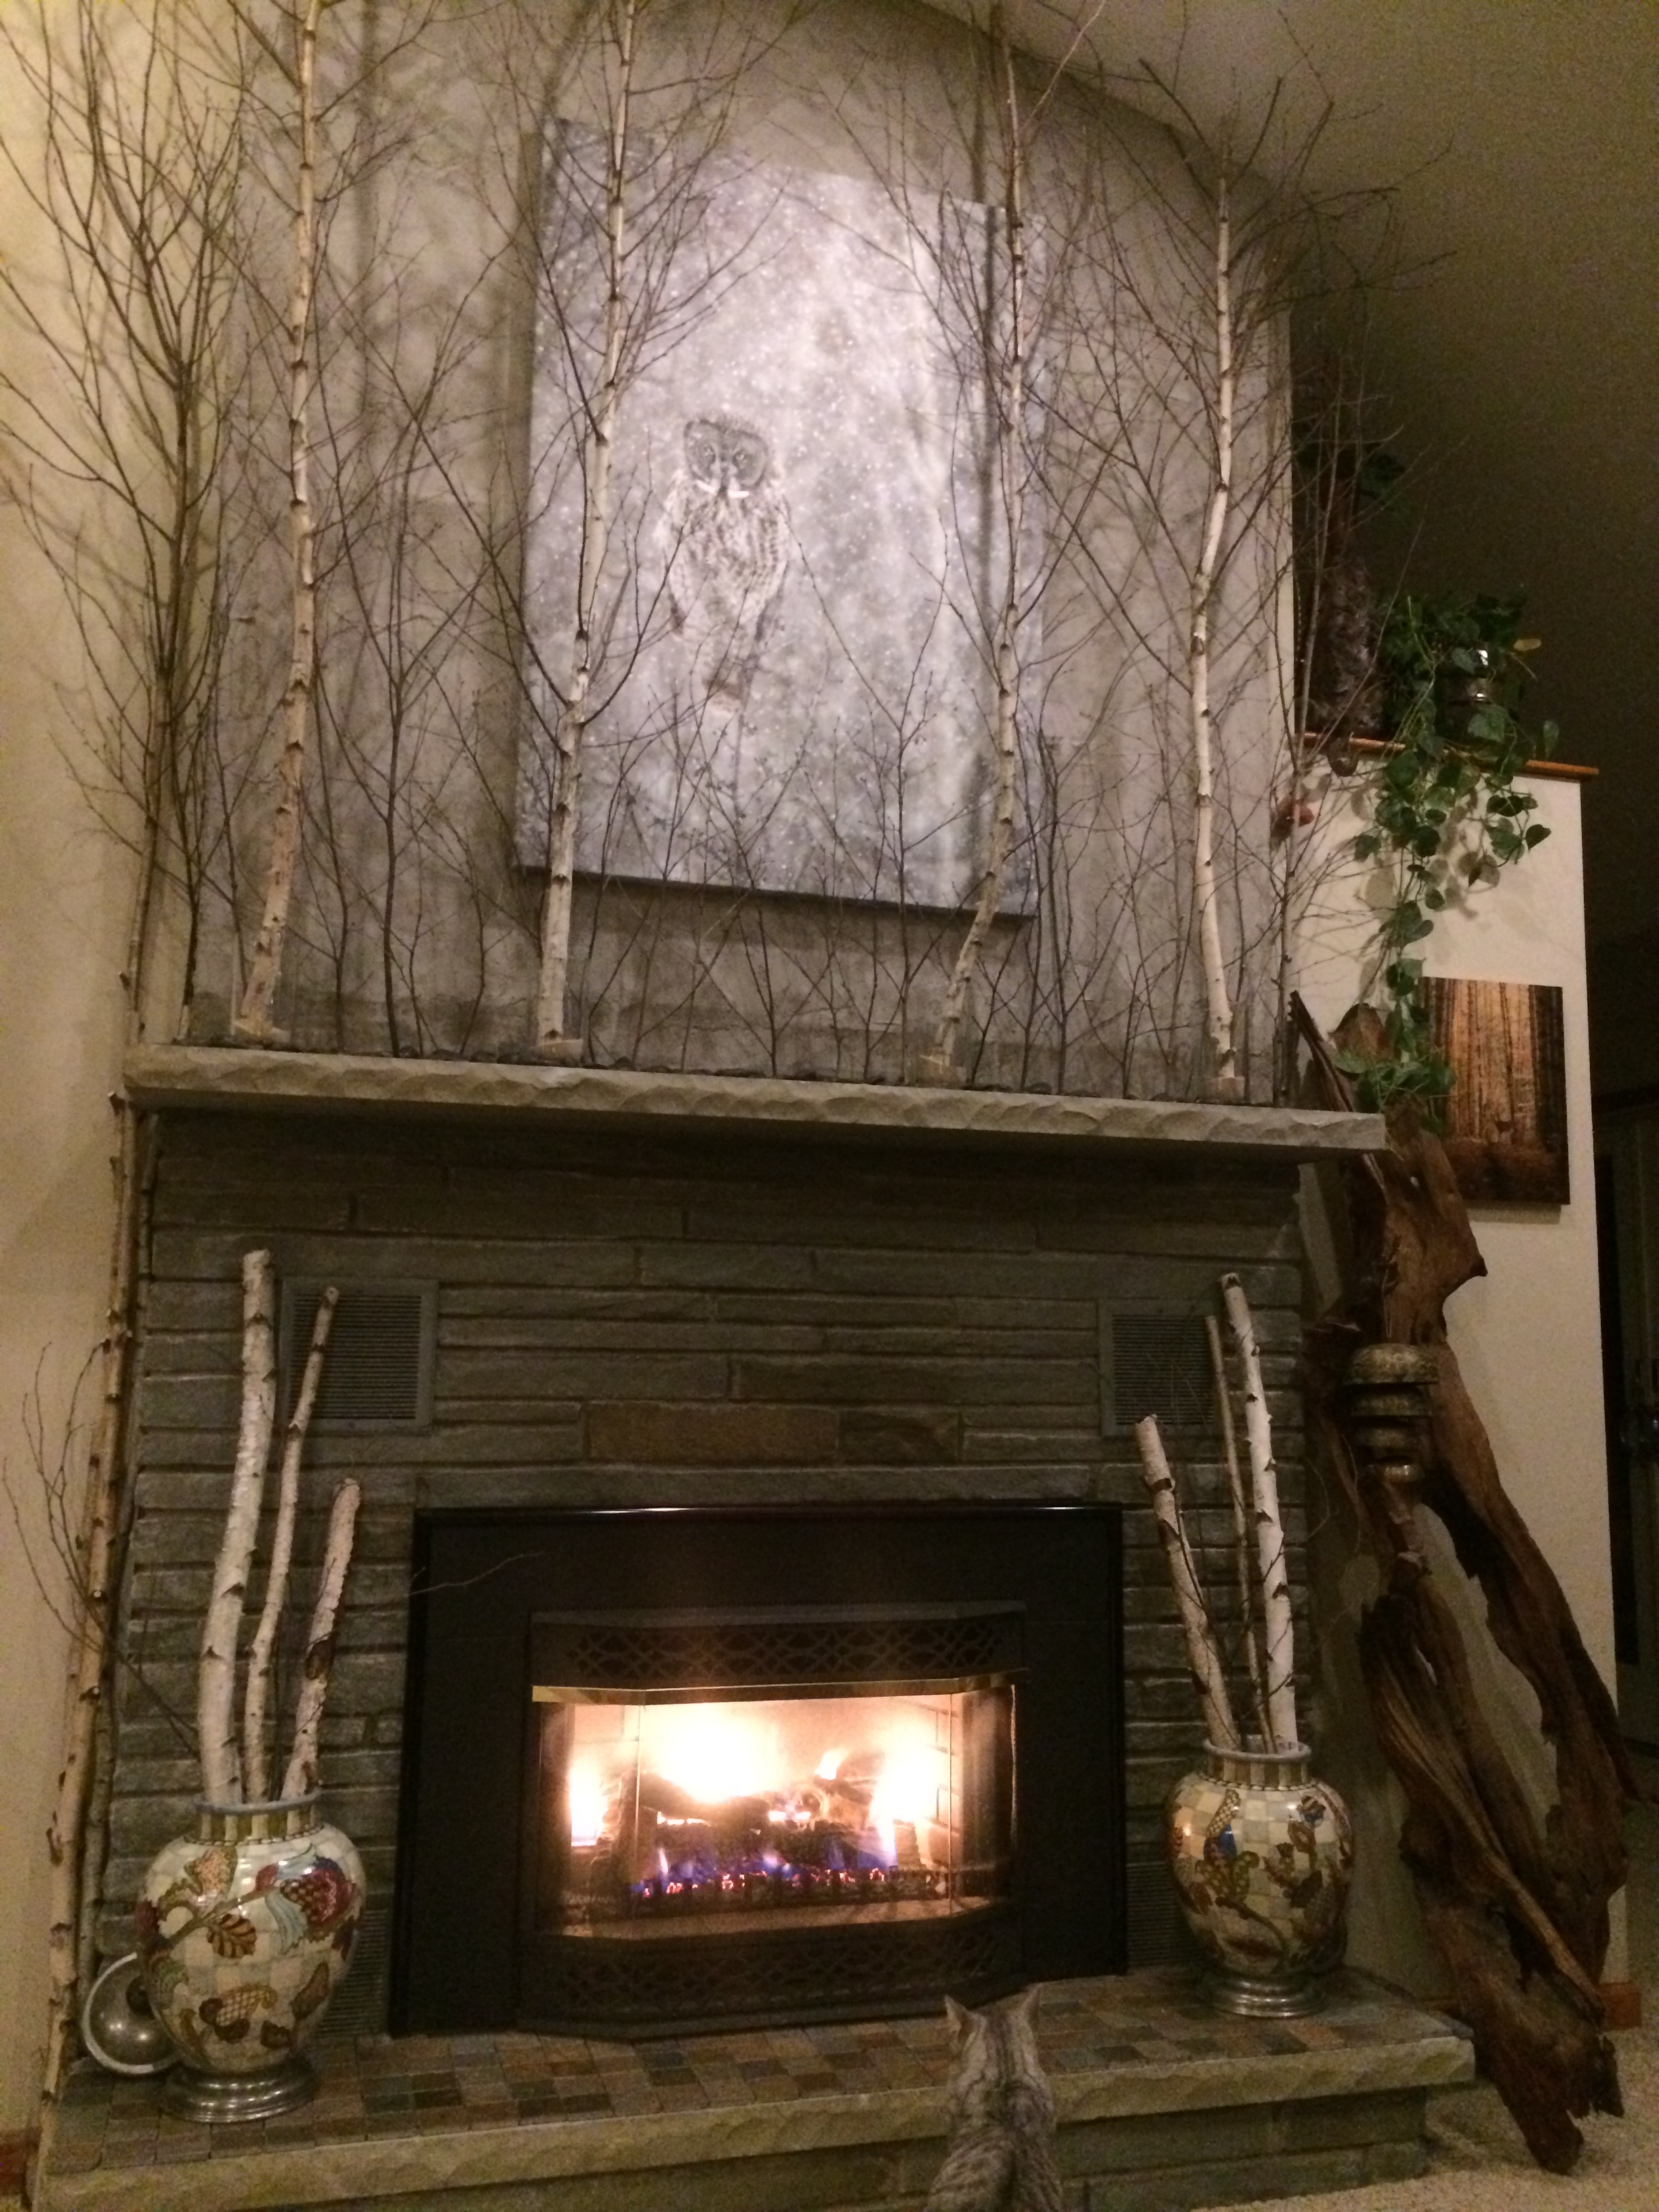
Finally, I was browsing through my husbands photos online (he is a photographer and sells his art on Fine Art America here, https://everet-regal.pixels.com/) and found this picture of an owl in a grove of birch trees during a snow shower, and thought, “if this was enlarged on canvas it might just work on the wall over the fireplace”. I roughly sketched a layout I was envisioning, for I am so visual I need a picture…especially when trying to describe an idea to someone else…uh huh, need a picture!
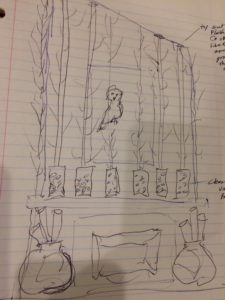
Sketch of fireplace wall layout with owl canvas and birch trees
I showed my sketch and ideas to my husband who re-sized the photograph online to a larger size canvas that would be available to purchase, and we ordered it. (You can find where we purchased it here https://everet-regal.pixels.com/products/silent-snowfall-portrait-ii-everet-regal-canvas-print.html ) We chose the 33.5″ x 48″ size, but there are many sizes available as well as other mediums, such as acrylic, metal, paper, and it can even be printed on a shower curtain or pillows!
large owl canvas purchased for vaulted ceiling fireplace wall as centerpiece
But just hanging a large canvas art would not be enough for the wall, so I suggested we bring in trees to line up around the art so it really looks like the owl is sitting in the trees! First we had to find the white birch trees. A request on facebook from my husband had several people responding back with permission to go on their properties to cut what we needed. (Please ask first for we are NOT encouraging that anyone go and cut down trees where there are posted signs or on private property) Hubby went out several times walking properties that we were given permission to search and came back with several trees perfect for the project.
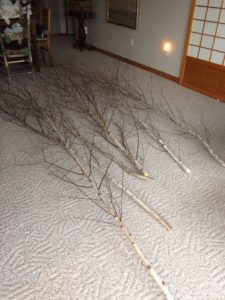
Cut birch trees brought in to start fireplace wall project
We chose white birch only because those type of trees were in the owl canvas, but one can use just about any tree-however, be aware that most trees have sap in them and will run more in certain seasons of the year- be sure to read up on whichever trees you choose. Also, faux trees could be used as well, whichever works best for you.
We were trying to decide how we would attach the trees to the mortar on the wall, and if there were ways we could bypass any wiring or nailing into the fragile mortar background. I thought if we put the base of the trees in a glass vase with a little bit of playground sand (my hubby thought to put the sand in) and cut the tops just enough so there was some tension pressed onto the ceiling, we wouldn’t need to have any nailing or screwing into the wall. We shopped for clear vases and there are so many choices with just as many prices, and we finally opted for some hefty weighted large glass mugs to do the trick. We found these at the Dollar Tree, and for a dollar, how could we pass them up!! https://www.dollartree.com/Brand-Name-Jumbo-Glass-Sports-Mugs-26-5-oz-/p412969/index.pro

Glass heavy mugs to use as vases for tree mantle project
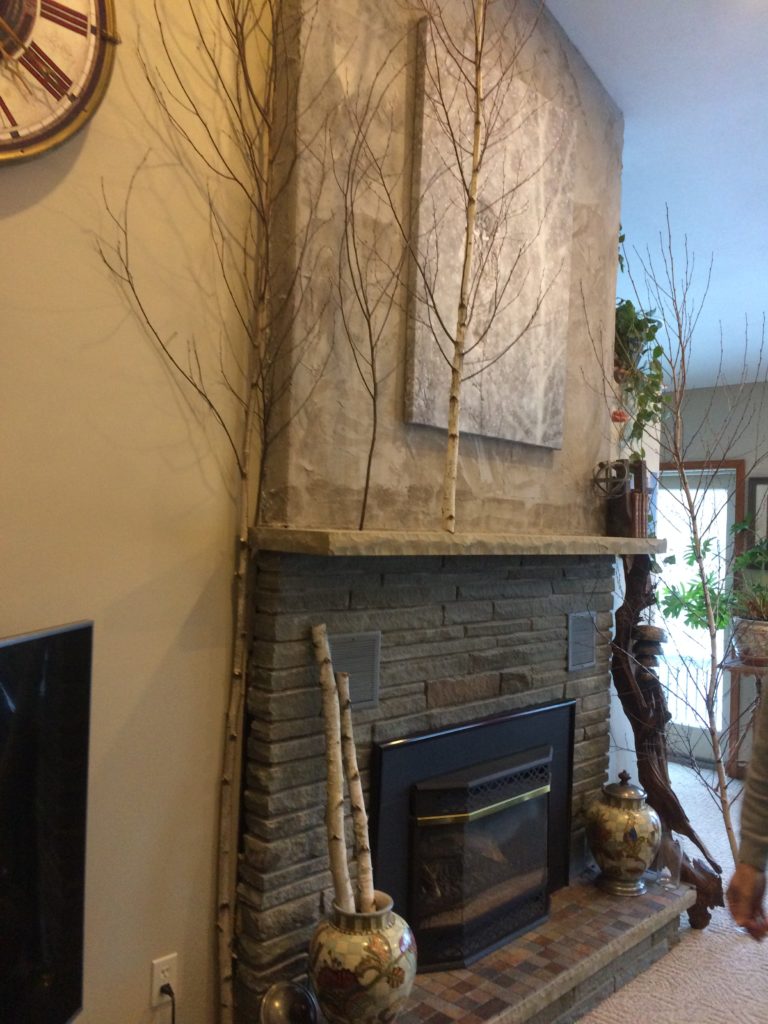
We faced the handles towards the back of the wall, and lifted each tree up and snipped off the ends with enough tension to stay up secure to the ceiling. Since the ceiling is vaulted and at an angle, each tree had to be snipped at different lengths. I also found bags of black river stones at the Dollar Tree and used them to spread along the mantle top. https://www.dollartree.com/Black-River-Rocks-32-oz-Bags/p363671/index.pro
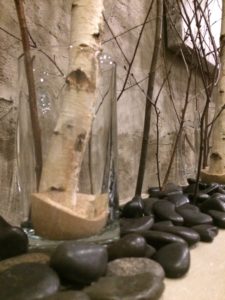
River rocks for fireplace mantle
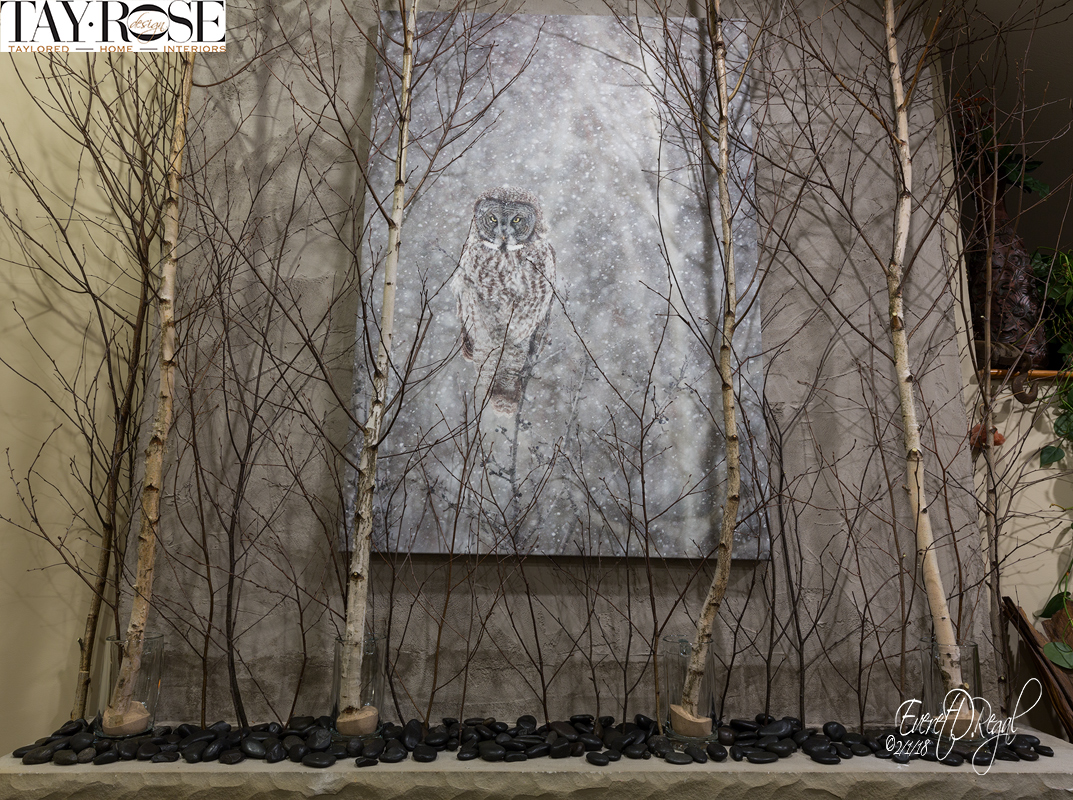
We ended up putting 4 trees, 2 on each side of the canvas then filled in below with wispy branch clippings up against the wall. We also tucked in a full length tree branch along both sides of fireplace from the floor up, then cut used the cut of trunks to stick in decorative urns on hearth. The only hardware we needed was the nail to hang the canvas art. Now the owl in the photo canvas comes to life hidden in real trees and even the eyes follow you wherever you walk…so cool!
Starting layout of canvas and trees on fireplace wall
The canvas was really the only real cost in the project, the trees were free, the vases and rocks total were less than $20.00, so all in all, a very inexpensive project that has a great “wow” feature for the room.
There are so many natural materials that can be used for decor that make a great statement: large driftwood pieces, large canvases painted or printed, shells glued on mirrors or picture frames, live succulent frames, rocks ….the list goes on and on.
Especially if you find materials in your own yard, projects can be kind on the budget, plus, nature inspires art and fits in decor “naturally.”
Finished fireplace wall