While working on a client’s bedroom for their daughters, a need for a desk and chair for their youngest was requested. The desk would be in a separate room and would be part of a wall closet unit so the desk was taken care of, but a chair was still a need. I thought, every little girl would love to have a chair made just for them-one that would have their name on it and make them feel very special. So, I started to look through my furniture stash, and pulled out this vintage painted wooden kitchen chair that I had purchased at a garage sale a couple of years ago. I liked the curves of the chair and the legs had nice details so I could accent them in some way. Plus, the chair was on the smaller size, not a big bulky chair….perfect for a desk chair. Now, I just had to design how to transform this dowdy find with a makeover for a seat for a princess…. Read more!
I love designing themed rooms….it can be challenging…always a treasure hunt, and most likely, I always have to create something myself for I can’t find the item or it’s out of my budget. For several years now, I’ve been invited to do the interior design for the Parade of Homes here in Upstate NY. The Parade is a huge design project, choosing everything from the siding color to tile, and cabinet knobs, but also, picking out all the furniture and accessories. It’s a little different when there is no clients, so I’m pretty much designing for a “pretend” family…something that is neutral enough to please, and unique enough to attract attention.
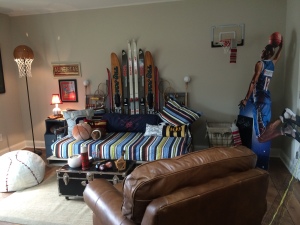
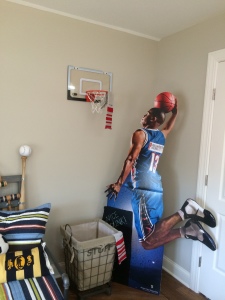
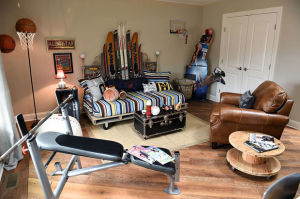
For the 2014 Parade of Homes in Clay, NY there was a large bonus room which I decided to design for a teen boy bedroom. My friend Judi from 1829 Farmhouse, owner of shop (Inspired in Liverpool, NY where bed is currently for sale) made the bed out of a pallet with pipe arms that we turned to the side so it was more like a sofa loaded up with lots of pillows. A trunk on wheels served as at coffee table; a found at a Flea Market of a large cardboard cutout sign of a basketball player laying up for a dunk that would be perfect when I place it next to the wall hoop positioned right over the laundry hamper….Nice Dunk!!
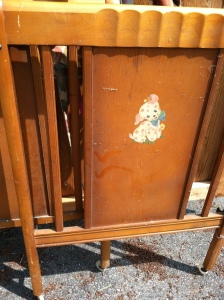
While out driving around one day, I came to a stop sign, and as usual, looked both ways before starting to accelerate into traffic. I spied to my right a pile of discards at the curb in front of a house. Instead of turning left, I pulled over to the right in front of the pile and eyed a vintage crib…remember the ones with the puppy and kitty decal on the wooden ends? Well this crib instead of decals were hand painted with the same vintage look of the old decals….these were coming home with me! Not sure what I wanted to do with it yet, but I’ll figure that out later. There were also a couple of broken dining room chairs where only the legs and seats remained…I threw them in the back of the car as well.
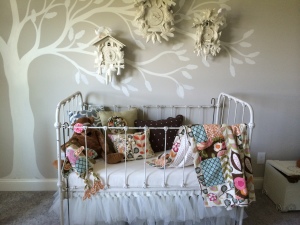
Little did I know then that these curbside treasures would come together in an idea for a Nursery I was designing for the Parade of Homes in 2014. I have a tendency of wanting to use something in a totally different way…a real repurposed project. For the Nursery, I was already using a vintage iron crib, a hand-painted dresser, some German Glittery Cuckoo clocks for the wall mural (see my other post about this project) so I needed something to fill in some space on the floor near the window. A chair….not just any chair, but a “crib” chair. A perfect perch to set a favorite stuffed animal, or a chair for supporting their first steps. Plus, I painted the back as a chalkboard, so this chair can grow into the next phase of their lives. Read more!
It’s been a quick several months preparing for the Parade of Homes this year, in Clay, NY. Our builder got in to the Parade late, so he hit the ground running in March to have the 3,100 sq.ft home finished by June 5th. After strange weather, and having to re-varnish the red oak floors twice due to humidity changes, which pushed back the furniture delivery, I had just a mere week to furnish the whole house…but did it with a little time to spare.
I had an intern helping me from a local College, plus the builders wife for a day helping to hang wall art etc. So glad I had them!
The Realtors wanted interior photos the day the furniture arrived, so I managed to delay them a day while we rushed to make at least the major rooms photo ready….whew!
The house colors were inspired by a pillow, and I based the outside siding, stone, and interior colors with that pillow so everything felt connected in a way.
The kids rooms I always individualize, for kids all have their own personalities, so this year I did a nursery,
A sports themed teen room, with handmade sports equipment headboard and pallet bed
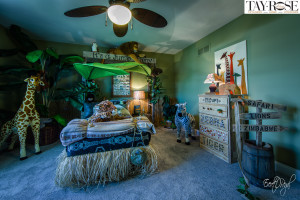
Of all the rooms this year, the hit was the boys Jungle Room.
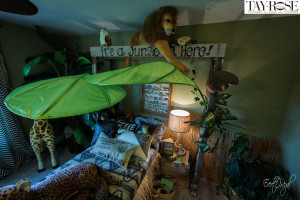
That room has had everyone giggle, and leave with a smile on their face. It was also the most fun and easiest room to complete. My husband even burned the song, “The lion sleeps tonight” on a cd for me to play continuously as background music in the room.
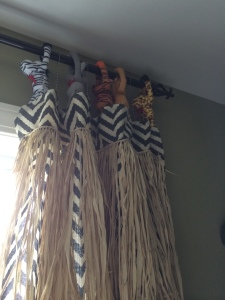
The ceiling fan makes the giant Ikea leaves sway up and down to the beat of the music. So fun! The arbor was made with old ladders and planks for the top. Raffia table skirting for bed skirt and around window panels.
Plush animals with velcro feet hold up the curtains while hanging on the curtain rod.
Hand painted dresser using animal print in lettering on drawers by 1829 Farmhouse/Inspired.
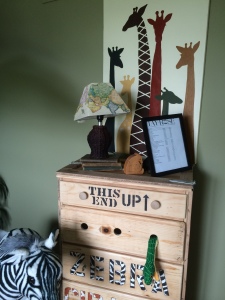
Jungle Room animal crate designed dresser by 1829 Farmhouse for TayRose Designs Parade of Homes 2014 Clay, NY
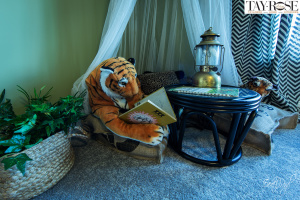
A reading nook with handmade coffee bag cushions, an electric lantern and netted tent in the corner, brings a safari feel while sharing a story with a friendly tiger. To receive posts via email click HERE ![]() Subscribe in a reader or sign up in subscription box in sidebar.
Subscribe in a reader or sign up in subscription box in sidebar.
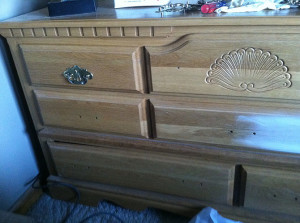
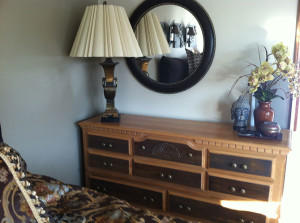
Seven years after I got married, and while my husband was out of State on a golfing trip, I thought it was time to give his bedroom set from before we were married, an updated look. I didn’t want to paint it, for I couldn’t make up my mind on the color, and I didn’t want to shock my husband too much upon his return.
So, I opted to stain the drawer fronts and change the hardware. I think the hardest part was getting the drawers out…they were tough little buggers!
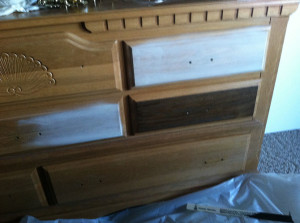
After sanding off the poly on the drawer fronts and wiping off the sawdust, I used some stain that I had on hand, and with a rag, rubbed on the darker color.
It was love at first sight! I loved the 2 tones and with the new hardware, it transformed the whole look. I let the first coat dry for several hours and applied the 2nd coat, then brushed on a matte poly.
Since the previous pulls were a size that was difficult to find, I chose to use 2 small round knobs in place of a pull, and really liked the look.
After tackling the dresser, I did the high boy chest, and the 2 night stands. I still have to figure out what to do with the bed headboard and footboard, but that will be another day. I’m just glad my husband liked the results of the dressers when he returned. 
![]() Subscribe in a reader or sign up in subscription box in sidebar.
Subscribe in a reader or sign up in subscription box in sidebar.
