I was given the opportunity to try a new wallpaper product from Walls Republic www.wallsrepublic.com. These particular wallpapers use a newer technology of pasting the object surface rather than pasting the paper first, cool, right? I have never really used wallpaper before besides lining drawers, so I was willing to challenge myself, and pick items that could be papered using the leftovers rather than tackle a”wall” to paper. Walls Republic have mega choices for paper in every style and color you can think of, so when you go to the site have fun! Plus they ship out up to 5 samples free, so you can see the paper in person before ordering…a nice perk!

Supplies I used for this project:
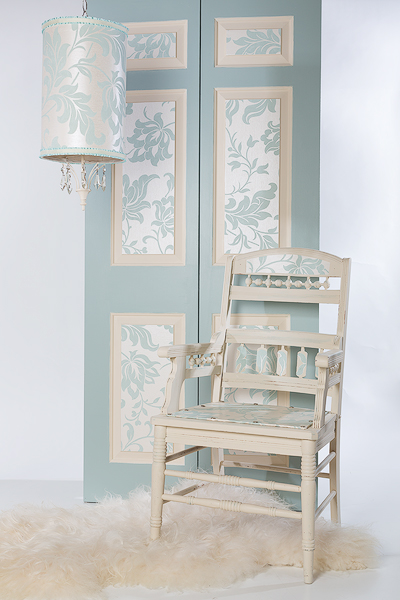
Wallpaper roll from Walls Republic pattern Adeline color Duck Egg #97411
Wallpaper adhesive paste brand Romans from Lowes (brand recommended from Walls Republic)
Wide brush or roller for pasting the adhesive
Wallpaper brush to smooth out air bubbles
scissors
ribbon and hot glue gun to attach
paint for painting inside of shade *optional, my shade just needed some freshening up
I had this vintage pendant light in my stash for years and once the wallpaper arrived, I knew this shade would be one of the perfect candidates for this project. You see, I had 3 items in mind…
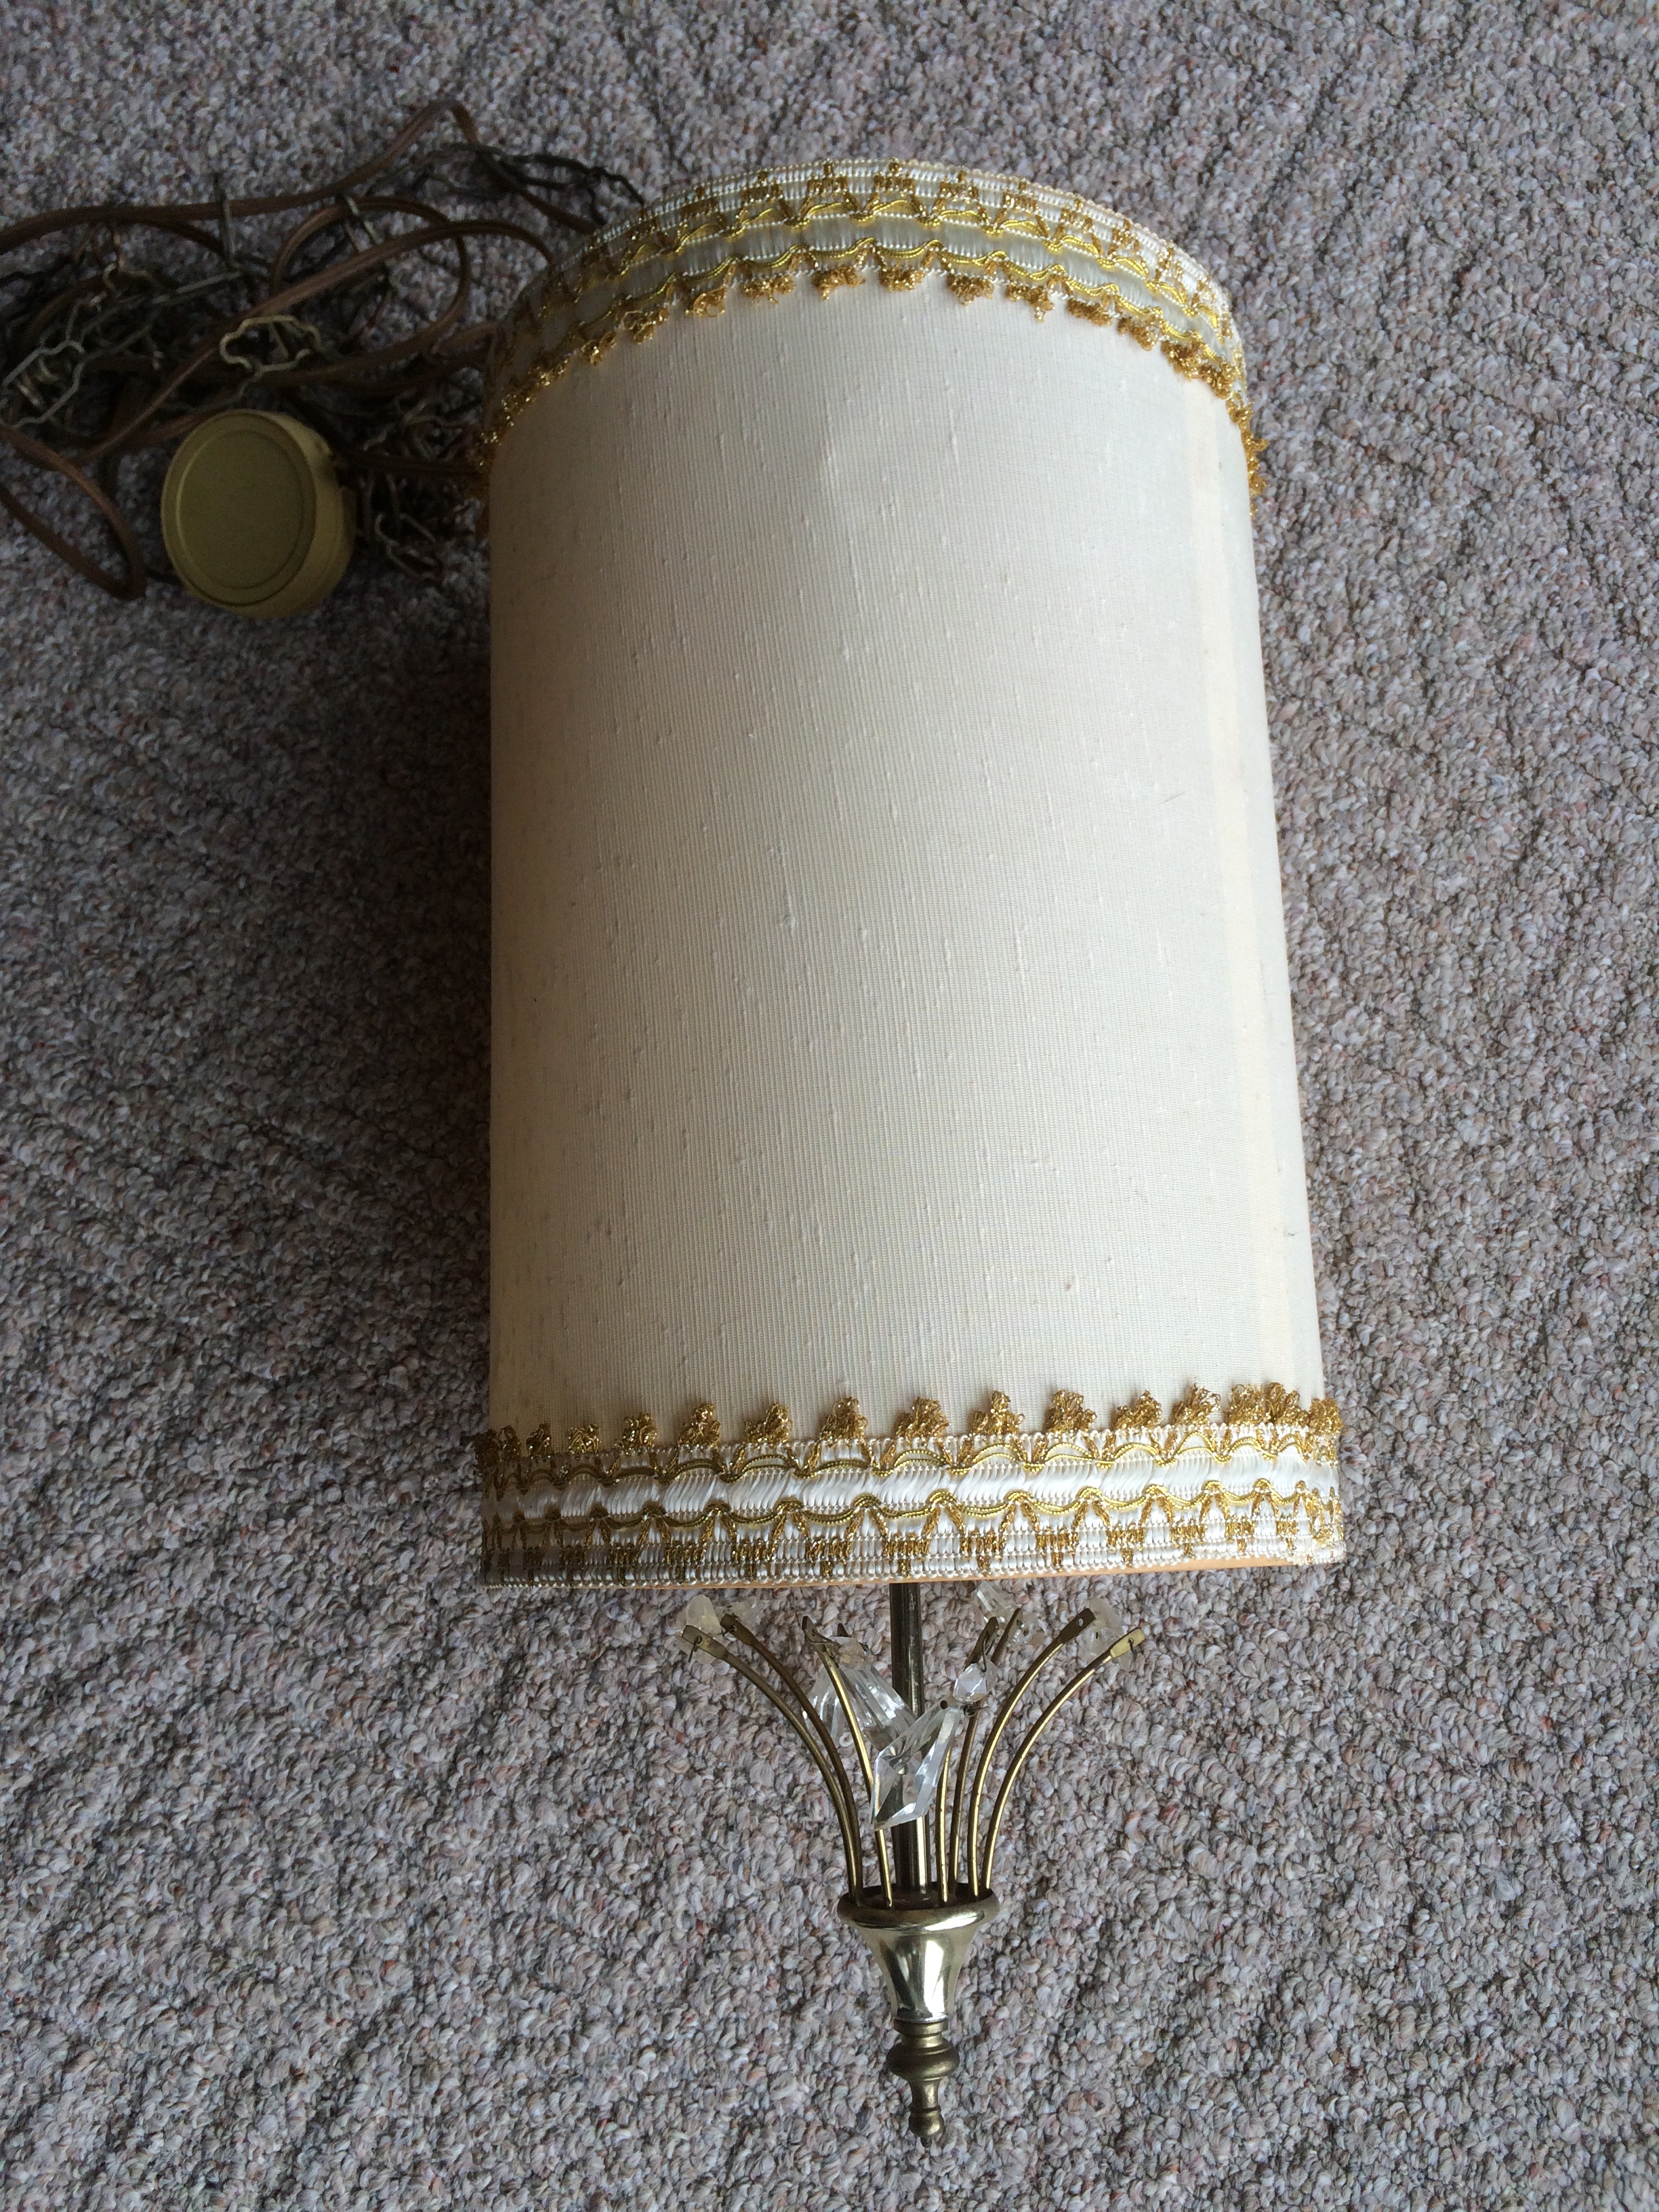
lamp before wallpapering
Oh boy, this lamp was not the prettiest flower in the pot, but I could see the potential. I disassembled the lamp so I could paint the parts later, and concentrated on the shade since that was what I was going to wallpaper. I first removed the old fabric trim and since there were some age discolorations on the inside of the shade, I painted the inside. At first, I used a spray primer paint, but didn’t like how the paint was dripping, so I smoothed out the drips while still wet and let it dry before painting over with the same color paint I was going to use on the metal parts, which is from Country Chic https://www.countrychicpaint.com/paints in the Cheesecake color that matched the wallpaper background really well.
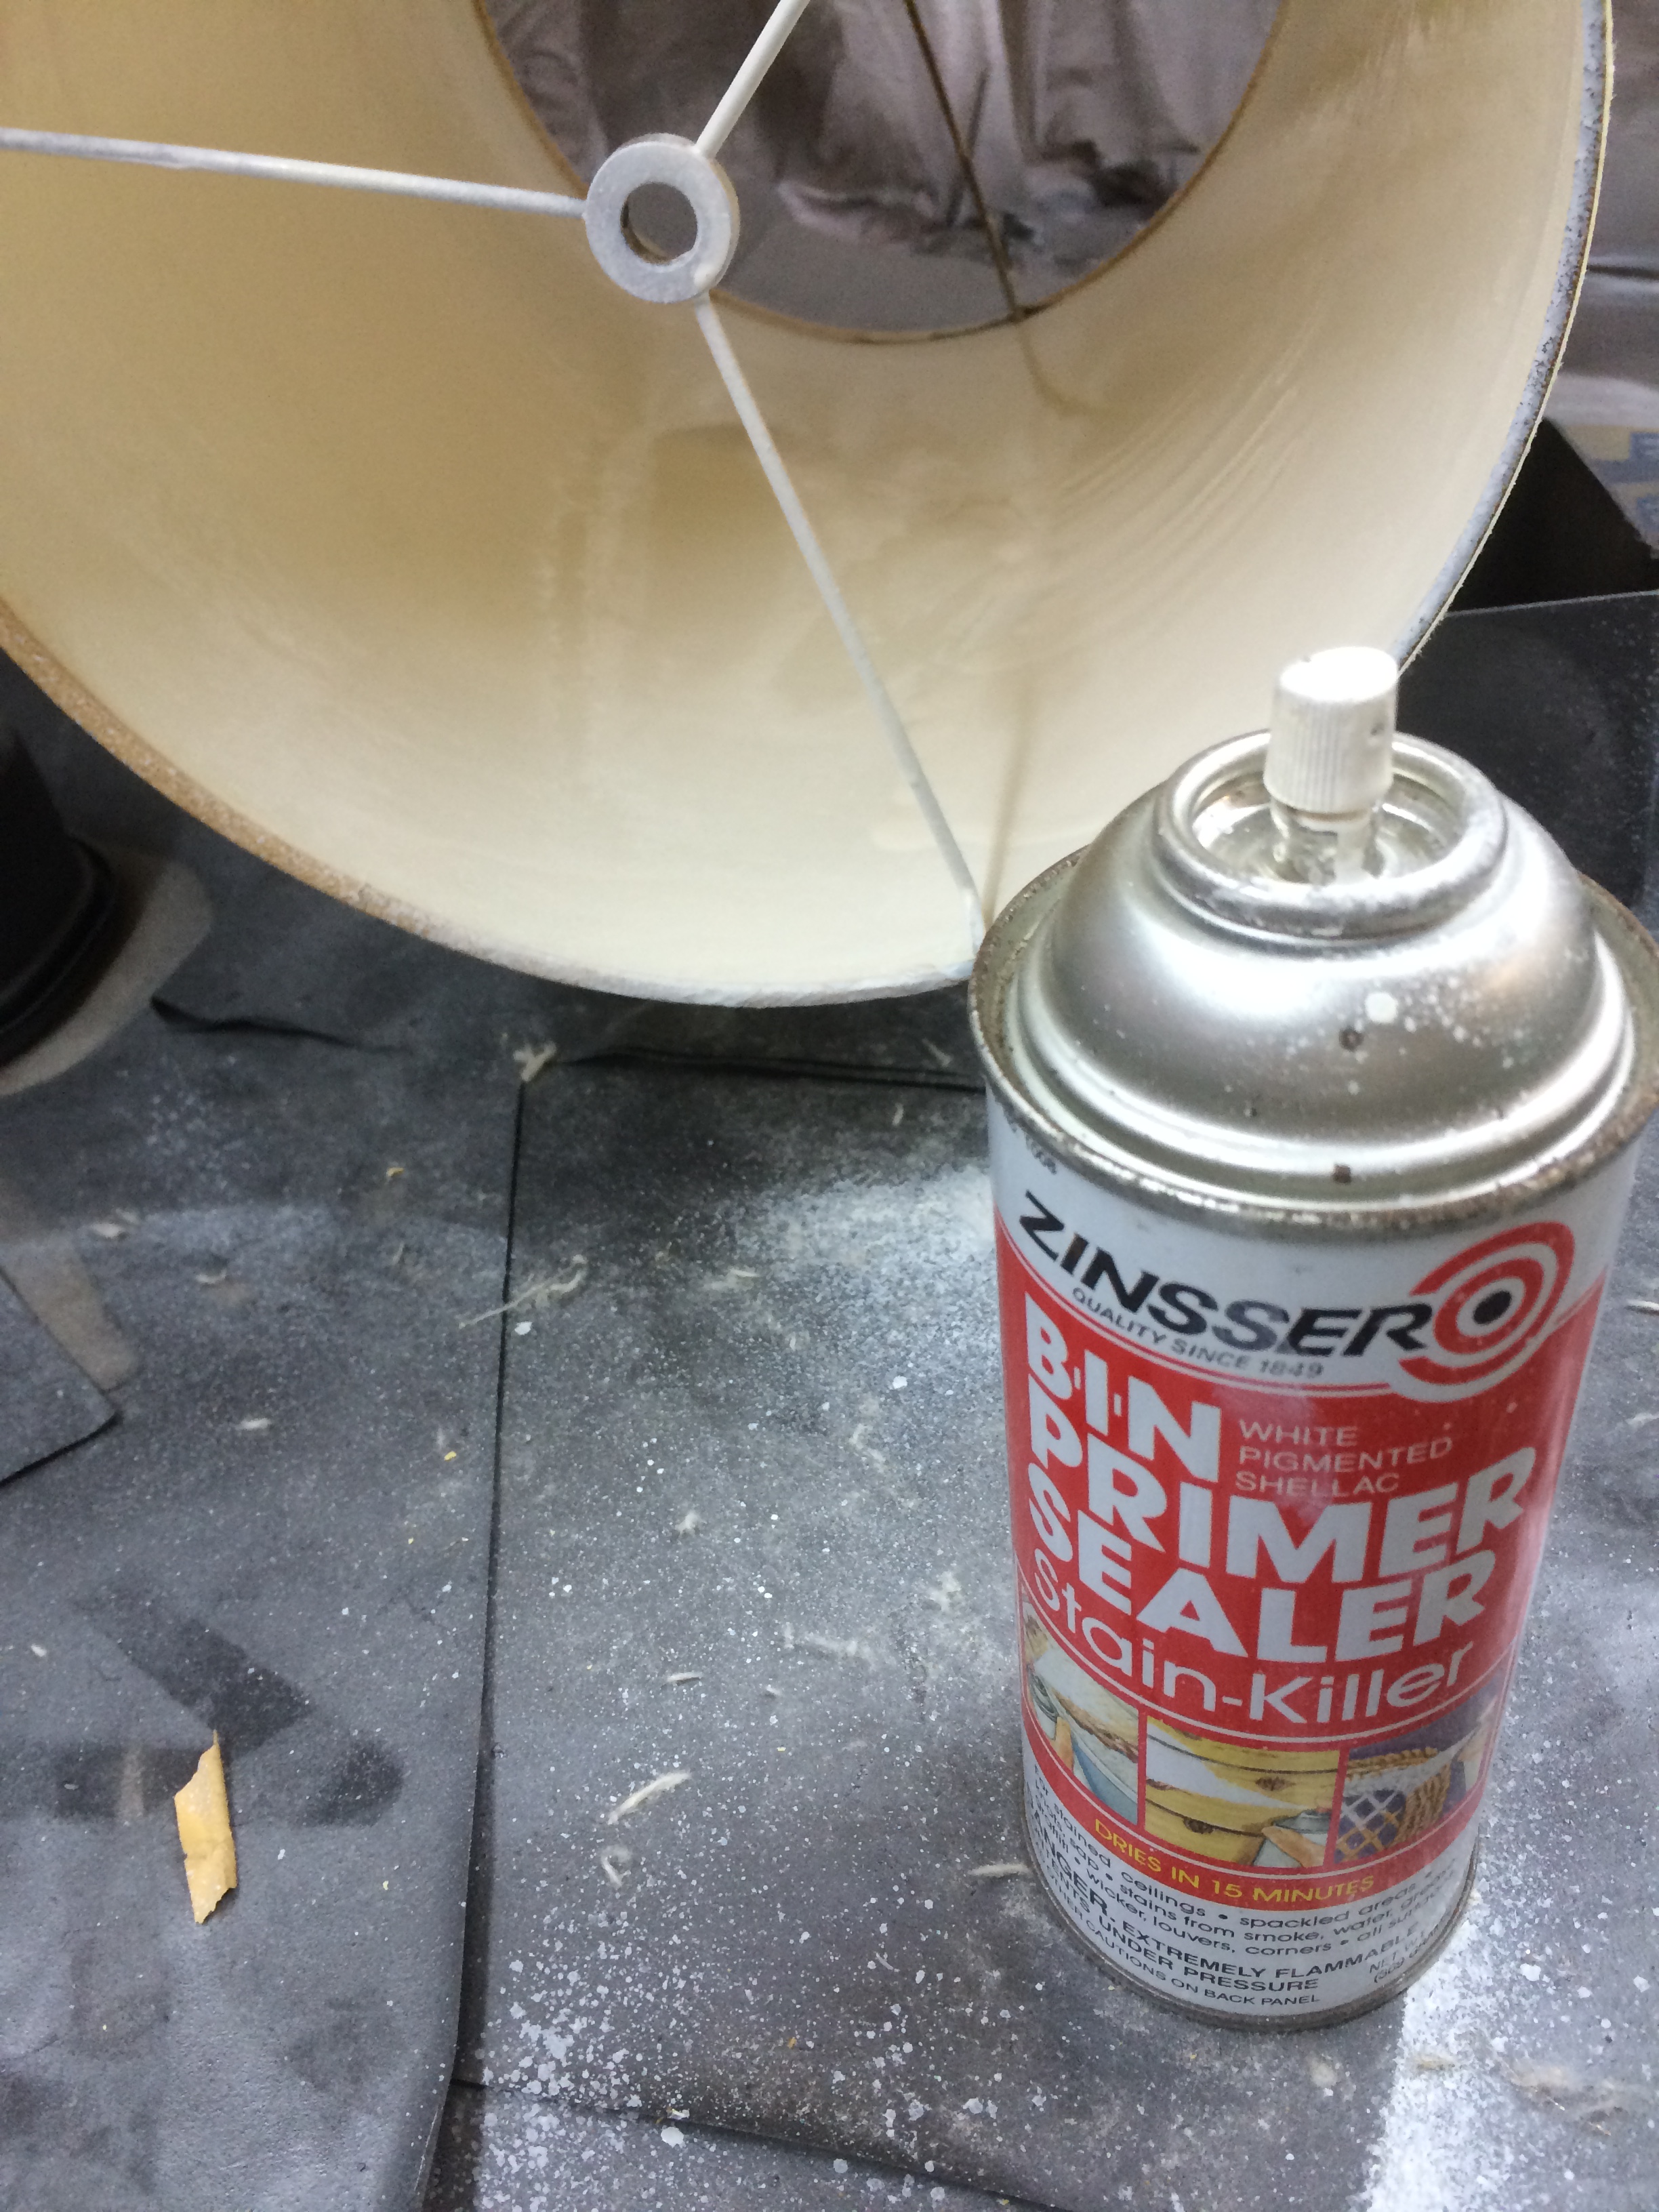
spray paint inside lampshade
Painting the inside with the mineral chalk based paint worked much better than the spray paint…just want to spare you the mis-step of using spray paint for this project. I always live and learn many times it seems, and usually from this, a much better way to do something presents itself…thank goodness! HA! While my paint brush was still wet, I went ahead and painted all the metal parts their first of several coats.
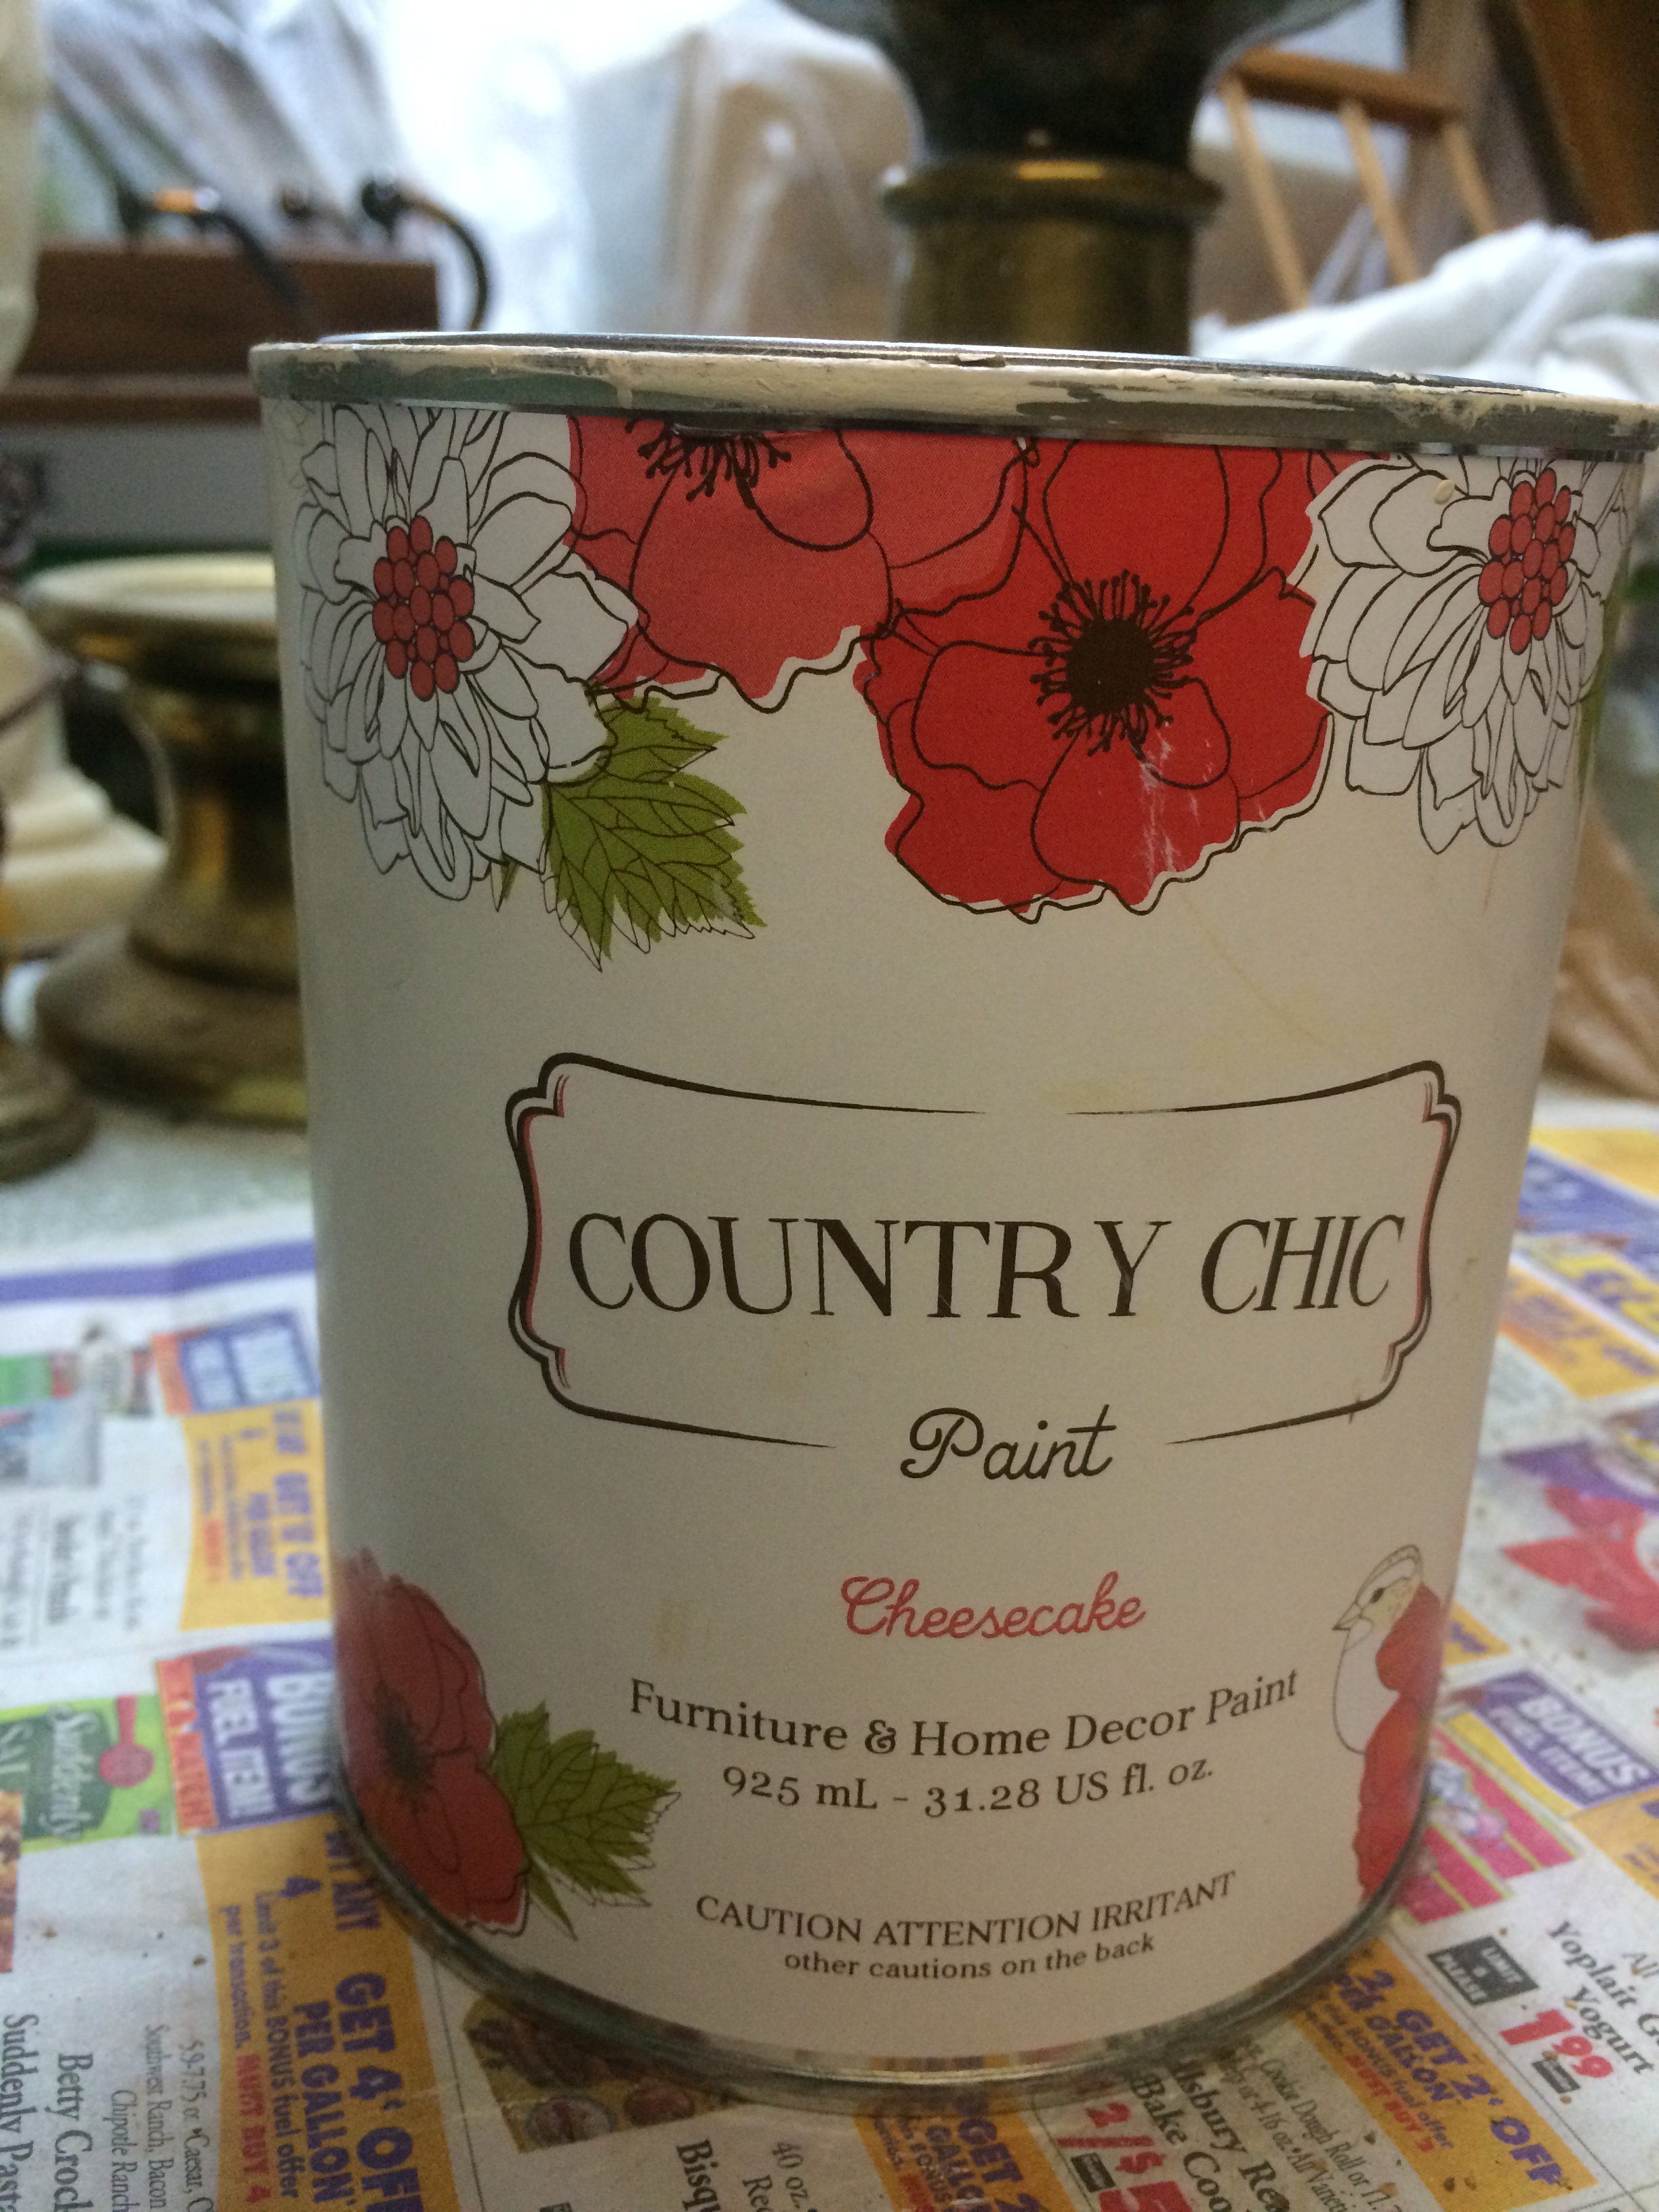
Cheesecake mineral chalkbased paint
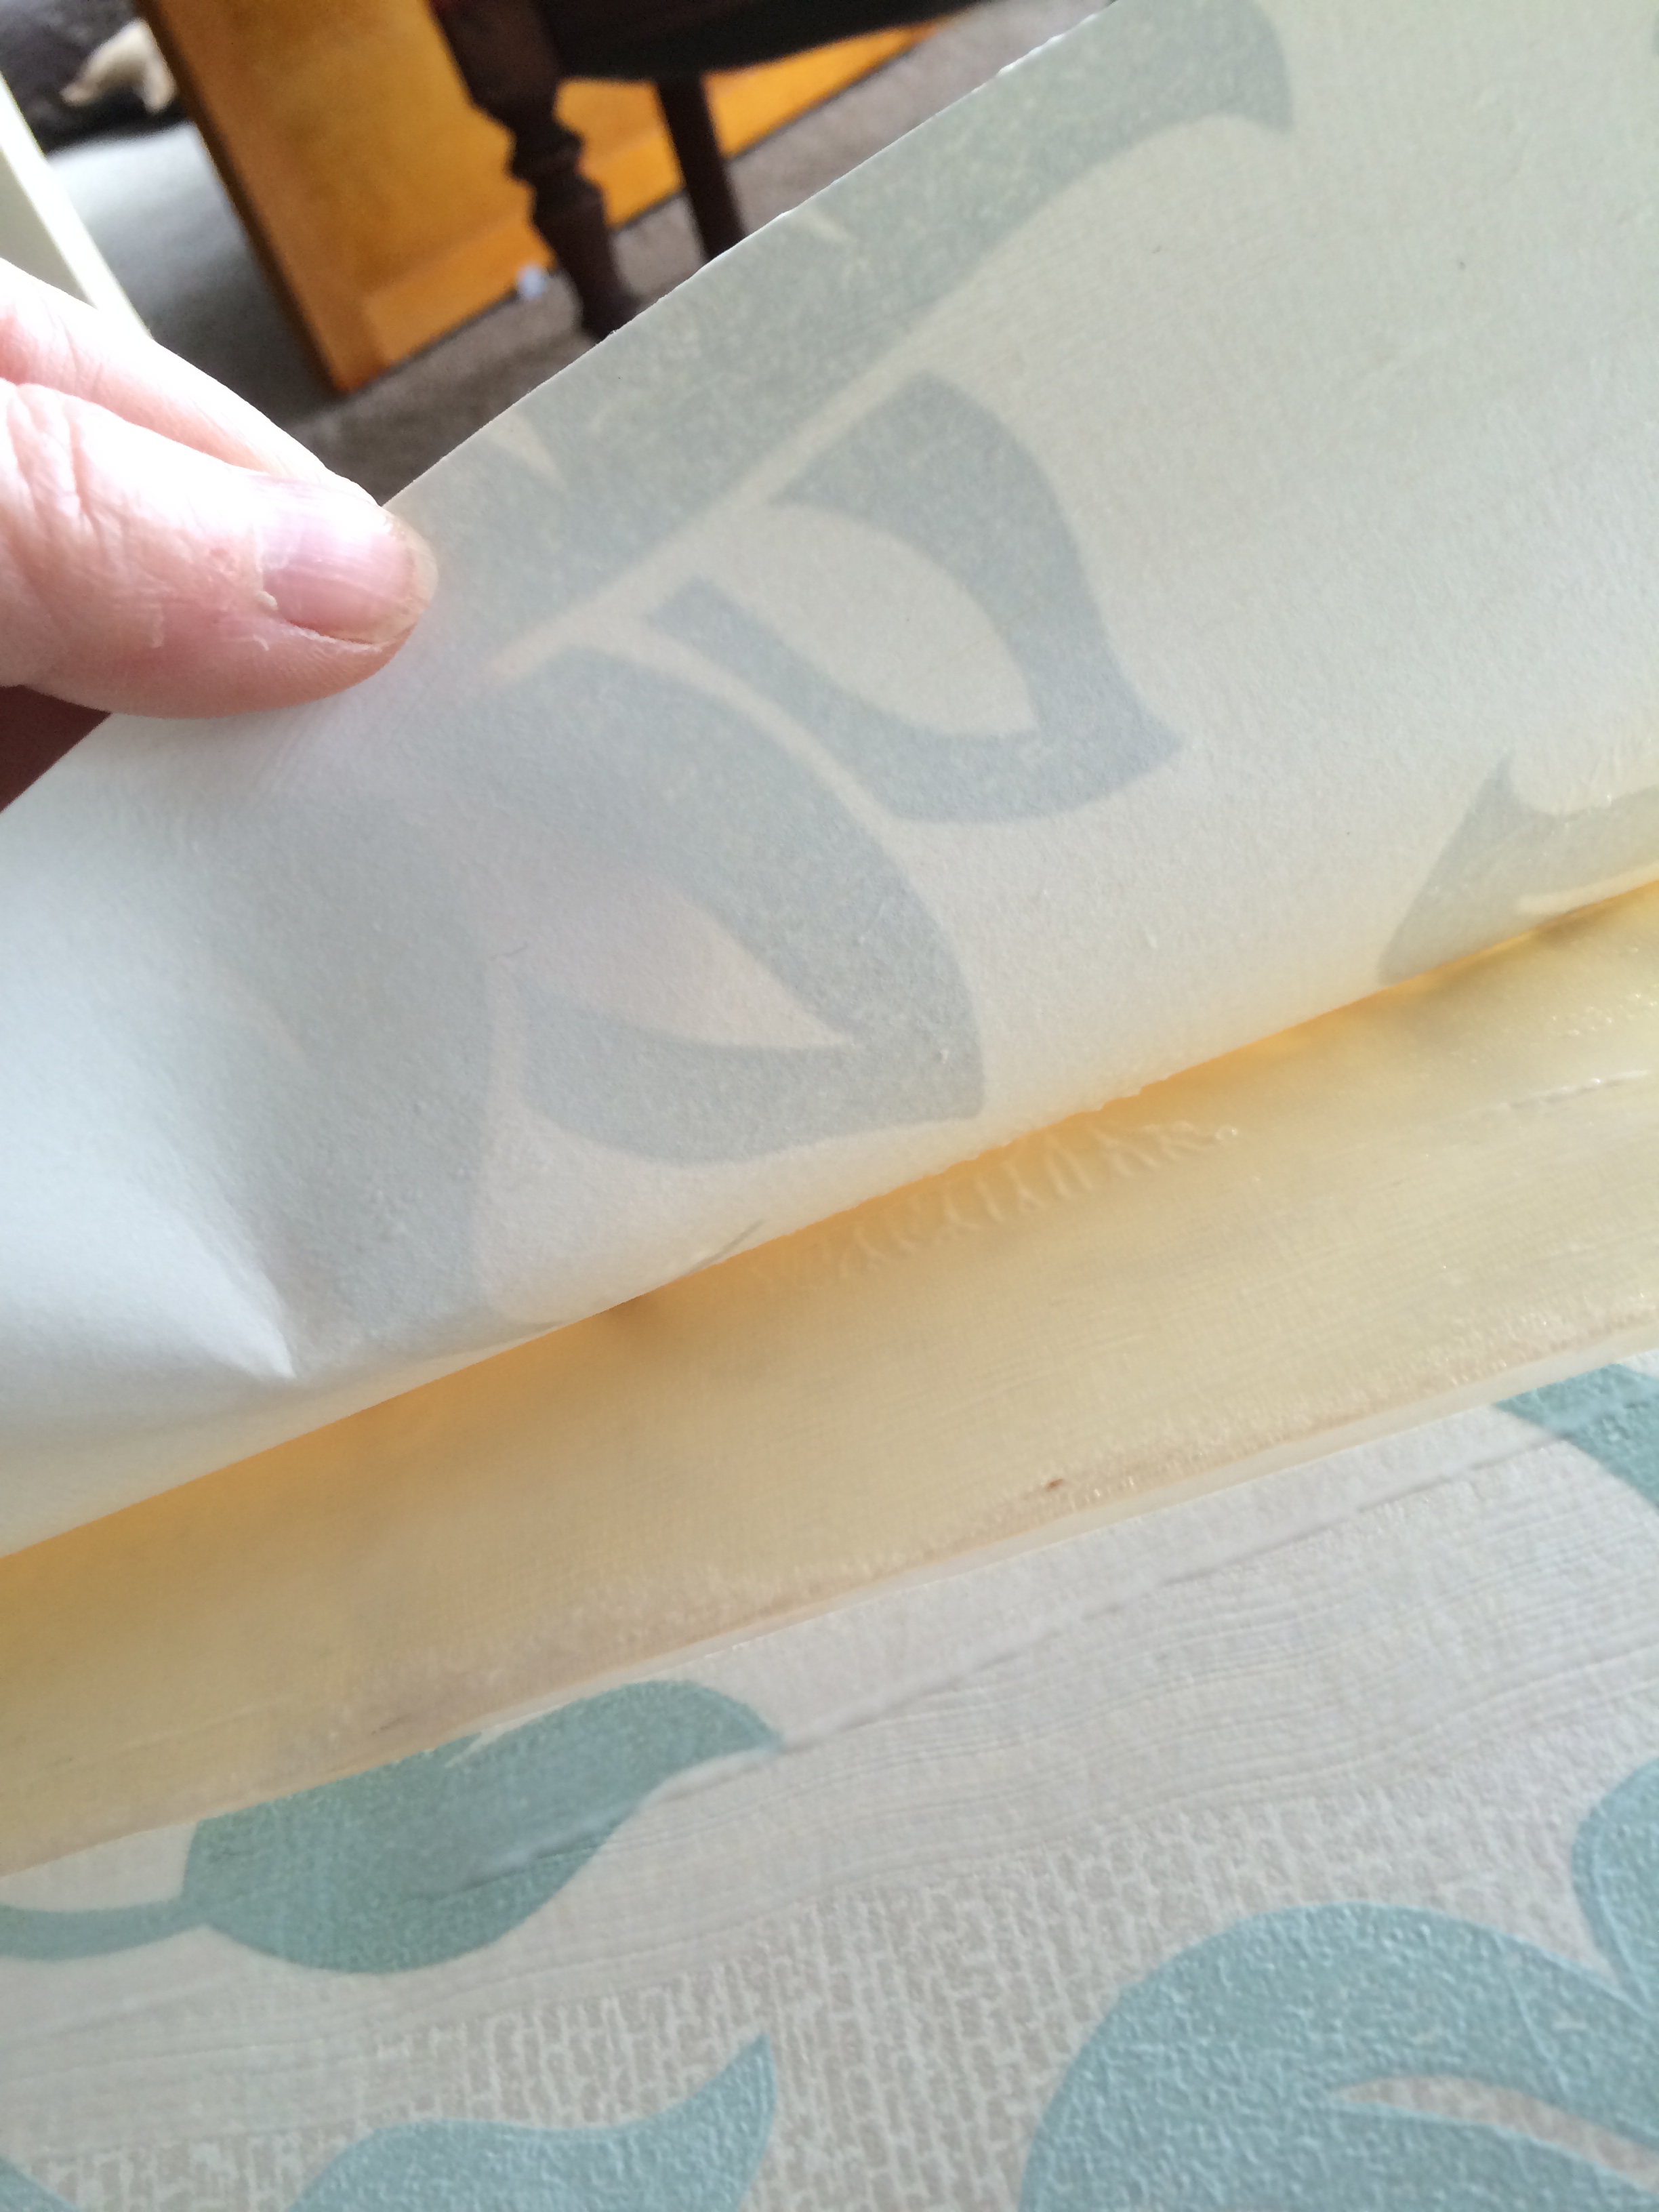
I laid the shade on the backside of the wallpaper that I unrolled a bit, and began to roll the shade holding on to the paper end so I could determine how much paper I would need to cover the shade. I was sure to leave about an inch overlap at the end. Walls Republic suggests that ends meet rather than overlap on walls, and that makes sense, but since I was doing a lampshade, I wanted a bit of an overlay. I cut off the piece and lined up the straight edge of the paper to the edge of the lampshade. On the other side of the shade will be the extra width of the paper that will be trimmed off after I pasted down the paper. I got my large paint brush and started brushing the paste onto the shade…remember, you don’t need to apply paste to the paper but right to the surface of the object. Try to avoid getting the paste on the surface of the paper, if I did, I used a damp soft cloth to remove….

laying lampshade on wallpaper to cut to fit
I continued to paste and slowly roll the shade onto the wallpaper, smoothing gently as it rolled until the whole shade was pasted and the wallpaper was in place. Then I went back over the paper with one hand inside the shade following my other hand on the surface using the wallpaper brush to smooth out the air bubbles to the sides until the surface was smooth. Having my hand inside ensured that I didn’t press too hard on the shade and dent it. I let the shade dry before I trimmed off the excess paper on the end. Walls Republic have a nice hanging instructional that is included with the wallpaper complete with drawings which always helps us visual people!!
wallpaper on lampshade
I knew I was going to add ribbon trim to the ends of the shade, so if my cut line wasn’t exactly straight that was ok because it was going to be covered by the ribbon. I was so lucky to find only 2 ribbons that came close to matching the colors in the wallpaper and I grabbed them…plus, at Hobby Lobby, they were on sale for 50% off…can I hear an Amen!! I used the hot glue gun to attach both ribbons, first the larger ribbon in blue, then the thinner cream ribbon.

hot glue ribbon to lampshade
I reassembled all the lamp parts, after I used Windex to clean off the glass prisms, then added the shade. One last step I did was to take the creamy color paint and dry brushed the chain. I didn’t want to completely cover the whole chain with the paint, for I like to see the metal coming through. You could also make a chain cover in a color matching the fabric would be pretty too.
All finished and ready to hang..I love how it seems to breathe a fresh breath- like putting on a new floral dress after wearing long underwear for months…HA! Can you tell I live in Upstate NY?
Check out my other posts showing how I used the same wallpaper to accent a chair and and bi-fold door so they would all coordinate together.
Seeing vintage in fresh new ways is always inspiring and keeps perfectly good treasures out of the dumps!
To view the other wallpaper inspired items using Walls Republic wallpaper you can find them here: http://tayrose.com/2015/04/16/how-to-wallpaper-a-bi-fold-door-to-use-as-a-headboard-or-screen/ http://tayrose.com/2015/04/16/wallpaper-challenge-at-least-for-me/
http://www.eregalstudio.com/ credit for finished group photos on my wallpaper project with the chair, bi-fold and pendant light.
To receive posts via email click HE RE  Subscribe in a reader or signup in Subscription box in sidebar.