• Shop
    • Antiques
    • Home Decor
    • Jewelry
      • Necklaces
      • Bracelets
      • Earrings
      • Rings
      • Pins
    • Upcycled handmade
      • upcycled womens tops
      • upcycled womens jackets
      • Upcycled womens pants
      • upcycled pillows
      • Upcycled Pickleball Shirts
      • upcycled purses
    • MacKenzie-Childs
      • MacKenzie-Childs Taylor Dinner Plate
      • MacKenzie-Childs Taylor Luncheon Plate
      • MacKenzie-Childs small oval dish
      • MacKenzie-Childs Taylor Bread & Butter
      • MacKenzie-Childs Taylor Mugs
      • MacKenzie-Childs Taylor Saucers
      • MacKenzie-Childs Taylor Breakfast Bowls
      • MacKenzie-Childs Taylor Berry Bowl
      • MacKenzie-Childs Taylor Chowder Bowls
      • MacKenzie-Childs Wallcourt pieces
      • MacKenzie-Childs Enamelware
      • MacKenzie-Childs Torquay dinnerware
      • MacKenzie-Childs MacLachlan Dinnerware
      • MacKenzie-Childs Taylor Serving Ware
      • MacKenzie-Childs Glass Goblets
      • MacKenzie-Childs glass tumbler
      • MacKenzie-Childs Glass Serving pieces
      • MacKenzie-Childs Decor pieces
      • MacKenzie-Childs Placemats & Coaster sets
      • MacKenzie-Childs Paper Products
      • MacKenzie-Childs Tile
    • Shoes
  • Home
  • About
    • I believe…
  • Gallery
    • Custom Design
    • Interior Design
      • Bath
      • Bedroom
      • Dining Room
      • Entry Way
      • Kitchen
      • Laundry
      • Living Room
      • Office
      • Mudroom
      • Themed Rooms
  • Color CCE
  • Services
    • Services
    • Design Process
    • New Construction
  • Journal
    • DIY
    • Repurposed
    • Art
    • Interior Design Room
    • Holiday
    • Theme Room
  • Press
  • Contact

Painted trunk blends with Decor

Taylor
06 Feb 2018
Custom Design, DIY, Interior Design Room
custom, DIY, hand painted, Home Decor, Interior Design, storage, TayRose Design, trunk, wall paint
before and after painted trunk blending with wall color

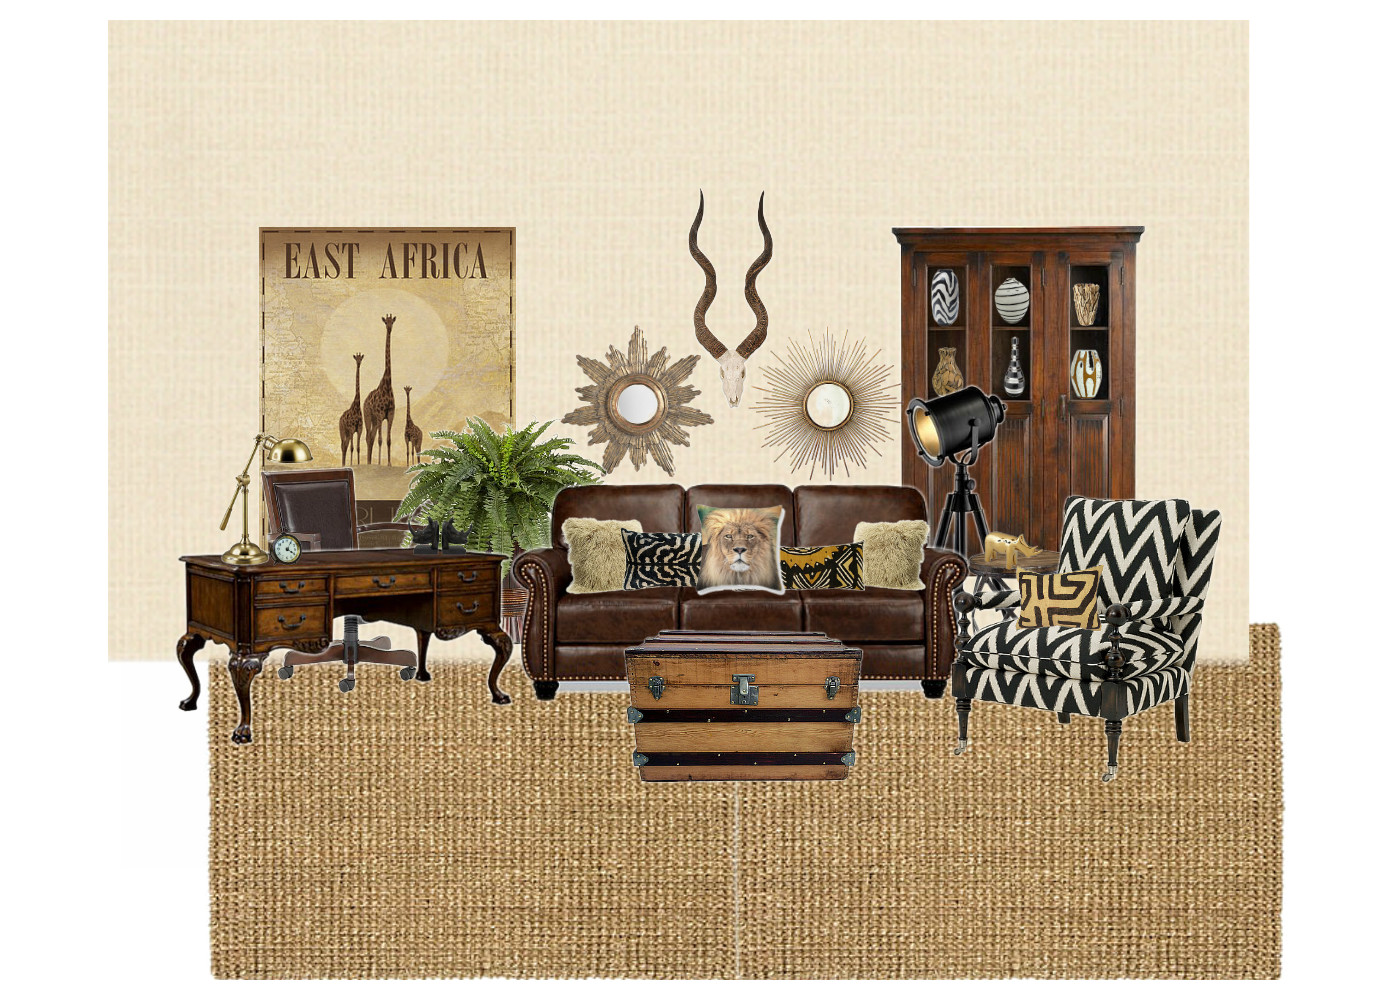
painted trunk blends in with wall color

After having some of our interior room walls repainted due to sheet rock issues, I had to remove all the artwork from the walls and then rehang it back up after walls had cured.  With the paint cans sitting in the mudroom to be stored back down in the basement, my eyes went to the trunk that holds some of my excess dishes, and seating in our photo studio, and I thought it just needed an fresh updated look.

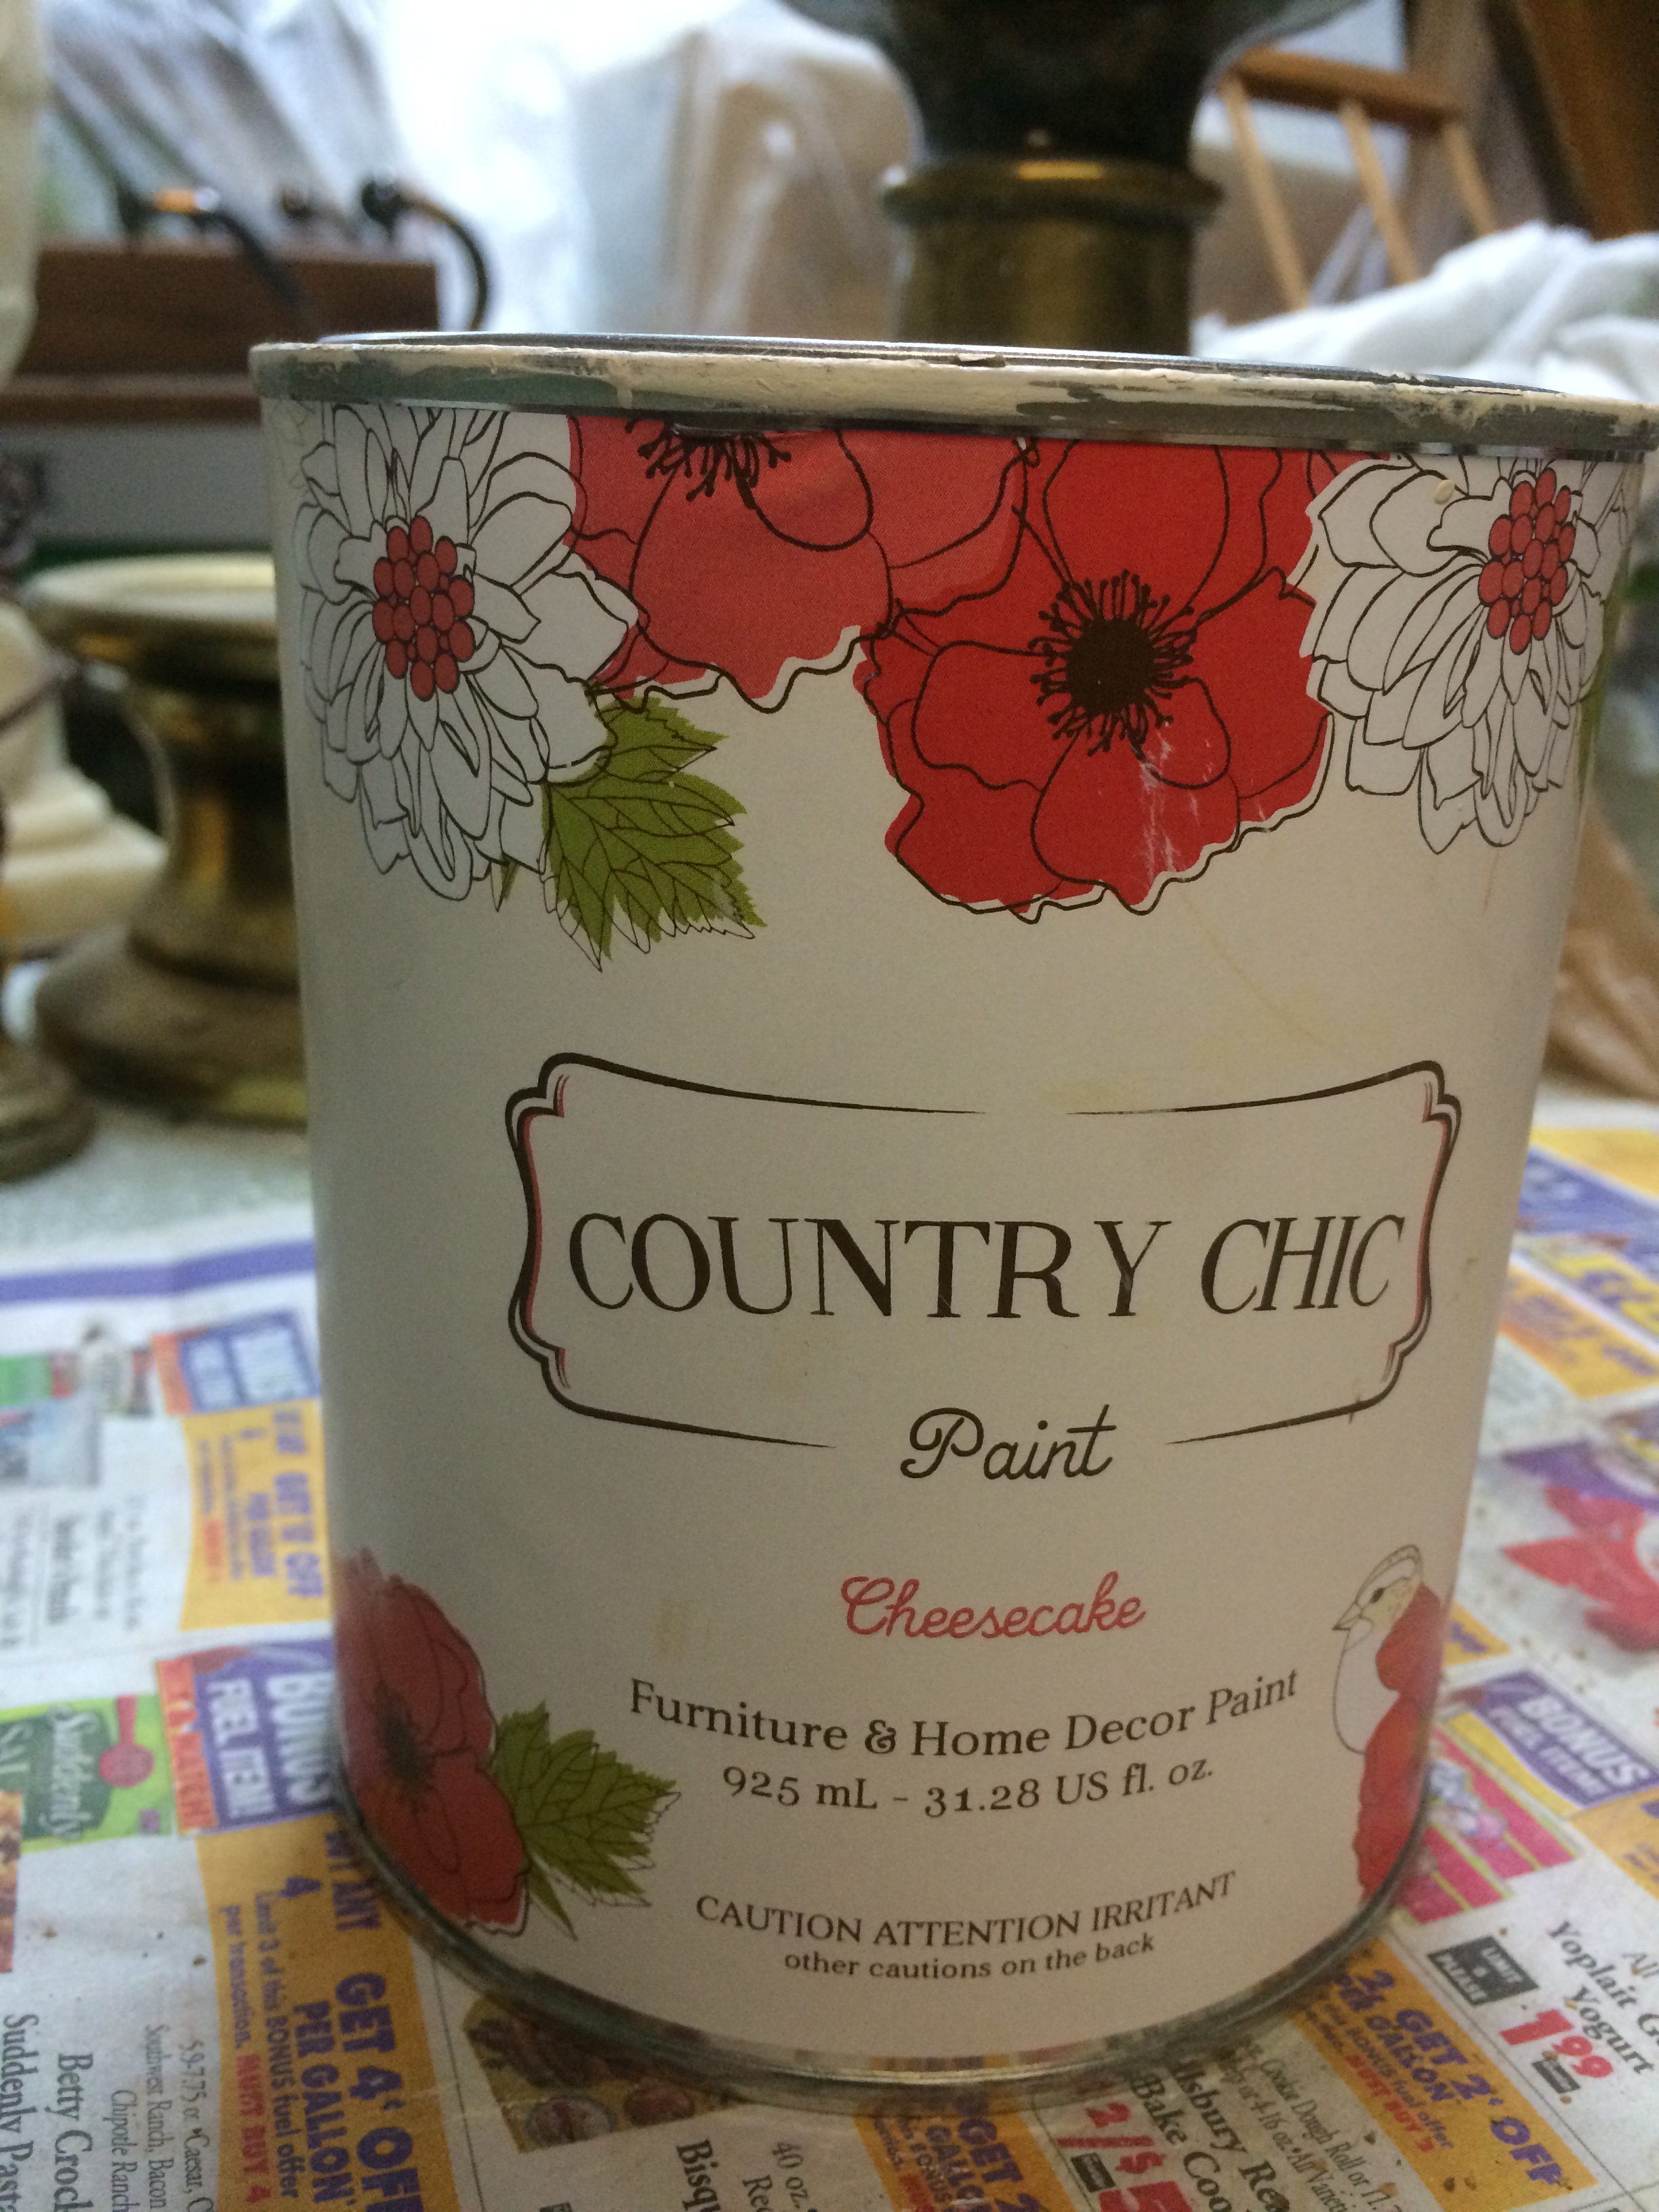
The details on the trunk are really lovely, and I appreciate the worn areas that validate the age and adventures it must have been through- the wooden slats and nail trimmed leather strips framing the edges and all the metal hardware that were a bit lost against the dark background color.  I didn’t realize that most of the trunk was actually a canvas fabric, so, could I paint it with the same paint as our accent wall?  Why not?

My first thought was to paint the whole thing, but fortunately, I started one row up on the side and after painstakingly using a fine artist brush to paint around all the little spaces of the hardware, I thought….”I think I’ll paint every other row then the top.”  I actually was glad I decided to leave some of the original color on the trunk for the new paint color was much lighter and really enhanced the details on the trunk much better than before.

Painted trunk details

Such an easy update, it dried very quickly and I wiped on some leather cleaner and wood conditioner and it now has quite the face lift!

The trunk blends in much better with the wall color and the items set upon it.

painted trunk blends with decor

Funny how inspiration will hit you….from repainted walls to paint cans waiting to be stored away….a beloved piece  gets a fresh look and blends in all the better now!


New Home, new furnishings Part 2 Master Suite

Taylor
21 Oct 2016
Art, DIY, Interior Design Room, Master Bedroom
decorator, designer, en suite, eRegal Studio Photography, Home Decor, Home Design, Home Interior Designs, Interior Design, Master Suite, neutral colors, TayRose Design
Master Suite in neutrals

Master Suite in neutrals

So many of us are so busy that we rarely have time to enjoy and retreat to our Master Oasis’s until the family has been fed; dishes done; lunches made for the next morning; kids bathed; stories read; kids tucked in; laundry folded; and bills paid…..so, collapsing into the bed that may or may not have been made that morning, and falling immediately into an unconscious slumber is how our Master bedroom meets our need.    And yet, trends reveal when it comes to designing, or building a house, clients want the master suite, and “en-suite”  to be spacious with sitting areas, even exercise machines with adjoining steam showers, double vanities and tv sets as their “must haves.”  Who has time to enjoy all of this blessedness?   But hey, who wouldn’t want a restful, spacious area to retreat to at the end of a hectic day?  We all deserve a space that beckons when the day is done, and the door can be closed to put the world on a time out.

Master suite sitting area in neutrals

Master suite sitting area in neutrals

This Master bedroom space was one of those spaces where I wanted to create a soothing break from the demands that every young parent lovingly accepts.  The client had sent me several photos of colors and styles they liked for the room which were very helpful to draw inspiration from and recreate for them.  Neutrals were chosen, in creams and taupe with a bit of gray.  Lots of texture from the nubby linen and metal nail heads of the casual chairs; the cool metal from the glass side table; to the painted metal art on the wall over the bed; and the soft cream of the carpet underfoot.  The warm woods of the bed, nightstands and dresser give a nice contrast to all of the neutral colors surrounding the room.

Seating grouping in master

Seating grouping in master

The comforter was a great find at Burlington’s and was the light neutral color that the client was looking for.  It’s hard to see, but there are fine light gray lines creating a subtle pattern on the fabric.  I was able to find matching shams, a throw, and all of the accent pillows at several different stores while shopping for accessories.  We found long curtain panels that had beautiful texture and just the perfect colors of gray and taupe to frame the windows and carry the color to the walls.  We hung the panels higher over the window to draw your eye up and helps the room feel larger.

Cream lamp and curtain panel by bedside

Cream lamp and curtain panel by bedside

I found the lamps and shades, in a simple shape, creamy like the trim color and a few photo frames to be filled with kiddo pictures in black and white to keep with the neutral scheme.  The design rule of grouping in 3’s and 5’s really does work in most cases, and helps surface areas from getting too cluttered.  Choosing groups that have different heights and shapes gives the items more definition and interest.   A small seating area was created on the back wall with a couple of nubby chairs, a small glass top table and then adding the accent mirror centered over the grouping instead of centering the mirror on the wall.   The standing dressing mirror fit perfectly just outside the entrance to the master bath plus doubles as a jewelry cabinet- I love when products can be double duty…so functional!!

Since the bed should really be the focal point of the room, I wanted something light and airy for the space over the large bed.  While in the Home Store, I found a large grey metal floral leaf art piece that was pointing up and leaning against the wall.  I picked it up and immediately turned it upside down.  Perfect!  I just needed to take some cream colored chalk paint and lightly distress the metal a bit to soften the color and bring it more to a neutral but still have that hint of gray coming through….just like the comforter….get where I am going with this?  Why upside down?  Well,  I think it looked better upside down, and I liked how the bottom which is now the top was narrower than the top which is now the bottom, and it seemed to “hug” the bed.  Did I lose anyone?  It’s fun to change up something whether it’s turning it upside down, or sideways, or adding a piece to it, or changing the color…..it’s all part of the design process.

Floral metal wall art painted and distressed

Floral metal wall art painted and distressed

You will notice that there is a lot of wall space in this room, and we do have future plans for that.  To the right of the bed, the wall leading to the master closet will be a grouping of black and white wedding photos framed and hung, one which will be enlarged to go behind an old pane window.

It’s important to carve out a space where you can escape…..even if just for a little while to rejuvenate….not only will you benefit from the results it can bring, but your family will appreciate it as well.  Even something so simple as making the bed and finding homes for the clothes that made their way to the floor, can do wonders when you drag yourself at the end of the day to a space that is welcoming you back.


To receive posts via email click HE RE Subscribe in a reader or signup in Subscription box in sidebar.

Taylor Regal in Phoenix, NY on Houzz

Shareathon Cutting Edge Stencil Project – Sofa Table and Pillow

Taylor
25 Jun 2015
Custom Design, DIY, Interior Design Room
Country Chic paint, custom, Cutting Edge Stencils, decorator, designer, eRegal Studio Photography, French poem, hand painted, Home Decor, Home Interior Designs, Interior Design, lamp, metallic, Phoenix NY, pillow, reuse, rub n' buff, Sofa table, Syracuse NY, TayRose, TayRose Design, unique, wallpaper

I again was invited by Hometalk.com to participate in a Shareathon project featuring Cutting Edge Stencils on any item of my choosing and sharing the process.  I haven’t used stencils very often and thought this would be the perfect opportunity to try them on a larger scale.

sofa table stencil label_1093

 I went to the Cutting Edge website, www.CuttingEdgeStencils.com and tried to choose just one of their beautiful array of various stencils for my project.  I had just been to an auction and purchased a sofa table that I thought would be a great candidate for stencils.  I chose the “French Poem” allover stencil, from the website because I really liked the writing style and since I don’t speak French, the mystery of what the words say….Sofa Table before photo_0257

While waiting for the stencil to arrive, I decided that I would prep my table so it will be ready for stenciling.  The sofa table had a factory finish, meaning it had a shiny finish over the paint that had to be sanded down before applying any new paint so the paint had something to grab onto.

sofa table sanding_0372

After sanding, I wiped off all of the sanding dust and wiped down all of the surfaces of the table so it had a clean, dust free surface to start painting.  Cutting Edge Stencils recommends acrylic or latex paint which I would have used if I painted my table with a latex paint, but  I chose to try the mineral based paint again from Country Chic Paints in the color Cheesecake, for that color is a warm cream and goes with everything.  I wanted a contrast color for accents and for the legs, so deciding the 2nd paint color was between Dark Roast and Licorice….dark brown or black.  I chose the dark brown color, mainly because again, it would have a better chance of blending in with most decor, and I also wanted to add some metallic highlights, and an antique gold would best suit a dark brown color.

paints for sofa table_0847

So with paint colors in hand and after the top of the table was sanded down, I used a sanding block to rough up the surface on the legs and apron of the table.  One of the  features that I liked about this table was that the ends flip up or down, and transforms from a really long table to a shorter version depending on the space allowed.  Another feature is that there is a drawer, which is very nice to have to store items for buffet, desk or playing cards .

drawer in sofa table_0260

I painted 2 coats of paint on the top and on the bottom shelf and let it dry.  I used a roller for the 2nd coat to smooth the layer, although the grain in the wood still showed the pattern, at least the paint was smoother without brush marks for an easier surface to stencil on.  I also painted the legs and the border in the contrast color with 2 coats as well.  The stencil arrived and there was a nice instructional sheet included along with a mini foam roller with several replacements and a small stencil brush.  The instructional included everything I needed from materials, getting started, stenciling techniques, tips and tricks and finally, cleaning and storage of  the stencil.  Cutting Edge Stencils also have wonderful tutorials on their website that I referred to before I got started so a lot of the uncertainty I felt melted away.

stencil instructions_0857

The stencil I received was an allover stencil, which means it is made for large surfaces like a wall.  Since the top and shelf of my table were on a much smaller scale, I ended up taping  the stencil on the ends to stabilize the stencil so it wouldn’t move as I painted.

sofatablestencil_0852

The table was also longer than the stencil, so I needed to re-lay the stencil after the paint had dried on the first half and line it up with the lettering to continue the poem.  Since the stencil is clear, it was easy to line up lettering as the pattern continued on the surface.  I started to use the small stencil brush using a small amount of paint on the brush, then dabbing on a paper towel before dabbing on table surface, and this process worked fine, but it was going very slowly, so I opted to try the foam roller instead.

sofatablestencilwroller_0859

What a difference!  With the roller, painting went super fast and very easy.  I still rolled off a lot of  the paint on a paper towel before applying on stencil and was careful how I rolled so that the roller didn’t catch on the letter edges and pull them up while rolling.  The chalk based paint seemed to work fine, no problems at all with the stencil.  I wanted to also try the stencil on fabric, so after finishing the table, and laying the stencil on the pillow cover to see how I wanted to line it up,  I used windex to spray on the dried paint and wiped clean with paper towels and rags.  Easy peasy.

sofatabletopstenciled_0866

After all the surfaces were painted and dry, I applied some antique gold colored rub n’ buff metallic to the legs and a little on the borders to bring out some highlights on the curves and brighten up the brown a bit.

sofatablelegmetallic_1435269027

After applying the metallic, I used the natural wax offered by the same company as the paint and brushed on all the surfaces and buffed off the excess until all the stickiness was gone.

sofatablewax_1435269174

I found a wallpaper roll I had onhand that I used to line the drawer, so a bit of a surprise when opened, and the colors seemed to work well with the paint colors.

sofa-table-3442

As I mentioned earlier, I wanted to try the stencil on fabric, so I used a solid velveteen pillow I had onhand, and I first removed the pillow insert, then laid the stencil down on top of the fabric and lined up the lettering as straight as I could, then taped down the edges of the stencil to the floor to keep it steady as I painted.  I was able to use the foam roller in the same application procedure on the fabric as I did on the table top and shelf and it worked like a charm!  I even used the same chalk based paint that I used on the table, for I read that the paint could be used on fabric as well.  I decided to flip and have the cream stencil words on a brown surface to show a different look with the lettering, plus I did have the pillow on hand, so no added cost there!

pillowstenciled_1435262425

When staging the photo with the table, I used a table lamp that had originally been brass and I painted it in the same color as the table with the chalk based paint, and I also took the lampshade and stripped off the fabric and painted the wire in cheesecake color as well.  I found at Hobby Lobby back in the dollhouse furniture area, a small wood dresser that I painted in same paints as the sofa table to pull in the colors as your eye went to the top of the lamp, and to have a little unexpected finial idea.

lampwithchalkpaint_143526

I love how the stencil poem gives enough of a pattern but doesn’t feel too busy and can be decorated  easily.   (Of course, when my husband takes such beautiful pictures, everything looks awesome.  See more of his wonderful work at eRegalStudio.com. )

sofa-table-3429


sofatablecollage_1435265385


sofatablecollage2_1435265095


Cutting Edge Stencils recommend storing the larger stencils flat and under a bed as an option, so that is where my stencil is heading….but not for long for I’m sure I will have more projects in the future that will include this stencil!


To receive posts via email click HE RE Subscribe in a reader or signup in Subscription box in sidebar.

Photo-Art pillows add big punch to Home Decor

Taylor
22 Apr 2015
Art, Interior Design Room, Office, Theme Room
Africa, Art, Clay NY, contemporary, custom, decorator, Eregal Studio, Home Decor, Interior Design, lion, mood boards, office, Parade of Homes, photography, pillow, TayRose Design, unique, Wall Art

Hanging pictures on our walls has always been a way to showcase our families,  remind us of a favorite movie with a poster, frame school art from our children through the years, or reminders of places we have been.  Wall art evolved to paintings of subjects we were drawn to, or abstracts with colors that melded with our sofas, that filled our walls with pattern and color.  With the many styles of design, from Contemporary Modern, Country, Shabby Chic, Traditional, Rustic to Eclectic, all of them have some home decor style that we identify with.   The graphic bold colors and stark black and white for Contemporary, the painted distressed wood for Country, the creamy whites and floral for Shabby Chic, and so on, and with all of these, photography, framed has been there to hang on our walls.

When you think of all the photographers in the world, and all the different styles and subjects they portray in their work, for Interior Designers, photography is the go to decor item for adding emotion and even drama to a room.  I am so fortunate to be married to a photographer, eregalstudio.com and have used his art photography in several of the Parade Houses I have designed, and I have marveled at how it fills a space with a powerful statement.

2012-POH-Hall eregal photo-

I feel a beautiful photograph can be compared with a beautiful painting, for they both affect an emotion, and they both capture a moment frozen in time.

The other day, my husband told me he had sold a pillow online from his Fine Art America store,http://fineartamerica.com/products/majestic-king-everet-regal-throw-pillow-14-14.html

lion pillow fine art america


I had to stop and ask, “a pillow?”   Now, I know this concept of a photograph on a pillow is not new.   I remember seeing children’s photos on pillows, or their favorite pet, but it got me visualizing an office or living room with accent pillows with beautiful photographs on them, and my mind started creating artful photo pillows!   Imagine an home office with dark mahogany furniture and a zebra colored rug, leather sofa, soft throw and a lion pillow?

zoo office lion pillow3

(I had so much fun designing the mood boards!) Or a more contemporary sleek office with chrome and glass and a pillow with a closeup of bridge cables or a tall buildingcontemporary livingroom mood boardthrow pillow Eregalstudio ship……there are so many ways that photography as an art form has grown from only on the walls to decor accents in pillow form.

Just another way to live with art!

Check out Fine Art America.com and see how any photo can be made into a 100% cotton pillow 14″ x 14″ up to 26″ starting $27.00 photo printed on both sides and insert included!

To receive posts via email click HERE Subscribe in a reader or signup in Subscription box in sidebar.

How to wallpaper a bi-fold door to use as a headboard or screen

Taylor
16 Apr 2015
Craft Project, Custom Design, DIY, Interior Design Room, Repurposed
bi-fold door, custom, decorator, duck egg blue, Eregal Studio, Home Decor, Home Interior Designs, Hometalk, Interior Design, Phoenix NY, repurpose, reuse, TayRose Design, wallpaper, Walls Republic

I’m writing a trilogy of sorts-a series of projects using wallpaper as an accent with the remnants from wallpaper rolls after papering a wall.  I will be sharing 3 projects; a chair, a lampshade and the project in this post is a bi-fold door.   I was invited to participate in a program to try a product and then share how it works and hopefully inspire others.  Since I never really used wallpaper before besides lining drawers, I jumped to the challenge.    We were given some choices of papers from Walls Republic, found here, http://www.wallsrepublic.com/ and I’m telling you, they have so many beautiful papers to drool over, plus, if you have trouble deciding, they will ship up to 5 samples free so you can touch and feel the actual paper before purchasing a roll….such a great option!   My paper choice was Adeline in Duck Egg which is a soft pretty blue color on a creamy white background.  The paper is nice and thick and had a pretty sheen when the light hit it.  We haven’t had any sign of Spring here in Upstate NY in March, so this wallpaper design was my way of bringing in a little Spring-

Wallpaper label from Walls Republic

Wallpaper label from Walls Republic

One of the projects I decided to apply wallpaper to, was half of a bi-fold door set.  My husband is a photographer and uses different items as back drops, and I thought this would be a great way to try wallpaper on a surface before applying it to a whole wall, since I was such a newbie with wallpaper.   I laid down my drop cloth on top of a piece of masonite board on the floor in the photo studio and brought my sawhorses in….it was freezing out in the garage…March and snow….you know, Upstate NY…brrrr.

prepare bifold for wallpapering.


I decided to paint the raised panel side of the door and add wallpaper to the inside of the raised panels, and then on the other flat side I would lay a full sheet of the wallpaper.  I found a lovely shade of blue paint color from Sherwin Williams, called Quietude #SW6212…isn’t that a great name? For the cream color in the background I chose a paint color from the Country Chic mineral chalk based line, Cheesecake, which matched the wallpaper nicely too.

Cheesecake mineral chalk based paint

Cheesecake mineral chalk based paint

After painting the edges, I traced out on paper the inner panel sizes and cut out the shapes on the wallpaper.  The other great thing about this wallpaper is they have a newer technology where you don’t have to paste the back of the wallpaper, but apply the paste to the item you are papering.  You can still apply the paste to the back of the paper if you want to, but with these newer papers you don’t have to do that step.   The adhesive paste that Walls Republic recommended is Romans and you can find it at Lowe’s but any good wallpaper adhesive should work, and if you have any questions, Walls Republic has great customer service.

wallpaper adhesive

Also, included with the wallpaper roll, are instructions, complete with drawings, which is so helpful for me who has to have a visual to see how something is done.

wallpaper roll with instructions


Once I had all my wallpaper patterns cut out, I brushed the adhesive paste to the raised panels and lined up my paper to the edge of the panel and slowly laid down the paper, smoothing gently as I laid it down, pushing the air bubbles to the sides until smooth.  I used a wallpaper brush to gently go over the top of the paper again, wiping away with a damp cloth any excess paste from the edges, trying not to get the paste on to the surface of the paper.  If I did get glue on the paper, I quickly wiped it with a lightly damp cloth- And the best feature of this wallpaper?  It’s dry strippable, which means you peel back a corner and pull it off in one sheet- Isn’t that awesome!!  This feature alone, makes using wallpaper as a decorative wall option much more inviting!!

add wallpaper to panel


After the paper had dried,  my husband trimmed off the wallpaper at the edges with a sharp razor blade. My husband is very precise which was so helpful with this project!  I noticed after the paper had dried that some of the glue residue on the paint after wiped was still shiny.  So I just touched up the paint on those areas and it all blended away.

trim wallpaper edge on panel


I flipped the doors over and wallpapered the flat side so it looked more like a wall.  I unrolled the paper so that it went beyond the ends about 3 inches and cut it.  With a large brush, I generously brushed on the wallpaper paste then with the trusty aid of my husband, we held the paper at both ends and gently lined up the paper along the straight end and slowly laid it down while gently smoothing out the bubbles underneath with the wallpaper brush.  Once dry, wallpaper was trimmed along the edges.

wallpapering bifold door

For the 2nd door, I laid it next to the other door, then unrolled another wallpaper panel lining it up against the other paper on the door so the pattern matched the other door as close as possible. Luckily, this pattern repeat is close, so there wasn’t much waste.

bifold with wallpaper to trim.

The final step was painting the hinges and I painted them with the blue color using a q-tip to dab the color onto the screws once installed.

painted hinge for bi-fold

With the bi-fold door, depending on where it is used, I was going to add some knobs or hooks to hold scarves or jewelry; in a large bath to hang a robe near the tub, or it can it can be a headboard for a twin, or queen sized bed if you do the double doors.  Lots of uses for these mobile wallpaper units as I like to call them!

Wallpaper-Project for bath

You can view my other posts showing steps for Walls Republic wallpaper accents on a chair and lampshade on my other posts found here: http://tayrose.com/2015/04/16/taking-a-vintage-pendant-and-adding-wallpaper-for-a-fresh-look/     http://tayrose.com/2015/04/16/how-to-wallpaper-a-bi-fold-door-to-use-as-a-headboard-or-screen/

Wallpaper-Project all 3 items


http://www.eregalstudio.com/  credits for finished wallpaper project pictured in this post

To receive posts via email click HERE Subscribe in a reader or signup in Subscription box in sidebar.

  • 1
  • 2
  • 3
Recent Posts
  • Owl Inspired Theme Toddler Bedroom
  • Painted trunk blends with Decor
  • Create a “trunk” inspired look for a Nightstand
  • Decorate fireplace wall “naturally” on a budget
  • How to Inspire Design with Pinterest Photos
Archives
  • February 2018
  • January 2018
  • October 2016
  • January 2016
  • June 2015
  • April 2015
  • March 2015
  • February 2015
  • January 2015
  • December 2014
  • November 2014
  • June 2014
  • May 2014
Newsletter subscription form

Enter your email address:

Delivered by FeedBurner

Categories
  • Art
  • Bathroom
  • Craft Project
  • Custom Design
  • Dining Room
  • DIY
  • Entry
  • Holiday
  • Interior Design Room
  • Kids Room
  • Kitchen
  • Living room
  • Master Bedroom
  • Mudroom
  • Office
  • Repurposed
  • Theme Room
Houzz
Remodeling and Home Design
Instagram
Instagram
HomeTalk
Featured on Hometalk.com
Follow me on Facebook
TayRose Design

Promote Your Page Too
315.224.4142
© 2014 k.linndesign. All Rights Reserved.